Stencil Painting Techniques
These stenciling techniques will make your projects crisp, and you should probably know about them.

Learn how to stencil and turn any wall into a true work of art. Our tutorial, How to Paint: Stencil Brush Painting Techniques, is packed with useful tips and information on stencil painting techniques. In fact, this free craft video includes essential information on how to use dry brush stencil paint, and so much more. You'll learn how to use the dry brush technique and also how to create a more filled-in, more color saturated look on your canvas.
This video is essential for you to learn how to paint with stencils without bleeding. Watch Ed Roth paint with minimal paint on the brush and using several different techniques to fill in the image. The stencil serves as a guide in which you can create a one-of-a-kind look. This is a great excuse to grab some paint and get creative.
Primary TechniqueStenciling

Materials List
- Stencil
- Stencil brush
- Wood canvas
- Paper plate
- Paper towel
- Spray adhesive
How to Stencil
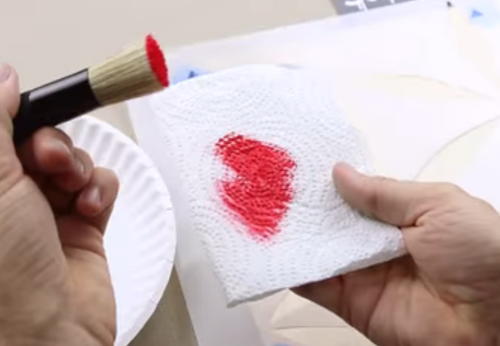
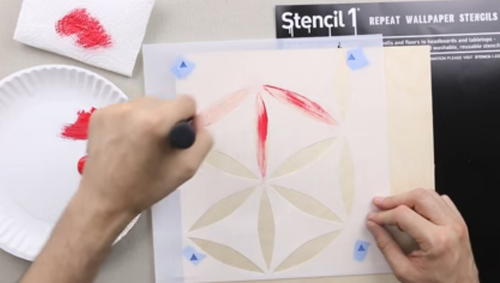
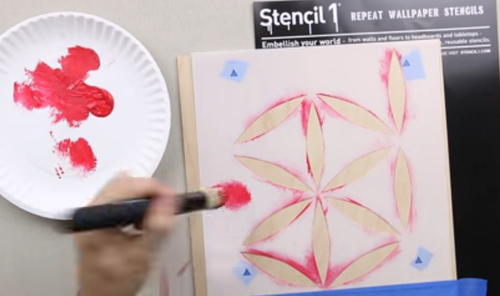
No matter what technique you employ to stencil your image, you'll want to keep these things in mind. For stenciling, it's a good idea to use a spray adhesive on the back of your stencil to keep it in place. This will give your image a crisp look when finished.
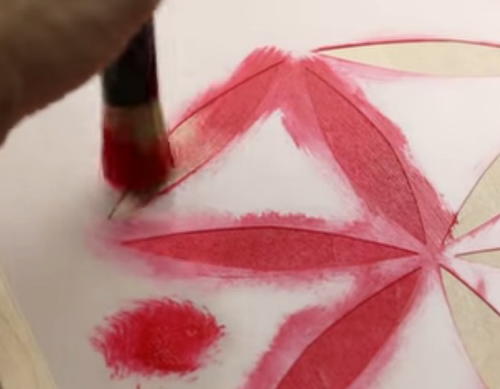
Stenciling is a dry brush technique. You won't be adding any water to the paint or to your brush. You really want to take so much paint off of your brush. Do this by dipping your brush in the paint, then brushing on the plate and even a paper towel to get any excess paint off.
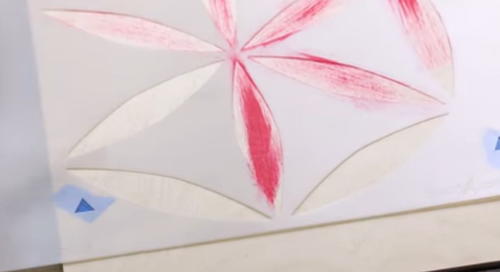
Dry Brush Technique
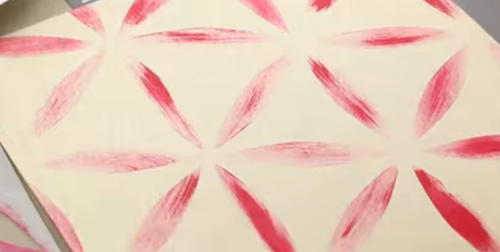
Great for an old world look or aged treatment, as though the wall had been there for hundreds of years. You're going for a not-so-filled-in brushed look.
-
Dip your brush in the paint on your paper plate, then you'll want to take most of the paint off the brush. You'll do this by brushing on the paper plate and even on a paper towel.
-
Brush lightly from the middle of the stencil outward. Think of the stencil as a guide. You're lightly brushing in.
-
Vary the intensity of the brushstrokes so some are slightly thicker and darker, and some are very light.
-
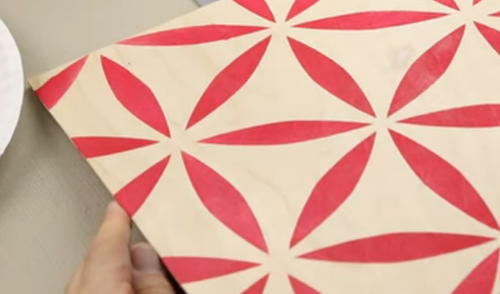
If you're using repeat patterned stencils, wait until the paint is dry, then reposition the stencil and continue using this method.
-
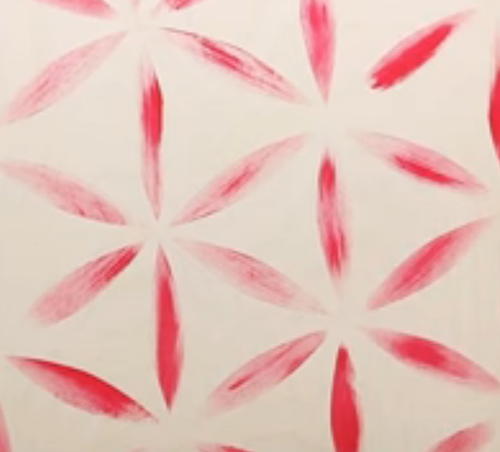
The completed look.

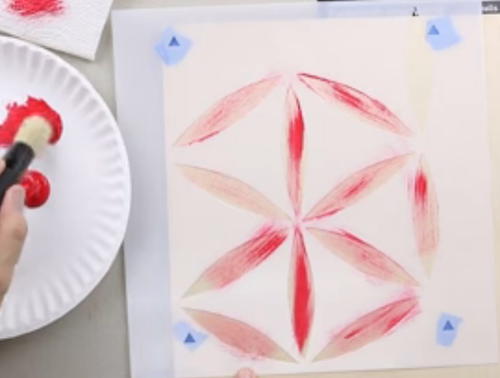
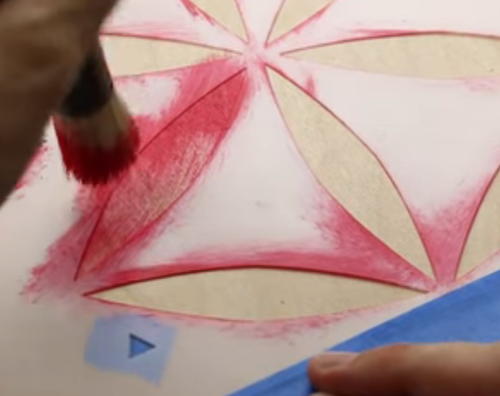
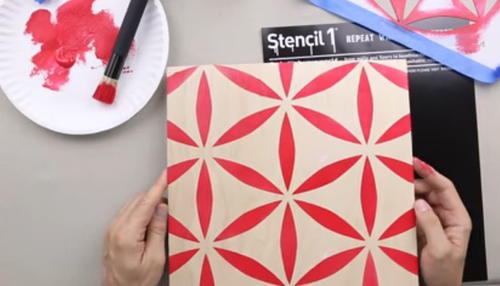
Solid, Filled In Technique
Use this technique for a cleaner look, almost like a printed or wallpaper effect.
-
As with the dry brush technique, you'll want to dip your brush in the paint, then remove any excess paint by brushing it off on the paper plate. You can even brush off excess paint on the negative space in the stencil!
-
There are a few techniques you can employ to get this clean look:
-
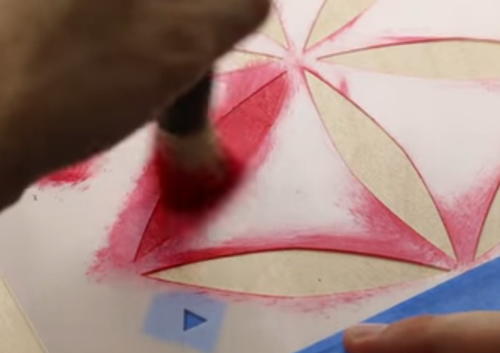
Stippling involves tapping the brush in the stenciled area. This ensures you won't accidentally lift up the stencil because you are literally pressing down in the stenciled area. Another word for this is pouncing.
-
Swirling: this effect fills in the design. As with the other techniques, PRESS LIGHTLY.
-
You can also brush in the pattern as normal, but of course be sure to press lightly so you don't disrupt the stencil and get paint under the lines.
-
Try using a combination of all three methods to see what works best for you and for the image you're filling in!
What problems have you run into with your stenciling projects over the years?
Read NextNighttime in the Towering Forest
Your Recently Viewed Projects

Thanks for your comment. Don't forget to share!
Weberme
May 04, 2018
Do you like that vintage look and would love to decorate using it on a wall,a vase, maybe a piece of furniture or even a shirt then watch this video on how to dry brush or stipple paint the right way so you do not end up with a mess with too much paint. This is a good video and has a written tutorial as well. The places to use this techinque are limitless. You can even decorate a scrapbook with it.
Dana N
Apr 27, 2018
I am totally guilty of always using WAY too much paint for projects with tons left over on my plate, whoops! This video was so helpful to show a little really goes a long way.
Sigo
Dec 27, 2017
I especially like the dry-brushed aged look of the first side that was done in this video. The imperfections make it look unique. I will give that a try. Until now I have always filled out the areas of stencils fully.
Report Inappropriate Comment
Are you sure you would like to report this comment? It will be flagged for our moderators to take action.
Thank you for taking the time to improve the content on our site.