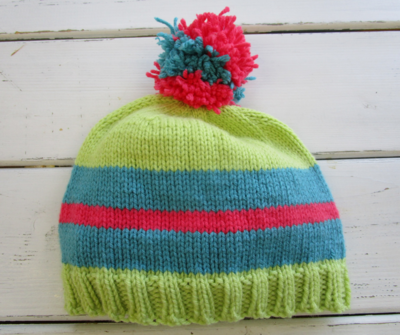
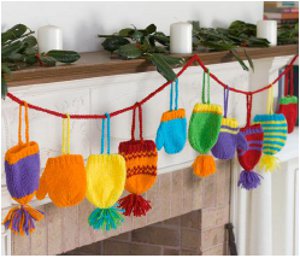
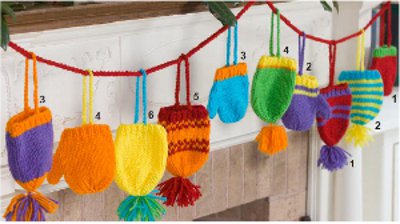
Bright Knit Hats and Mittens Holiday Decorations
These Bright Knit Hats and Mittens Holiday decorations from Red Heart Yarn are great for decorating your mantel for Christmas. This project would also make great advent calendars! To make your own calendar, knit 24 mittens and fill with goodies!
Find more festive holiday patterns in Red Heart's special eBook, Jolly Holidays: 15 Free Knit and Crochet Gifts and Holiday Projects.
Materials:
- Red Heart® Super Saver® Art. E300, available in solid color 7 oz (198 g), 364 yd (333 m); multicolor, heather and print 5 oz (141 g), 244 yd (223 m), flecks 5 oz (141g), 260 yds (238 m) skeins: 1 skein each 0319 Cherry Red A, 512 Turqua B, 672 Spring Green C, 324 Bright Yellow D, 254 Pumpkin E, and 358 Lavender F
- Knitting needles: 5.5mm [US 9].
- Yarn needle
- Stitch holder
- Stitch markers
- 5.5mm [US I-9] crochet hook
- Yarn needle
- 4” square of heavy cardboard (for pompoms)
Instructions:
GAUGE: 16 sts = 4”; 20 rows = 4” in St st (knit on Right Side, purl on Wrong Side). CHECK YOUR GAUGE. Use any size needles to obtain the gauge.
Special Stitch
M1 = Make 1 (Increase) – Lift strand between needles to left-hand needle and knit strand through the back loop, twisting it to prevent a hole.
wyib = with yarn in back.
HAT #1 (worked with A and F)
Ribbing
- With A, cast on 34 sts.
- Row 1 (Right Side): With F, *k1, p1; repeat from * to end of row.
- Repeat Row 1 until piece measures ¾” from beginning.
Body
- Work in St st and stripe sequence, as follows: Work 5 rows with A, 2 rows with F, 2 rows with A, 2 rows with F. Work remainder of hat with A only.
- Work in St st until piece measures 4” from beginning; end with a Wrong Side row.
Shape Crown
- Row 1: K2, [k3, k2tog] 6 times, k2—28 sts.
- Row 2: K2, [k2, k2tog] 6 times, k2—22 sts.
- Row 3: K2, [k1, k2tog] 6 times, k2—16 sts.
- Row 4: [K2tog] 8 times—8 sts.
- Cut yarn, leaving a long tail. Thread tail through remaining sts and pull to gather. Use remainder of tail to sew back seam.
Finishing
- Weave in ends.
Pompom
- Wrap yarn around 4” piece of cardboard 20 times. Slip wraps from cardboard and tie a length of yarn tightly around center of wraps. Cut ends of wraps, fluff and trim. Attach pompom to top of hat.
HAT #2 (worked with B and D)
Ribbing
- With B only (do not change color after cast-on), work ribbing same as for Hat #1.
Body
- Work in St st and stripe sequence, as follows: Work *2 rows with D, 2 rows with B; repeat from * until piece measures 4” from beginning; end with a Wrong Side row.
Shape Crown
- With B, work crown and finish hat same as for Hat #1.
HAT #3 (worked with E and F)
Ribbing
- With E only (do not change color after cast-on), work ribbing same as for Hat #1.
Body
- With F, work in St st until piece measures 4” from beginning; end with a Wrong Side row.
Shape Crown
- With E, work crown and finish hat same as for Hat #1.
HAT #4 (worked with D, E, and C)
Ribbing
- With D only (do not change color after cast-on), work ribbing same as for Hat #1.
Body
- With E, work in St st for 1 row.
- With C, work in St st until piece measures 4” from beginning; end with a Wrong Side row.
Shape Crown
- With C, work crown and finish hat same as for Hat #1.
HAT #5 (worked with A and E)
Ribbing
- With A only (do not change color after cast-on), work ribbing same as for Hat #1; end with a Wrong Side row.
Body
- Row 1 (Right Side): *With E, k1; slip 1 with yarn in back (wyib); repeat from * to end of row.
- Row 2: With E, purl.
- Row 3: *With A, k1; slip 1 wyib; repeat from * to end of row.
- Row 4: With A, purl.
- Rows 5–8: With E, work even in St st.
- Rows 9 and 10: Repeat Rows 3 and 4.
- Repeat Rows 1–10 until piece measures 4” from beginning; end with a Wrong Side row.
Shape Crown
- With E, work crown and finish hat same as for Hat #1.
HAT #6 (worked with D)
Ribbing
- With D only (do not change color), work ribbing, body and crown same as for Hat #1. Finish same as for Hat #1.
MITTEN #1 (worked with C and A)
Ribbing
With C, cast on 33 sts.
- Row 1 (Right Side): K1, *p1, k1; repeat from * to end of row.
- Row 2: P1, *k1, p1; repeat from * to end of row.
- Repeat Rows 1 and 2 until piece measures ¾” from beginning; end with a Wrong Side row.
- Change to A and work in St st for 4 rows.
Shape Thumb
- Row 1 (Right Side): K16, place marker, M1, k1, M1, place marker, knit to end of row—3 sts between markers.
- Row 2: Purl.
- Row 3: Knit to first marker, slip marker, M1, knit to next marker, M1, slip marker, knit to end of row—5 sts between markers.
- Repeat Rows 2 and 3 until there are 11 sts between markers.
- Next Row (Wrong Side): P16, place next 11 sts on stitch holder for thumb, purl to end of row—32 sts on needle.
- Continue in St st until mitten measures 4½” from beginning; end with a Wrong Side row.
Shape Top
- Next Row: [K2tog] 16 times—16 sts.
- Next Row: [P2tog] 8 times—8 sts.
- Cut yarn, leaving a long tail. Thread tail through remaining sts and pull to gather. Fasten off.
Thumb
- With Wrong Side facing, place 11 sts from holder back onto needle.
- With A, work in St st for 4 rows.
- Next Row (Wrong Side): P1, [p2tog] 5 times—6 sts.
- Cut yarn, leaving a long tail. Thread tail through remaining sts and pull to gather. Use remainder of tail to sew thumb seam.
Finishing
- Sew side seam. Weave in ends.
MITTEN #2 (worked with D and F)
- With D, work ribbing same as for Mitten #1.
- With F, work in St st for 2 rows.
- With D, work in St st for 2 rows.
- With F, work remainder of mitten same as for Mitten #1.
- Finish same as for Mitten #1.
MITTEN #3 (worked with E and B)
- With E, work ribbing same as for Mitten #1.
- With B, work remainder of mitten same as for Mitten #1.
- Finish same as for Mitten #1.
MITTEN #4 (worked with E)
- With E only (do not change color), work same as for Mitten #1. Finish same as for Mitten #1.
HANGING CHAINS
- For each Hat and Mitten, make hanging chain, as follows: With crochet hook, join desired color yarn with slip st in side of cast-on edge, ch 33, slip st in other side of cast-on edge. Fasten off.
Up Next:
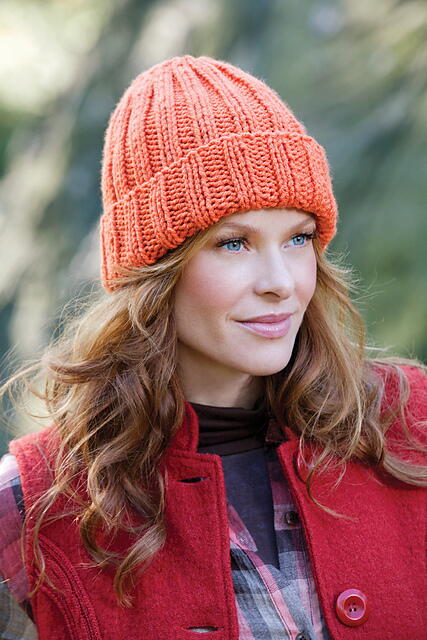
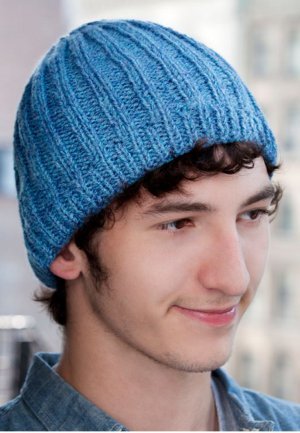
Read NextBeginner Hat Knitting Pattern
Your Recently Viewed Projects


Thanks for your comment. Don't forget to share!
paver2
Nov 07, 2018
Oh, dear! Where am I going to put this? I don't have a fireplace mantle. I have made small mittens similar to these but not the hats. I hung the mittens on the Christmas tree and they really looked cute. I'm not sure if I would put a garland of them on the tree, but I will find a place for it.
FireFightersMoM
Jul 08, 2017
I love anything miniature. These are so cute and will be so much fun to make.
Smurfville25 91023 48
Sep 30, 2012
I love your sie. So many good ideas. I think the hat garland would make lovely Xmas gift ideas.
cshurson 6651634
Jul 29, 2012
Lovely colors; I would hang hats right-side up as right now they look like bags, not hats. Alternate way to make might be on knitting spools.
Report Inappropriate Comment
Are you sure you would like to report this comment? It will be flagged for our moderators to take action.
Thank you for taking the time to improve the content on our site.