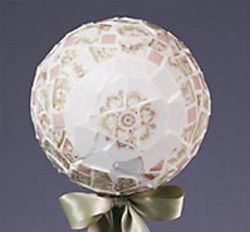
China Mosaic Topiary
The charm of pretty, patterned teacups and soft, vintage colors abounds in this one-of-a-kind topiary design. Mosaic crafting is easier than it looks. Try it today!

Materials:
- STYROFOAM Brand Foam:
- Ball, 5"
- Sheet, 1" thick, scraps
- Patterned china saucers, two to three
- Flat-backed glass gems to complement china, 20
- Acrylic paint to complement china
- Clay pot, 4-1/2"
- Wooden dowel, 1/2", 8" length
- Pre-mixed acrylic spackling
- Plaster of paris
- Coordinating satin ribbon, 1" x 2/3 yd.
- Green sheet moss
- Pencil
- Ruler
- Masking tape
- Disposable palette
- Water basin
- Paper towels
- Scissors
- Disposable plastic cups, two
- Measuring cup
- Spoon or craft stick
- Flexible rubber spatula
- Rubber gloves
- Old towel
- Natural sponge
- Hammer
- Tile nippers (optional)
- Low-temp glue gun and glue sticks
Steps:
Note: Broken china pieces may have sharp edges. Be extremely careful when working with them. Wear rubber gloves for your safety.
- Use pencil to poke hole in bottom of foam ball. Use glue gun to glue one end of dowel into hole. Let dry. Glue opposite end of dowel into center bottom of pot. Secure dowel in place with strips of masking tape placed across pot rim.
- Wax serrated knife with candle stub or paraffin. Cut several cubes from foam scraps. Loosely pack foam scraps into clay pot; these will keep pot from cracking as plaster of paris expands.
- Following manufacturer's instructions, mix plaster in disposable cup. Pour plaster into pot until foam chunks are no longer visible. Let set. Remove tape from top of pot.
- While plaster sets, break china for mosaic. Wrap one piece of china in towel. Gently tap hammer against china. Continue until broken pieces are about 3/4" across; remove from towel. Break remaining china until there are enough pieces to cover foam ball.
- Use glue gun to glue china pieces to foam ball, fitting pieces close together to cover entire surface. Note: Spaces between china pieces will be more pronounced on rounded surfaces; more "grout" (spackling) may show on finished piece than expected.
- If additional china pieces are required to fit particular spaces, repeat Step 4. Tile nippers may be used to shape china pieces as needed. Note: Designer chose to highlight individual motif in center of topiary, surrounded by plain china pieces, then patterned rim sections. Your design will depend upon china you choose.
- Place about one cup of spackling into remaining disposable cup; stir vigorously with spoon until smooth.
- Wearing rubber gloves, use fingers or spatula to work spackling "grout" into cracks between china pieces. Using damp sponge, gently wipe mosaic surface to smooth grout lines and remove excess spackling. Rinse sponge often.
- Following manufacturer's instructions, let spackling set. Use sponge to wipe surface clean. Let spackling dry overnight. Buff surface with dry towel to shine.
- Paint wooden dowel and clay pot, including inside rim, with acrylic paint. Let dry.
- Glue glass gems around pot rim. Glue moss into top of pot. Tie ribbon into bow around top of dowel; spot glue to secure.
®™ Trademark of The Dow Chemical Company ("Dow") or an affiliated company of Dow. For more project ideas, please see styrofoamstyle.com.
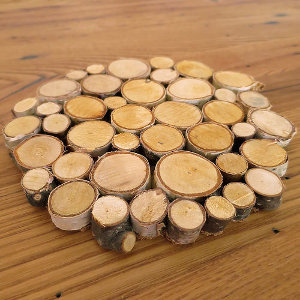
Read NextMagical Forest Trivet
Your Recently Viewed Projects
Thanks for your comment. Don't forget to share!
BettyVedder
May 02, 2017
I've wanted to try this for a long time, and these step by step instructions make the process a lot more clear. I think I will finally get up the nerve to try!
Report Inappropriate Comment
Are you sure you would like to report this comment? It will be flagged for our moderators to take action.
Thank you for taking the time to improve the content on our site.