Collect Your Things
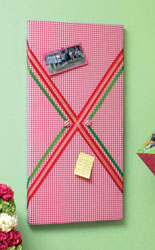
Keep your papers and pictures posted with this easy and cute girl's bulletin board. Have it up for everyone to see.
Materials:
-
STYROFOAM™ Brand Foam:
- 1" x 12" x 36" sheet, one
- Pink gingham fabric: 18" x 30"
- Ribbon: Pink grosgrain, 1" x 56"; pink & green polka dot, 3/8" x 56"; green grosgrain, 3/8" x 48"
- Covered button forms, ¾", two
- Ruler
- Sharp pencil
- Serrated knife and old candle; or, dental floss
- Straight pins
- Thick, white craft glue
- Iron and ironing board (optional)
- Low temperature glue gun and glue sticks (optional)
- Sawtooth picture hangers, two
Instructions:
-
Using ruler and pencil, score foam sheet to create 12" x 24" rectangle. Wax serrated knife with an old candle. Holding foam sheet firmly on a flat surface, extend one end and cut across score line, using knife like a saw. Or, try dental floss: stand the sheet on its edge, and hold a 20" length of dental floss along the scored line, positioning one hand at the bottom of the board and the other at the top; draw the dental floss down through the foam sheet along the scored line. Save 12" foam square for another use.
-
If necessary, iron fabric. Place fabric, right side down, on flat surface. Spread thin, even coat of white craft glue along edges of foam rectangle. Center STYROFOAM™ brand foam on fabric, and carefully wrap fabric around foam, folding corners neatly, and glue and pin fabric to back of foam sheet.
-
Cut pink grosgrain ribbon into two, 28" lengths. Starting 3" down from each corner, glue and pin ribbons to back of bulletin board and around to the front, forming a criss cross pattern. Repeat with pink & green polka dot ribbon, layering it on top of pink ribbon. Cut green grosgrain ribbon into four, 12" lengths. Position green ribbons in a v-shape, ½" from pink ribbons; glue in place.
-
Cover two button forms with gingham fabric; glue to front of bulletin board, covering point formed by greengrosgrain ribbon. Let dry.
-
Glue sawtooth picture hanger to top two corners in back. For additional hold, insert and glue two straight pins through holes in sawtooth picture hanger.
- Let dry before hanging.
®™ Trademark of The Dow Chemical Company ("Dow") or an affiliated company of Dow. For more project ideas, please see styrofoamstyle.com.
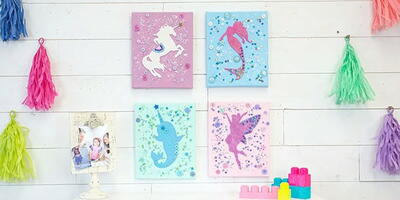
Read NextMagical Wall Art For Kids Room
Your Recently Viewed Projects

Thanks for your comment. Don't forget to share!
Report Inappropriate Comment
Are you sure you would like to report this comment? It will be flagged for our moderators to take action.
Thank you for taking the time to improve the content on our site.