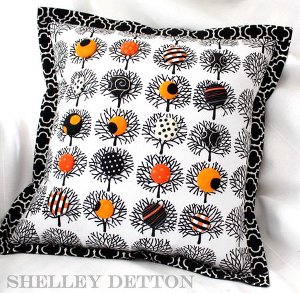
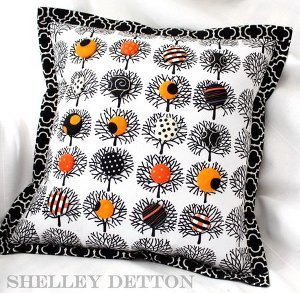
Cute as a Button Tree Pillow
It's as simple as black and white-decorative throw pillows from Shelley Detton are easy and fun! This Cute as a Button Tree Pillow is just the thing if you're looking for easy sewing projects. Find little buttons with leaves on them for a cute autumn design!
Materials:
- 1 square of fabric, cut at 13.5"
- Fusible interfacing, cut at 13"
- Fabric covered buttons
- Pencil
- Xacto knife
- Hot glue gun
- 4 strips of border fabric, cut to 1.5" wide
- 2 rectangles of fabric, cut to 15" x 11"
Instructions:
-
Fuse interfacing to backside of fabric, leaving 1/4" border around all edges of fabric without interfacing (to reduce bulk when sewn together).
-
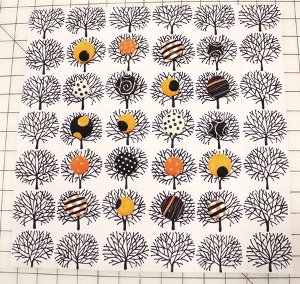
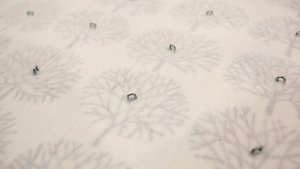
Place the fabric covered buttons where you want them to go, leaving at least 2.5" with no buttons all the way around or you'll have a terrible time trying to sew the pillow together later on. I used 2 different sized buttons and alternated them in rows.
-
Use a marker or fabric pencil and carefully put a dot beneath each button where the shank touches the fabric.
-
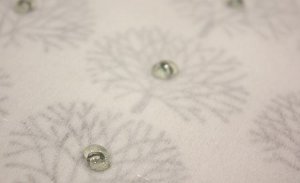
Moving one button at a time, carefully poke through the fabric and interfacing at each marked dot with a tiny Xacto knife or other very small tool. If the hole/slit is too big, you'll struggle later on. Gently push/coax the shank of the button through the fabric and interfacing. If the hole is small, the button will stay in place for now.
-
When all buttons are pushed through, carefully turn fabric over to access all the shanks poking through the backside.
-
Using a hot glue gun, squirt a small but generous blob of hot glue around each shank, making sure that the glue oozes inside the little loop of the shank to hold it in place and keep the fabric from fraying around the hole. Let harden thoroughly.
-
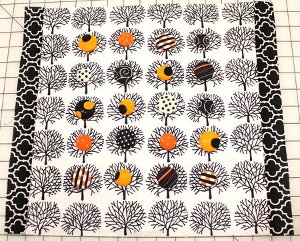
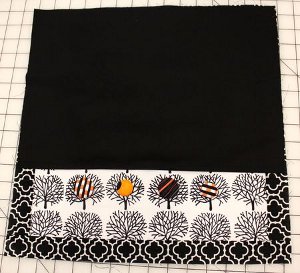
Stitch border fabric to sides, press, and trim.
-
Add 2 more strips to top and bottom of pillow. Press and trim.
-
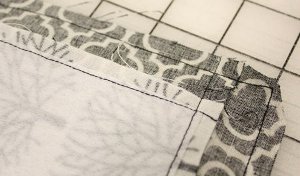
Press backing (rectangles) under 1/4" of one of the 15" edges on each rectangle. Press under again to hide the raw edges. Stitch along that "hem".
-
Place pillow front face up on table. Place the 2 rectangles face down, aligning outer raw edges so that there is about a 3" overlap over the middle of the pillow. Pin in place all around outer edge of pillow.
-
Stitch 1/4" all the way around, clip corners to reduce bulk. Turn right side out, press edges.
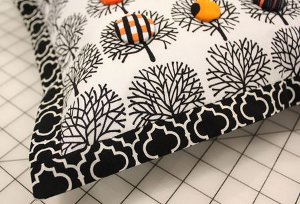
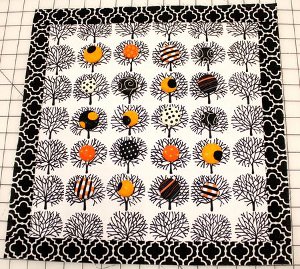
- To create flange, "stitch in the ditch" all the way around the pillow where the border meets the main fabric. Insert pillow form and you now have one very cute pillow!
Read Next"God is Love" Free Printable Art

Thanks for your comment. Don't forget to share!
Report Inappropriate Comment
Are you sure you would like to report this comment? It will be flagged for our moderators to take action.
Thank you for taking the time to improve the content on our site.