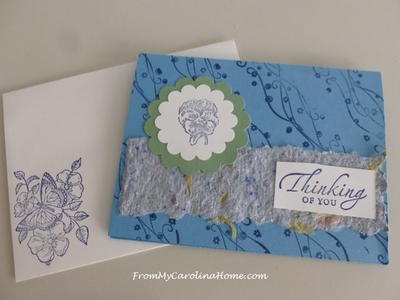
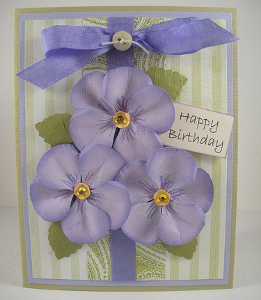
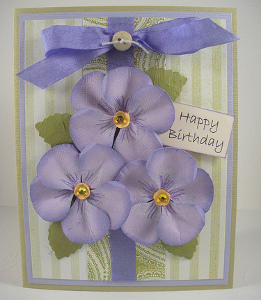
Pansy Birthday Card
Make your own birthday cards with this easy project idea from Sue Eldred. The pansy birthday card features beautiful paper flowers, making it the perfect birthday card for a mother, sister, or friend.
Materials:
Paper Blossoms Tools:
- 64503 Floral Petals
- 64500 Alpine Snowflake
- 64502 Birch Leaf
- 65800 Tool Kit
- 65900 Molding Mat
Additional Supplies:
- 53700 5/16” Hole Punch (Mc Gill)
- Fabri Tac Glue (Beacon Adhesives)
- #962 “Always” Scrapbook Paper (Fancy Pants Designs, Inc.)
- Purple Palisades, Lavender Twilight, Witch Hazel, Candlelight Cardstock (Bazzill)
- Cream Cardstock
- 98200 Multi Tags Diagonal Punch (Mc Gill)
- Versa Magic Chalk Inks: Pretty Petunia, Tea Leaves (Tsukineko)
- White Color Box Inkpad (Clearsnap)
- PC1008 Violet Prismacolor Pencil
- Purple Ribbon: approx. 8” (May Arts)
- Self Adhesive Jewels: Desert Sun (Bazzill Basics)
- Small Cream Button and White String
- Double Stick Tape Runner, Foam Mounting Squares (Scrapbook Adhesives by 3L)
- Computer Generated Font: Bradley Hand 20pt.
Instructions:
To Make the Pansy:
- Punch the Floral Petals 5 times in Purple Palisades Cardstock.
- Use the largest Petals. Rub the edge of the petals with Pretty Petunia ink, rub the pointed end of the petals with White Color Box ink to add color details.
- For additional details: Draw thin marks at the base of the petal with the Violet Pencil.
- Place the shapes on the Craft Molding Mat. Using the 8mm stylus, press down into the center of the shape as you move the tool in a circular motion over the entire paper shape. As you do this, the paper will curl up around the stylus.
- Place the tweezers at the smaller, defined end of the shape. With your index finger and thumb, pinch the paper around the end of the tweezers.
- Holding the pinched end between your finger and thumb, use the tweezers to grasp each side of the shape and roll back to form petal.
- Punch a Snowflake out of green card stock and place on the Craft Molding Mat. Hold the 8mm stylus at a 90 degree angle to the paper. Press down and roll the stylus around in the center to form a cup. This forms the flower base to attach petals and leaves.
- Dip the narrow end of the first purple petal in the glue and adhere to the cupped Snowflake arms. Continue with the next purple petal. Next, adhere the petals in a grouping of three over the previous two purple petals.
- Punch a 5/16” hole from Candlelight cardstock. Place onto Craft Molding Mat, with the 5mm stylus, press down and roll the stylus around the center to form. Glue the small circle into the center of the pansy flower and add a self adhesive rhinestone.
- Punch 4 Birch Leaf shapes from the Witch Hazel cardstock. Follow step #3 above to prepare the shape. Use the 1mm stylus to add thin veining details to each leaf.
- Rub Tea Leaf ink over leaf to bring out veining details.
- Glue a leaf to each side of the flower to complete the Pansy.
- Three Pansies are needed to make the Pansy Birthday Card.
Card Assembly:
- Cut two pieces of “Always” scrapbook paper. One 3 ¾” x 5” striped side vertically, and the other 1 ½” x 5” paisley side.
- Adhere the paisley strip down the center of the striped layer. Adhere a piece of purple ribbon down the center of the paisley strip.
- Adhere layers onto a 4” x 5 ¼” piece of Lavender Twilight and then a 4 ½” x 5 ½” card made from Witch Hazel cardstock.
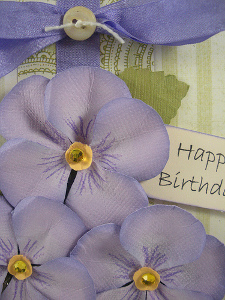
- Glue three Pansies in a cluster in the center of the card.
- Print “Happy Birthday” on cream cardstock and punch out with the Multi Tags Punch. Rub Pretty Petunia ink onto the edges of the tag.
- Add two foam mounting squares to the back of the tag and mount beside the Pansy Cluster.
- Fold purple ribbon into thirds with the ribbon ends out. Wrap the center of the ribbon a couple of times with white string and knot. Add small cream button to string ends and tie to the center of the ribbon bow. Glue to top of card over pansies.
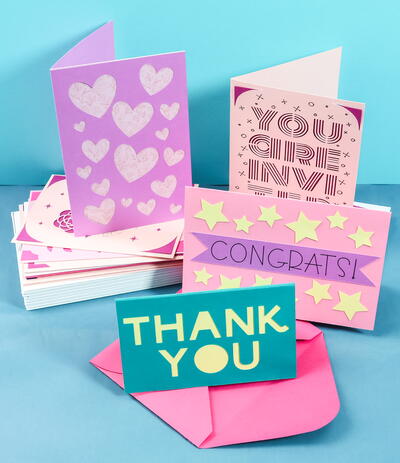
Read Next64 Handmade Cards for Every Occasion
Your Recently Viewed Projects


Thanks for your comment. Don't forget to share!
lpalmer59 7490208
Mar 03, 2016
I would make this card in a class of students with little to no experience of making cards. It is quick and easy, and in no time at all they would have a card in their hands that they could see and admire and know they created it. I think the ribbon just set is off nicely and the tag can have any sentiment on it that you would desired.
karenchristanell48 9847048
Feb 18, 2012
A really beautiful and elegant card! Thanks for sharing your how to's on making this!
Report Inappropriate Comment
Are you sure you would like to report this comment? It will be flagged for our moderators to take action.
Thank you for taking the time to improve the content on our site.