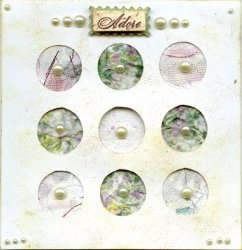
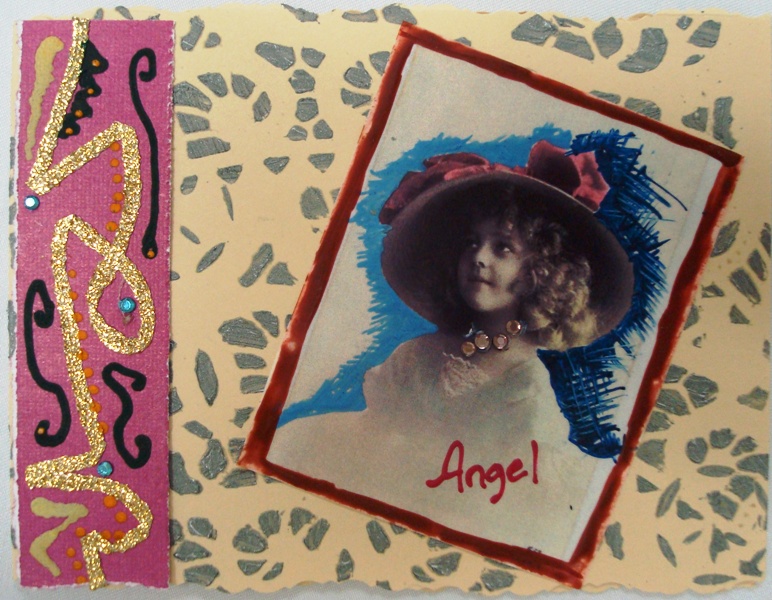
Doily Vintage Angel Card
A paper doily sets the background for this vintage inspired card from Kandi Corp. Any child's image can be turned into a vintage photo with a few clever techniques. Beeswax pigments, gold fusible ribbon and swarovski crystals add elegant touches to the card.
Tools:
- Hot Wax Art® Stylus with Brush & Calligraphy Tip
- Professional Touch® HotFix Applicator with 3mm tip
- Ribbon & Tread Tips
Materials:
- 1” x 4” Pink Cardstock
- 11” x 4” Beige Cardstock
- 2½ x 3½ Child Image
- Paper Doilies
- FG3003 Burnished Gold Fusible Ribbon
- Hot Wax Art® Berry BeesWax Pigments
- Hot Wax Art® Ocean BeesWax Pigments
- Hot Wax Art® Metallic BeesWax Pigments
- 3mm Aquamarine & Light Amethyst Swarovski® HotFix Crystals
Instructions:
-
Cut Beige Cardstock 11” x 4” long.
-
Take paper doilie and lay it on top of the card.
-
Turn on the Hot Wax Art® Stylus. Preheat for about 2 minutes. Be careful. The metal end of the Stylus and the tip get very hot! DO NOT TOUCH ANY METAL PARTS of the Stylus or tips while in use. Using the Hot Wax Art® Stylus with Brush Tip, brush Metallic Silver BeesWax Pigments over the doilie. Repeat as needed to cover the card.
-
Using the Pink Cardstock, cut a 1” x 4” rectangle for a border.
-
Apply the Burnished Gold Fusible Ribbon using Kandi’s Professional Touch® HotFixApplicator with the small Ribbon & Thread tip inserted. Turn over the Pink Cardstock rectangle so you are working on the back of the cardstock. Hold one end of the Burnished Gold Fusible Ribbon in place and apply heat to the ribbon using the Applicator to fuse the ribbon in place. This will secure the ribbon and prevent the edge from fraying. Turn the rectangle back over to the right side, and press the ribbon down by holding the applicator in one hand and maneuvering the ribbon with the other hand. When you are done, secure the end of the ribbon to the back of the card by turning the card over and fusing the end to the back of the card.
-
Add details to the card using the Hot Wax Art® Stylus with the Calligraphy Tip and your selection of BeesWax Pigments.
-
Using the Hot Wax Art® Stylus with the Calligraphy Tip inserted, apply Dark Blue BeesWax Pigment and Light Blue BeesWax Pigment to the background in the child’s image.
-
Using Kandi’s Professional Touch® HotFix Applicator with the 3mm tip inserted, apply 3mm Light Amethyst Swarovski® HotFix Crystals for the child’s necklace.
- Fold your card in half. Using adhesive attach the border and child’s image.
Read Next5-Minute DIY Thank You