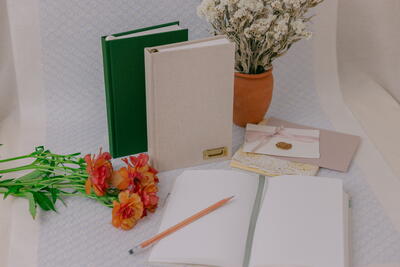
Hardcover Minimal Journal

Case binding is the quintessential hardcover book structure and one of my favorites to make. It’s typically the next step for beginner bookbinders to make books with hard backs. The text block and hardcover case are built separately, then assembled at the end. Use this binding to make any kind of journal or sketchbook with light- to medium-weight paper. This project will be covered fully with book cloth and include matching endbands and a ribbon bookmark.
Materials List
-
•40 sheets of 8½ x 11inch (21.6 x 27.9 cm) writing or sketch paper, 60–80lb (90–120gsm) text weight, grain short
•Strip of stiff paper cut to 8½ inches (21.6 cm) in length and 2–3 inches (5–7.6 cm) in width
•Waxed linen thread, 25/3 gauge (thin)
•2 sheets of 8½ x 11inch (21.6 x 27.9 cm) end papers, medium weight preferred, grain short
•Waste sheets for gluing
•PVA glue
•2 pieces of scrap book board larger than 5½ x 8½ inches (14 x 21.6 cm) with long side clear taped
•Mull, cut to 8½ inches (21.6 cm) long and 3 inches (7.6 cm) wide
•Japanese tissue paper (optional), cut to 8½ inches (21.6 cm) long and 3 inches (7.6 cm) wide
•Ribbon for bookmark, ¼–3/8 inch (6–10 mm) wide
•Endbands
•1 sheet of book board, at least 8¾ x 12 inches (22.2 x 30.5 cm), 0.08-inch (2 mm), short grain
•1 sheet of 10½ x14 inch (26.7 x 35.6 cm) bookcloth
•Moisture barrier sheets -
Tools
•Bone folder
•Metal ruler
•Pencil
•Awl
•Scissors
•Needle
•Glue brush
•Pressing equipment: book press, clamps or weights
•Cutting mat
•Utility knife
•Artist tape or washi tape
•3/8-inch (1cm) spacer
•¾-inch (1.9 cm) spacer
•Rotary cutter
•2 hinge rods or double-pointed knitting needles size 0–2 (2–2.75 mm), at least 8 inches (20.3 cm) long
•Lighter for sealing the ribbon
Instructions:
Making the Text Block
-
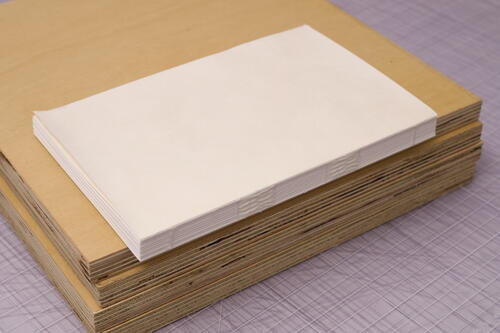
Start by folding four sheets of writing or sketch paper in half, with the short edges meeting each other. Crease the fold with the bone folder. Flip the folded papers vertically and crease the fold one more time. This is the first signature, which should measure 5½ x 8½ inches (14 x 21.6 cm). Make nine more signatures like this.
-
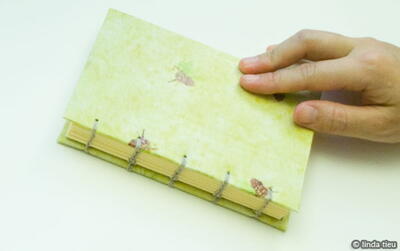
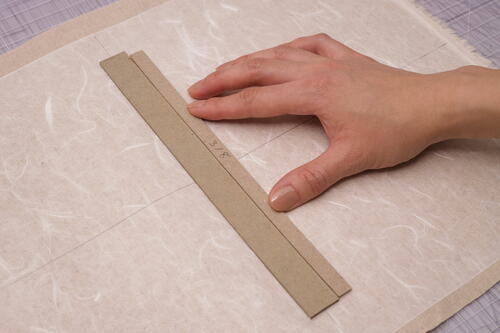
Use the French Link Stitch for sewing the text block. Throughout those steps, you will be using the strip of stiff paper, ruler, pencil, awl, thread, scissors and needle.
-
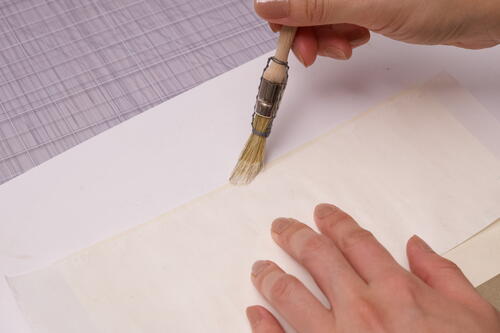
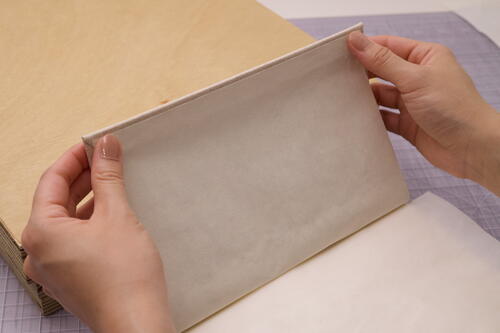
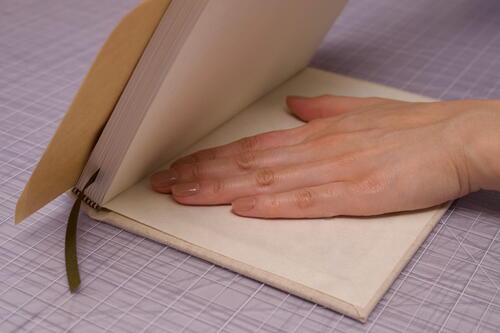
Fold the two endpaper sheets in half one at a time with the smooth or patterned side on the inside and crease the fold with the bone folder. Use a waste sheet with a straight edge to mask the first endpaper, leaving a narrow strip, about 1/8 inch (3 mm), at the fold. Use your glue brush to apply PVA glue to the exposed narrow strip. Attach the endpaper onto one side of the text block, lining up the folded edges without exceeding the signature. This method of attaching endpapers is called “tipping in.” Press along the glued edge to adhere. Tip in the remaining endpaper onto the other side of the text block.
-
Note:
When pressing the text block, aim to align the signatures at the head and tail as best as possible for smooth and level edges.
Pressing and Lining the Spine
When pressing the text block to prepare the spine for gluing, aim to reduce the thickness of the spine slightly and to keep it level with the fore edge as much as possible. It’s important to not over-tighten, which can cause the signatures to fall out of alignment along the spine. Gluing and lining the spine with supportive materials will ensure that the book will be strong and flexible to withstand use.
-
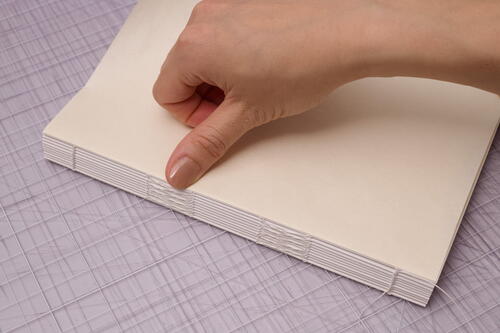
Place the text block in between two scrap book boards, with the taped edges lined up with the spine. The taped edges will prevent the text block from sticking to the boards. Tap the text block and board sandwich on the desk to bring the signatures to alignment along the spine.
-
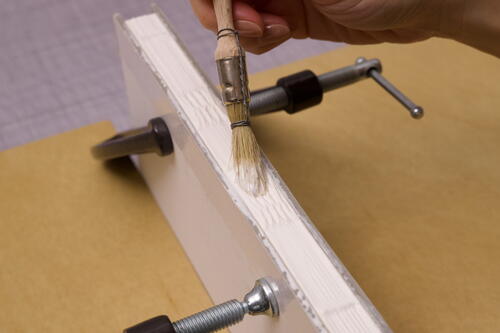
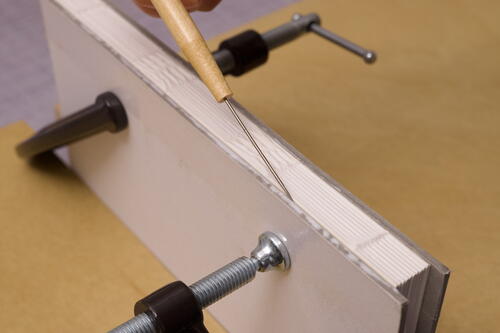
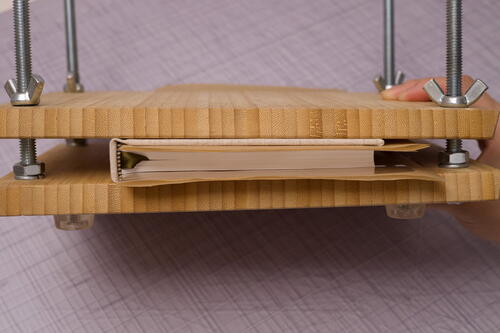
Gluing the spine is easiest if the text block is pressed and propped up vertically with the spine facing up. Apply consistent medium pressing force on the signature folds along the spine.
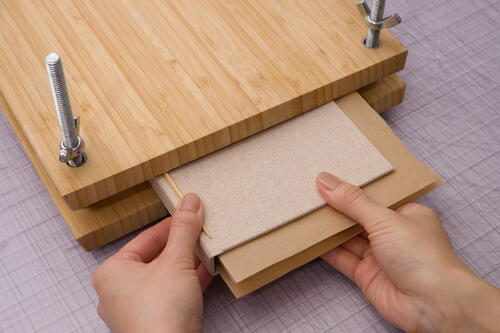
Here are a few ways you can press the spine:- a. If you have a book press, slide the sandwiched text block into the press with ¼ inch (6 mm) of the spine edge extending beyond the edge of the press. Press the text block and lift the press to stand vertically.
- b. Using spring clamps or C-clamps, press the sandwiched text block, making sure there is even pressure along the spine. Avoid pinching any part of the spine and over-tightening the clamps. Prop up the text block between two boxy weights to stand.
- c. The text block can be pressed under weight as it lays horizontally. Place the sandwiched text block in between two boxy weights, such as heavy books. Have ¼ inch (6 mm) of the spine edge extend beyond the weights so that you can work on the spine. Use stable weights to prevent shifting.
-
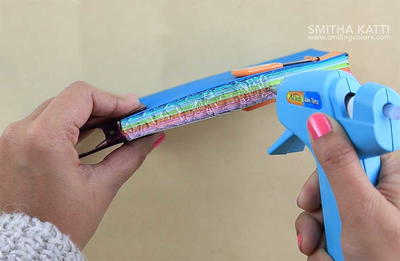
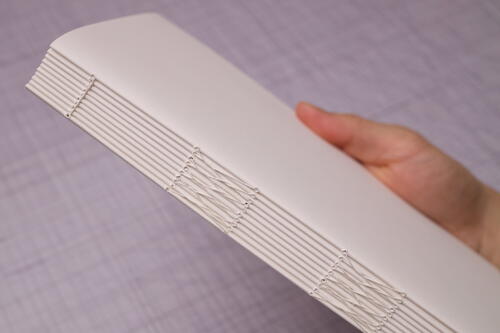
Cut the thread ends down to about a ¼ inch (6 mm). Brush a generous layer of PVA glue along the length of the spine, but not so much that it pools and seeps in between the signatures. Using an awl or the tip of the brush handle, tuck the thread ends in between the signatures. Use the tip of the brush to stipple glue over the links or use your fingers to push glue into hard-to-reach areas. Cover all of the gaps in the spine and let the glue dry to touch.
Tip:
Run the tip of the awl between the outer signatures and the pressing boards to remove glue for easier detaching later. -
Brush two to three more thin coats of glue, letting each coat dry before applying a new one. Let the glue dry completely in the press, at least 20 minutes.
-
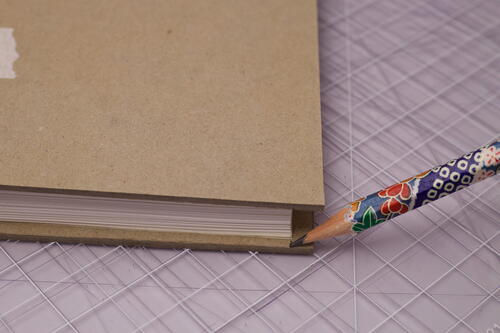
Take the book out of the press. Slowly detach the pressing boards from the text block and remove any excess dried glue. Optionally, trim the fore edge with the utility knife and metal ruler.
-
Let’s line the spine with strengthening and decorative materials. Place the book back into the press with the spine extending beyond the edge of the pressing boards, about ½ inch (1.3 cm).
Note:
I prefer when the text block is propped upright, but you can work on the spine on flat, lifted platforms as it lays horizontally. -
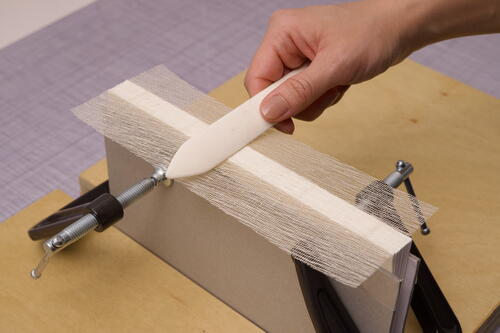
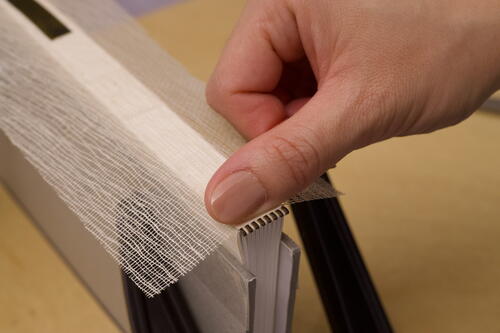
Confirm that the strip of mull is the same length as the spine. Brush on a thin layer of glue along the length of the spine. Center the mull onto the spine and lay it on. Press firmly with your fingers to adhere and rub on with the bone folder. It’s important for the mull to be attached fully, forming over all the little bumps on the spine, so that the mull can do its job of supporting spine movement.
Tip:
If you prefer extra spine support, add another layer of thin, Japanese tissue paper. -
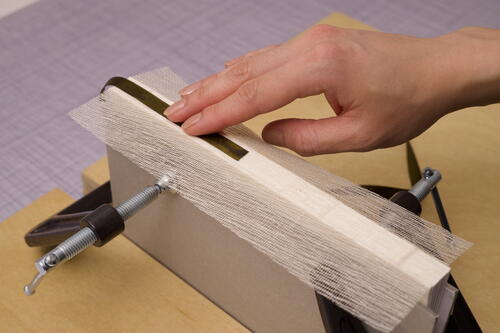
Working on a waste sheet, brush glue onto 3 to 4 inches (7.6 to 10.2 cm) of one end of the ribbon. Center the ribbon onto the spine and attach it at the head side. Press and hold the ribbon to adhere. Brush glue onto one endband, avoiding the piping, and stipple glue onto the text block and ribbon, being careful not to get glue on the part of the ribbon that will be visible beyond the text block. Attach the end band onto the text block. Press and hold to adhere. Glue on the remaining endband. Carefully remove the text block from the press. Measure out the ribbon to be at least 3 inches (7.6 cm) longer than the length of the book and trim it with scissors. Slip the ribbon bookmark into the middle of the text block, leaving some slack at the top so the adhesive is not disturbed. Confirm that all of the spine linings are adhered and set the text block aside to dry.

Making the Hardcover Case
It’s best practice to measure and cut the boards for the hardcover case after the text block is complete. With each project, the text block results can vary, so it’s important that the hardcover case is tailored to the text block for the best fit.
-
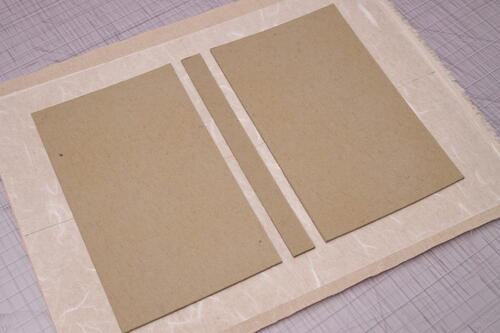
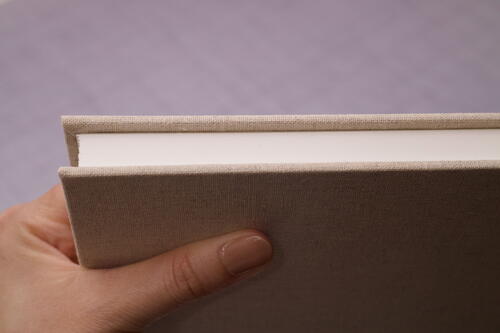
Let’s start by making the front and back covers. Measure and write down the width and length of the text block. The cover boards will be the same width as the text block, but the length of the spine will be an additional ¼ inch (6 mm). The extra spacing creates a cover overhang of 1/8 inch (3 mm) at the head and tail. Cut two pieces of book board, with the grain running parallel to the spine. Hold the boards against the text block to confirm that the width is the same, and the length extends beyond the text block by 1/8 inch (3 mm) at the head and tail.
Note:
Aim for the width of the spine board to be level with the thickness of the fore edge. When determining the spine width for a flat-back book, I’ve found that the thickness of the textblock plus both boards is often slightly too wide, so I usually reduce it to the thickness of the text block plus one board. -
To measure the width of the spine board, keep holding the boards on either side of the text block and compress with one hand. Measure and write down the thickness of the text block plus one cover board. Cut a piece of spine board that is the same length as the cover boards, and the width that you just wrote down with the grain running lengthwise along the spine.
Test Fitting the Hardcover Case
-
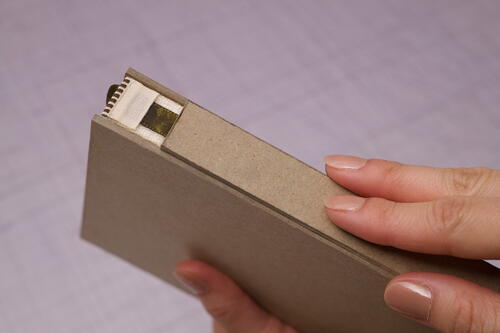
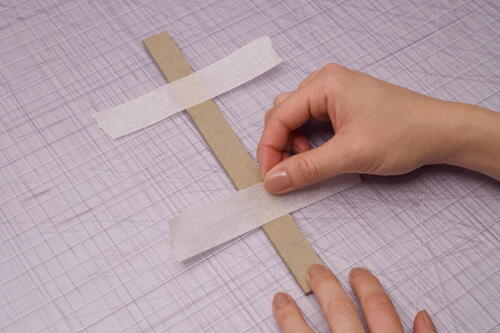
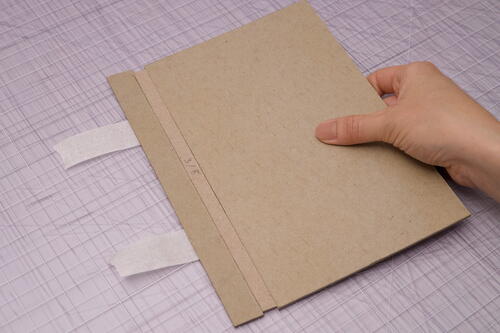
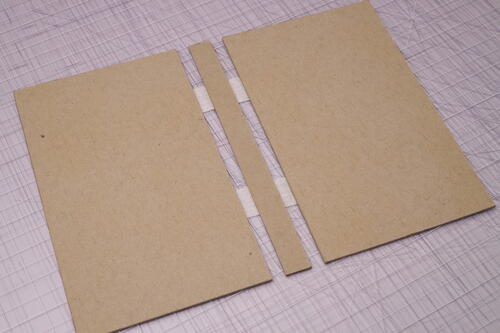
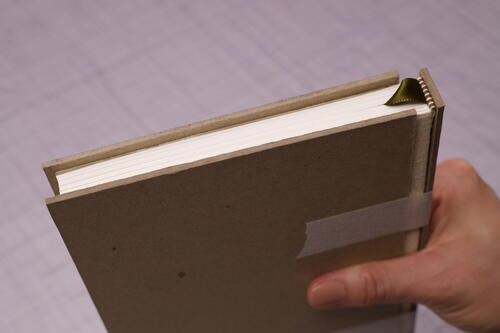
This is one way to check that the boards are the right size before committing to covering the boards. To test the fit of the case, use two pieces of artist or washi tape, about 5 inches (12.7 cm), and place them horizontally across the spine board. Flip the spine over and place a 3/8-inch (1-cm) spacer on one side, against the spine board. Then place a cover board against the spacer, checking for alignment at the head and tail. Move the spacer to the other side of the spine board and place the remaining cover board. Remove the spacer and wrap the boards around the text block. Push the text block firmly into the inner spine and center it between the head and tail, pulling the covers outward to maximize the hinge gap. The hinge gap may seem roomy now, but once the cover material is applied, the hinge will be stabilized.
-
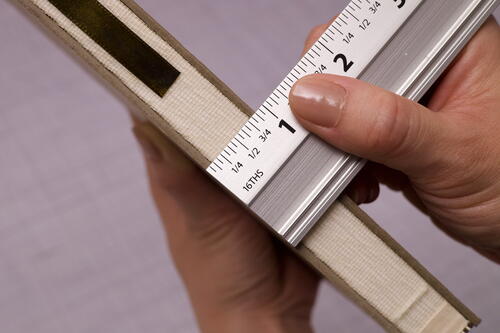
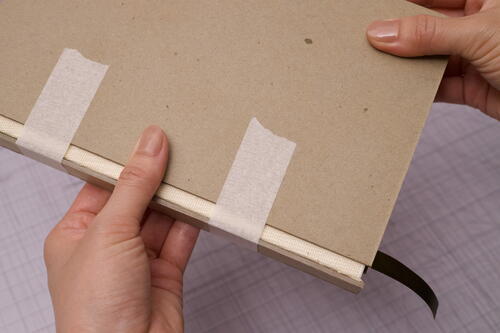
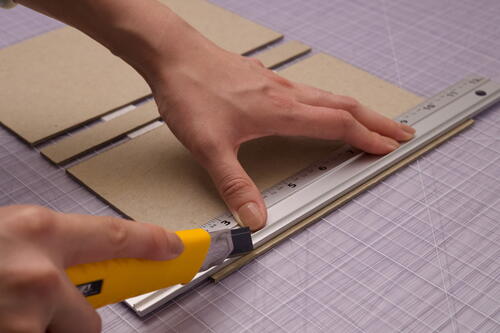
Check that there is an even overhang trim, about 1/8 inch (3 mm) around the head, tail and fore edge. The fore edge is likely to be too long. With a pencil, mark where the text block fore edge ends on the cover boards. Measure and mark 1/8 inch (3 mm) past this mark to indicate the cover overhang. Make the same marks on the opposite cover and, with your ruler and utility knife, trim both boards to size. Trim any other part of the case to your liking and test fit the case after each adjustment. Note that the book cloth will add some bulk to all sides of the cover.
Note:
Experiment with the width of the hinge gap to find your preference.As a general rule, thicker boards and cover materials will require a wider gap. A common hinge gap space for small-to medium-sized case bound books is ¼ inch (6 mm). I’ve found that 3/8 inch (1cm) also works well, as it allows covers to open more loosely, resulting in a book that lies flatter when opened. -
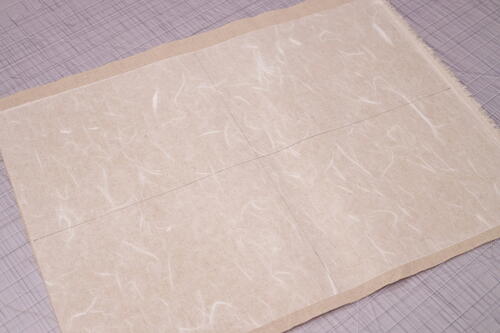
Once you’re happy with the fit, measure and mark the midway point on a short edge of the book cloth and make the same mark on the opposite side. Draw a horizontal line across by connecting the points.
-
Measure and mark the midway point on along edge of the book cloth and make the same mark on the opposite side. Draw a vertical midline by connecting the points. These lines will be helpful for centering and squaring the boards.
-
Brush a thin layer of glue onto the spine board. Attach it squarely onto the center of the book cloth, using the midlines as guides.
-
Place a 3/8-inch (1-cm) spacer on the right side of the spine board. Brush a thin layer of glue onto a cover board and attach it against the spacer, making sure the spine and cover boards line up at the head and tail. Press firmly to adhere.
-
Repeat step 6 for the left side of the spine board.
-
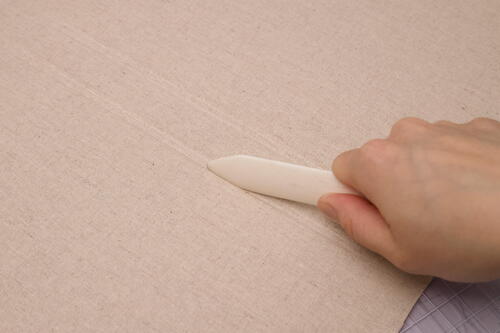
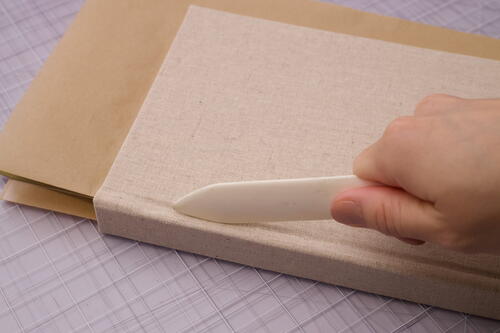
Flip the cover over and rub on the book cloth with the long edge of the bone folder with medium pressure. Smooth from the center moving outward. Score the hinges by digging the tip of the bone folder into the hinge gaps pressing along the edges of the boards. This will help form a groove at the hinge and allow for more movement when opening the cover.
-
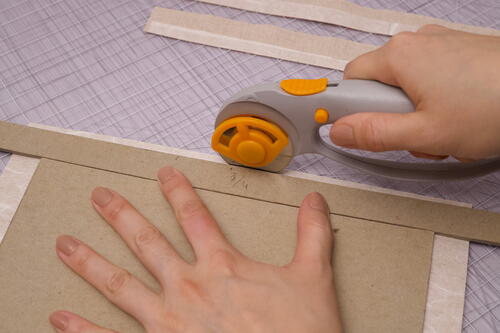
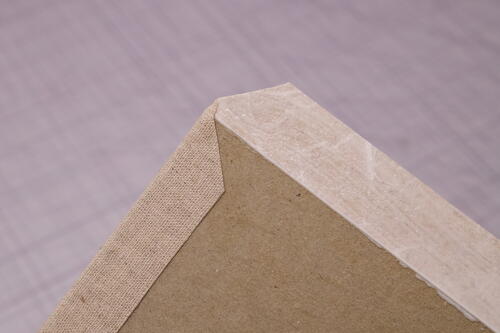
Flip the cover over. Trim each edge of the book cloth with a ¾-inch (1.9-cm) spacer and rotary cutter. If you don’t have a spacer, measure and mark ¾ inch (1.9 cm) from each edge of the cover board. Cut each corner of the decorative paper at a 45-degree angle, leaving about 1/8 inch (3 mm) of excess. This tiny space should be slightly wider than the thickness of the board, and is important for neat turn-ins.
-
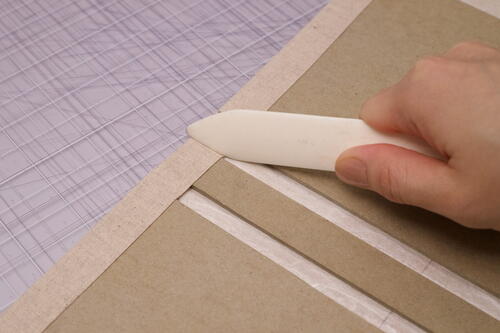
Starting at the top edge of the cover, brush a thin layer of glue onto the tab of book cloth. Wrap the tab around the board and press firmly throughout. Smooth out the glued tab with a bone folder. Press the book cloth into the hinge gap with the bone folder. Repeat for the tab on the opposite side.
-
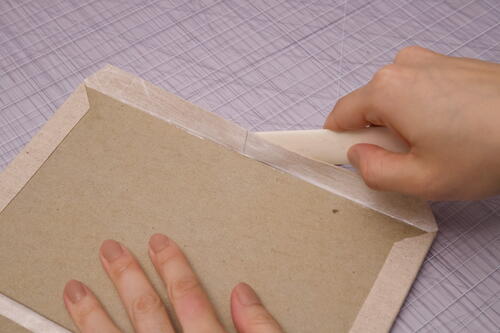
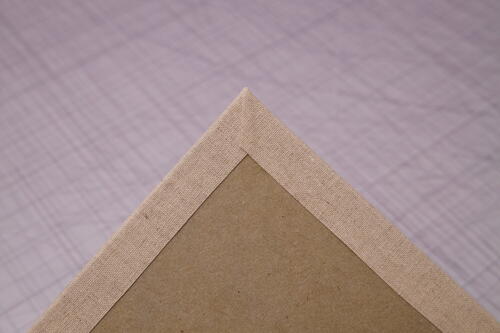
Let’s turn in the side tabs. Brush glue onto one of the remaining two tabs. Use the bone folder to tuck in and press the corner bits flat. Wrap the tab over the book board's edge with the help of a bone folder. Repeat for the last side tab.
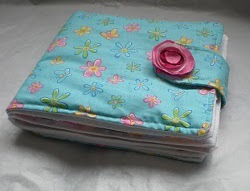
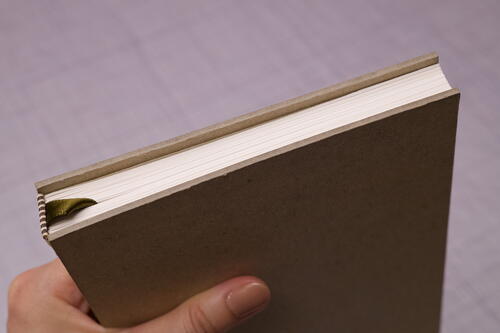
The case is complete! Lay the cover flat to dry, at least 20 minutes. You can also lightly press it under weights to flatten it while it dries. It is normal if the covers bow out slightly when they're dry. Gluing the endpapers to the inner covers will “pull” the cover inward to straighten out. The goal is to find a balance between the pulling forces of different materials glued onto the outer and inner covers.
Casing in the Text Block
The text block is cased in by gluing each endpaper onto the inner covers one at a time. It can be difficult to get everything aligned in the beginning, so don’t be discouraged! Try to move decisively, especially since PVA glue sets quickly. Have dry waste sheets and moisture barrier sheets ready as each endpaper is glued. I encourage you to read through this section before attempting it.
Note:
The spine will not be glued as the spacing in between the text block and case allows the book to open and close.
-
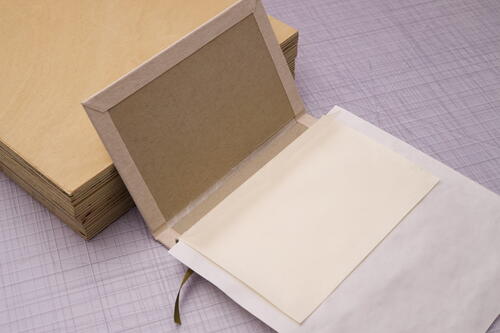
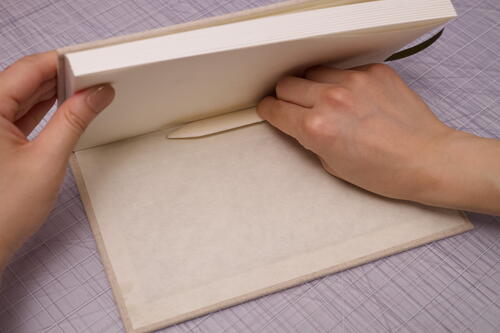
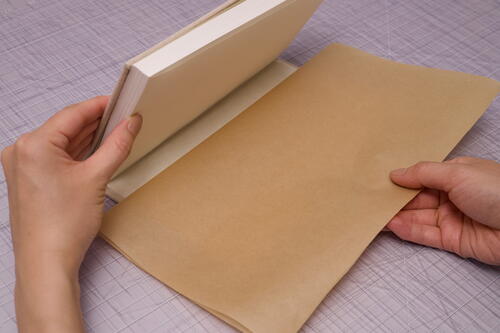
Test fit the case over the text block. Visually note the cover overhang at the fore edge, which will be helpful for the next step. To set up, position the book with the fore edge facing you. Open the cover and prop it up at an angle on an object. Center the text block on the back cover between the head and tail. Slip a waste sheet under the top endpaper leaf.
-
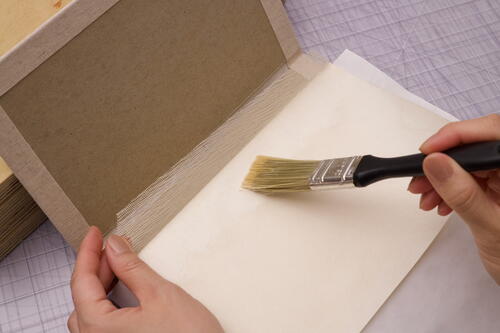
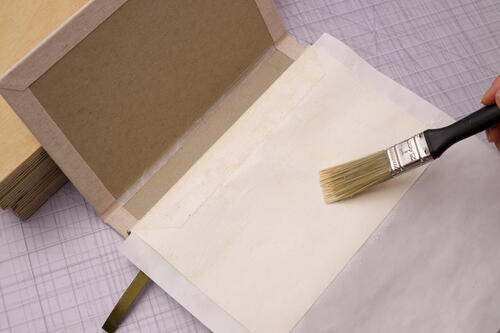
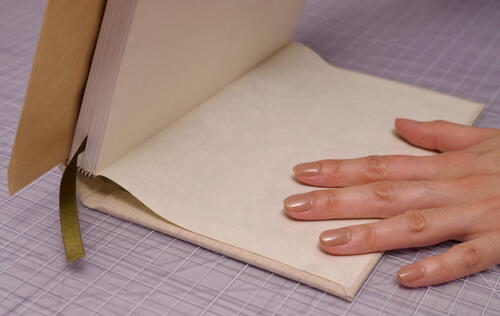
Cut the corners of the mull at the head and tail at a 45-degree angle. Gently lift the mull and brush a thin layer of glue onto the endpaper, as wide as the mull tab. Press the mull down to adhere. Then brush on a thin layer of glue throughout the page, brushing outward from the mid-spine. It’s crucial to not let any glue seep onto the spine. Lift each outer corner of the endpaper and place them squarely onto the cover, leaving the overhang spacing you noted earlier, about 1/8 inch (3 mm). Remove the waste sheet. Holding the edge of the endpaper in place with one hand, and the text block and cover with the other, spin the book 180 degrees to work on the inner cover flat. Holding the book slightly open at a 45-degree angle, smooth the endpaper inwards and gently press out any bubbles. Press the long edge of the bone folder against the gutter and pull outward a few times. Slip in a moisture barrier sheet and close the book.
Note:
During this process, try your best to ensure the text block is fitted against the spine board as much as possible. This will help the hinges function properly so that the book can open fully. -
Flip the book over to glue the other side. Position the book with the spine on the left side. If you’re left-handed, position the book with the spine on the right side. Open the remaining cover. Slip a dry waste sheet under the top endpaper leaf. Cut the corners of the mull at the head and tail at a 45-degree angle. Glue down the mull first, then brush glue throughout the endpaper, brushing from the mid-spine moving outward. Lift the endpaper leaf with one hand and lift the cover with the other hand. Attach the fore edge of the endpaper squarely onto the cover as best you can, leaving the overhang spacing you noted, about 1/8 inch (3 mm). Don’t adhere the whole sheet. Holding the cover and endpaper with one hand, and the book with the other hand, flip the book over to work on the inner cover flat. Hold the book slightly open at a 45-degree angle with one hand, pressing the spine down into the cover. Adjust the endpaper alignment by gently lifting the glued sheet and re-positioning if the glue is still wet, aiming for an even cover overhang on all three edges. Keep the text block pressed into the spine as you smooth down the endpaper inwards towards the gutter. Press the long edge of the bone folder along the gutter and pull outward a few times. Slip in a moisture barrier sheet and close the book. Alternatively, you can use the method described in step 25 if you prefer.
Note:
If your endpapers are misaligned or wrinkled when you’re casing in your first books, that’s okay! This process will take some practice. You can try using heavier weight papers. They generally don't expand as much when moisture is introduced, making them easier to work with as endpapers. -
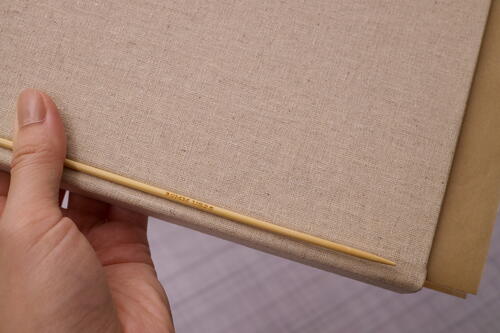
Nice, you just cased in a book! Use the tip of the bone folder to score the hinges on the book cloth. For more pronounced grooves, place hinge rods or double-pointed knitting needles into the hinge gap. With the hinge rods and moisture barrier sheets in place, press the book horizontally for at least 8 hours (or over-night) to dry. It’s normal to need to re-position the hinge rods as you put the book in the press. You can press the book with a book press or between pressing boards with weights on top. Do not over-tighten the press to minimize the risk of glue seeping into the hinges and spine. The book should be compressed just enough until every component is flat and there is no visible spacing between the covers, and above and below the book.
Note:
Your location, the time of year, and weather conditions can affect the drying time! The more humid and rainier your climate is, the longer it will take for glue to dry. -
Pulling the book out of the press is the highlight of case binding! Carefully remove the moisture barrier sheets as they may be stuck on from seeping glue. Before opening the book, check that the covers, spine and text block lay flat and square. The book needs to be opened methodically to warm up the spine. Open the book all the way at the middle, then the first third of the book and finally the last third of the book. Flip through the pages to test for smooth spine movement. Open the inner covers to check the endpapers. If an additional trim is needed, cut the ribbon bookmark to the desired length, then seal the ribbon edge with a lighter.
Note:
Heavier weight papers, such as mixed media or watercolor paper, are not suitable for flat-back and round-back books due to the stiffness of the paper, which creates a lack of drape of the pages.
Credit:
Reprinted with permission from Handmade Books at Home by Chanel Ly. Page Street Publishing Co. 2023. Photo credit: Chanel Ly.

Read NextHardcover Minimal Journal