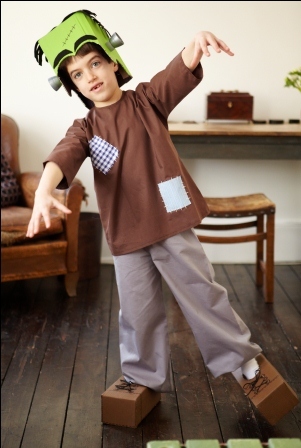
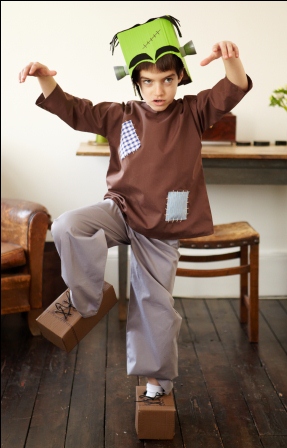
Frankenstein Kids Halloween Costume DIY
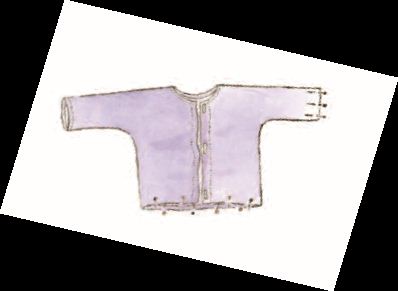
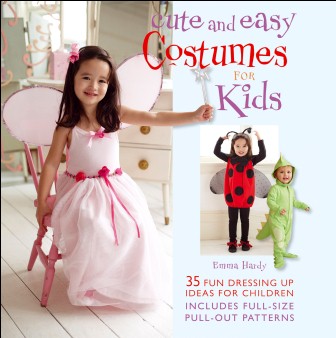
Make your child into a monster when you create this adorable DIY Halloween costume. The Frankenstein Kids Halloween Costume is a charming project that harkens back to old school Halloween costume ideas that were actually DIY-ed. You can make this costume from things you can find in your home. Use some spare fabric and a few cardboard boxes to create a fun Frankenstein costume for Halloween. Find this project and 34 other kids Halloween costumes in Cute and Easy Costumes for Kids by Emma Hardy.

All Photos Copyright CICO Books, 2010
Materials:
- 45x44in (114x110cm) brown fabric for the top, and matching thread
- 49x34in (124x85cm) gray fabric for the pants, andmatching thread
- Scraps of fabric for patches
- Pinking shears
- Embroidery floss and needle
- Craft knife
- Cardboard box approx 61/2x61⁄2x8in (17x17x20cm) for the head
- Green and brown water-based paint and paintbrush
- Black felt
- High-tack craft glue
- Black marker pen
- Two bottle tops
- Two cardboard boxes for the shoes approx 9x41⁄2x31⁄2in (23x11x9cm)
- Two 28in (70cm) pieces of black cord
Instructions:
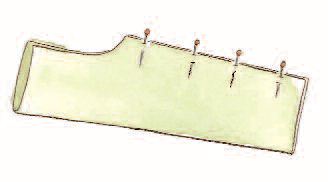
- Make the top and pants using pattern pieces 75a, 75b, and 76. Trace and cut out pattern pieces 75a and 75b and combine them along the marked lines to make one large pattern. Use this to cut out one front and two back pieces from fabric. Right sides together, pin and stitch the back pieces to the front, along the top of the arms, along the underside of the arms, and down the sides, taking 3⁄8in (1cm) seams. Snip into the seam allowances under the arms. Press the seams open.
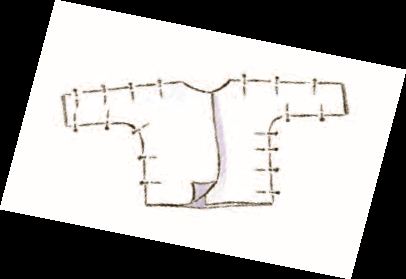
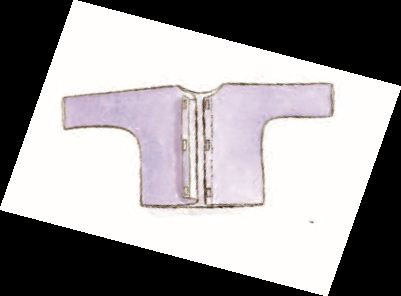
- Turn right side out. Turn under 3⁄4in (2cm) on the back edge of both back pieces. Pin and stitch in place near the raw edge. At the center edges of the top, sew the two pieces of a Velcro patch to the underside of one edge and the outside of the other edge, aligning them so that they are at the same distance from the top on both edges. Repeat at the top and bottom using the above diagram as a guide.
- Press under 3⁄8in (1cm) on the bottom edge, the neck edge, and the lower edges of the sleeves. Pin and stitch these hems in place. Press the top.
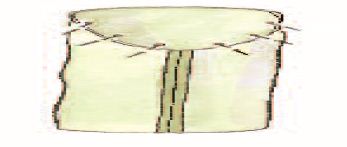
- Using pattern piece 76, cut out two legs from fabric. With right sides together, pin and stitch the long sides of the leg pieces together on both legs, taking a 3⁄8in (1cm) seam. Press the seam open.
- Turn one leg right side out and slip it inside the other leg. Line up the seams and pin and stitch a 3⁄8in (1cm) seam around the tops of the legs. It can be a good idea to sew a second line of stitching to reinforce the seam. Make small snips in the seam allowance around the curve, being careful not to cut through the stitches. Turn the pants right side out and press.
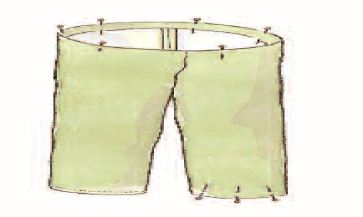
- Press under 3⁄4in (2cm) at the top edge. Pin and stitch close to the raw edge to make a channel, leaving a small opening in the stitching. Push a piece of elastic through the channel (see page 122) and stitch the opening up. Press under 3⁄8in (1cm) at the bottom edge of each leg, and pin and stitch these hems in place. Press.
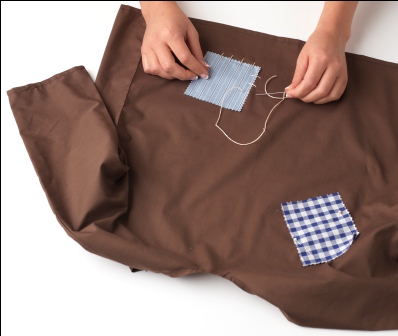
- Cut 4in (10cm) squares of assorted fabrics using pinking shears, and stitch them randomly onto the top. Using embroidery floss, make large stitches around them for decoration.
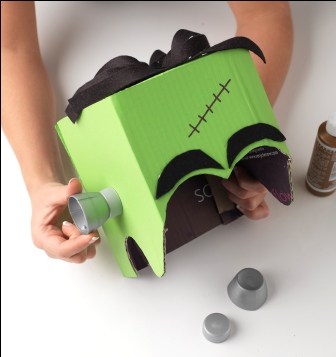
- Using a craft knife, cut off the top of the box for the head, and turn the box upside down. Cut ear shapes from the sides and a brow from the front. Paint the head green and leave to dry completely.

- Cut six 6x3/4in (15x2cm) strips of black felt and glue them onto the top of the head. Cut out two felt eyebrow shapes and glue them onto the face.

- Draw a scar on the forehead using a marker pen. Glue bottle tops onto the sides of the head to look like a bolt, holding them in place until they are stuck.
- Remove the tops from the two boxes for the shoes. Cut an oval about 31/2in (9cm) long in each box, about 11/4in (3cm) from the back. Make sure that your child can push their feet through the holes. Paint the shoes brown and leave to dry.

- Draw stitching and lace holes on the shoes with the marker pen to decorate them.

- Make small holes for the laces. Thread the lengths of cord through the holes to lace them up. Finish with a bow on each shoe.

TIP: Use old shoeboxes to make Frankenstein’s oversize shoes. Or look for empty food boxes in similar sizes, making sure that the boxes are not so big that they could cause accidents!
 Project excerpted from Cute and Easy Costumes for Kids by Emma Hardy. CICO Books, $19.95, 2010.
Read NextDIY Easy Halloween Magnets