Happy Halloween Necklace
Now is the time to think of homemade crafts. Halloween is around the corner, so celebrate with a Happy Halloween Necklace from Heidi Borchers. Not all projects have to be spooky and ghoulish - this necklace is cute and pretty!

Materials:
- Fabric – Halloween prints (pre-iron to remove wrinkles)
- Aleene’s Fabric Fusion Permanent Dry Cleanable Adhesive
- Ruler (clear type works great)
- Pencil
- Embroidery floss – 2 of each black, orange
- Plastic drinking straws – cut to just under 3/4“
- Beads – assorted
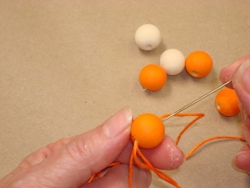
- Wooden beads- painted with orange acrylic paint
- Needle
- Alphabet letters- ‘H’ Button (I used Blumenthal Lansing’s Alphabet letter Buttons-approximately 1” tall), ‘A’ plastic letter (found in the mosaic aisle of my craft store), ’P’ metal letter (used in mixed media/scrap booking), ‘Y’ ceramic alphabet letter bead
- Plastic ring
- Metal jewelry findings – eye pins, jump rings
- Cardboard – for using as a squeegee for applying the glue.
Instructions:
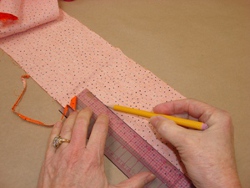
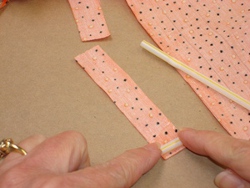
- Place fabric on flat workspace, with the wrong side facing up. Using the plastic ruler, lightly mark line at 3/4” with a pencil.
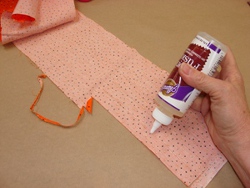
- Apply small line of glue along the pencil line.
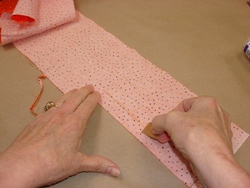
- Immediately squeegee the glue with a small piece of cardboard.
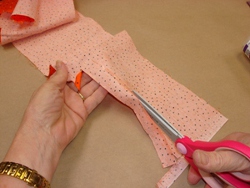
- Cut along the pencil line. You will need approximately 3 to 4” for each bead you want to make.
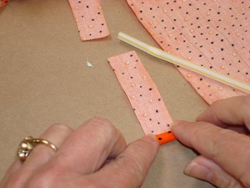
- On the wrong side of the fabric strip, place small amount of glue onto one end of the fabric. Place a pre-cut plastic drinking straw into the glue.
- Roll the fabric over the drinking straw.
- Place small amount of glue on the edge of fabric. Squeegee the glue with the cardboard to spread into a thin layer.
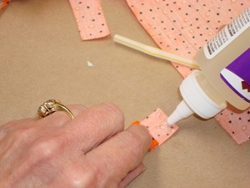
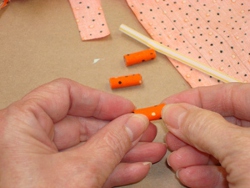
- Finish rolling into bead. gently press along edges for glue to adhere edges. Repeat to create each bead.
- I covered my re-painted wooden beads with embroidery floss. For each bead, you will need approximately 1-1/2 yards of orange embroidery floss. Thread needle through hole and repeat in and out until the bead is covered. Do not cut off the excess thread if you want to tie these onto the necklace. If you are going to thread onto necklace, you can trim off the excess floss strands.
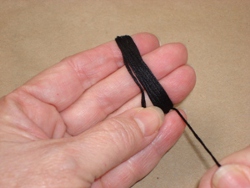
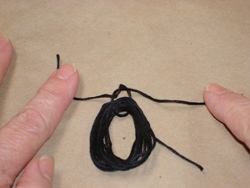
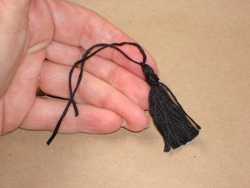
- To make a tassel, wrap the embroidery floss around three fingers 10-15 times.
- Tie off the top edge of the floss. This will be the top of the tassel.
- Place a small drop of the glue at the top edge. Place a 6” piece of floss into the glue and wrap tightly around the top edge about 5 times. Knot the end at top to help it hold. Cut the tassel open at the bottom.
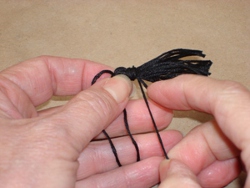
- Trim the tassel ends even at the bottom edge. Completed tassel.
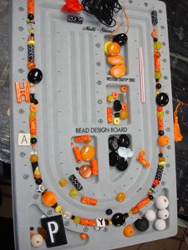
- Lay out the necklace the way you want it, then thread onto a piece of black embroidery floss.
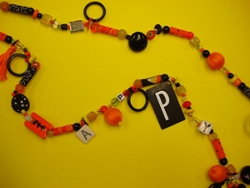
- Completed necklace.
For a comprehensive video tutorial of this project, check out Happy Halloween Rolled Beads Necklace.