Stylish Felt Camera Cozy
Keep your camera, phone, or MP3 player safe from harm with this Stylish Felt Camera Cozy. Great for carrying around with you while you're traveling or going for a nature walk, this tech cozy can easily fit in your purse or hang around your wrist for easy access. Though this cozy is designed for a camera, you could easily use this pattern to create a lovely felt cozy for any one of your tech gadgets. Decorate it however you'd like or give it as a gift for the upcoming holiday season.

Materials:
- Felt paper (white)
- Fancy buttons
- Threads (white and green)
- Unused printed cotton fabric (old or new)
- Ribbon (Offray)
- Ribbon (Craft)
- Yarn needle
- Pins and safety pin
- Tape measure
- Scissors
Instructions:
-
Make a perfect square with a measurement of 7 ¾ inches (W) X 7 ¾ inches (L) and then cut the excess.
-
Provide ½ inch allowance when folding one side. Using a white thread, run the felt paper under the sewing machine.
-
Pull the fold towards the front side and make a 1 inch measurement. Attach pins to securely hold it. Insert a Craft ribbon under the fold and choose design #27. Use the first run with white thread as your guide to make your stitch design run straight along the edge. Begin running it under the sewing machine.
-
Choose a design from your printed cotton fabric. Provide an allowance along the edge of the design when cutting it. Lay it on the top center of the felt paper and attach a pin. Using a green thread, sew along the edge until you reach the end. Repeat the sewing along the edge twice and then cut the excess fabric. This is the finished appliqué design.
-
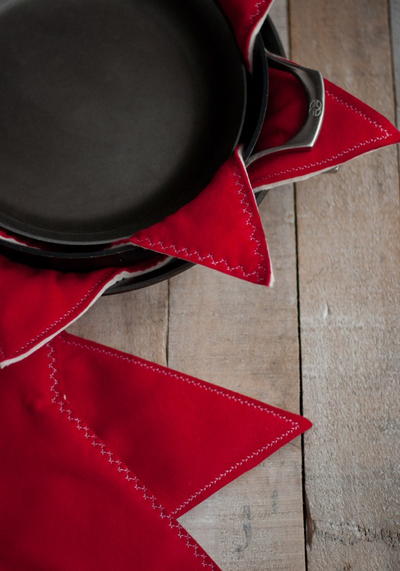
Invert the felt paper. Pull the two sides together and attach pins along the edge. Starting at the bottom side, provide ½ inch allowance when sewing it. Provide ¼ inch allowance when sewing the side. Be sure to leave the fold open for the insertion of the ribbon.
-
Still inverted, lay one bottom side flat and provide ¼ inch allowance from its pointed tip when running it under the sewing machine. Do the same procedure on the other bottom side. This makes the bottom sides squared.
-
Cut 30 inches of Offray ribbon. Facing the right side, use a safety pin to insert it inside the fold until you reach the end. Make another round of the insertion of the ribbon. Be sure the remaining ribbon hanging is of equal length or make adjustment, if possible. Note: The size of the ribbon will vary depending on the size of your hand and wrist. Be sure to make adjustment before cutting the ribbon.
-
Using a yarn needle, insert one at a time the ends of the ribbon into the first button and pull the button down. Insert one end of the ribbon into the second button and another end into the same button the other way. Extend the ribbon ends 4 inches long before tying it. Tie the ribbon once on top and then tie it at the bottom. Leave some inches to hang. Note: Choose a fancy button that has the right hole size to insert the ribbon.
- While holding the second button, pull the ribbon to close the pouch. Pull down the first button to the end of the pouch. Insert your hand in between the ribbons.
Read NextFelt Princess Flower Crown