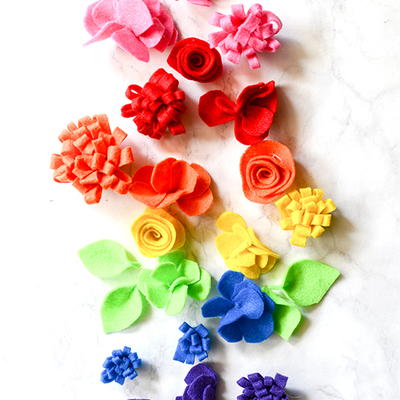
Rosebud Felt Flower Bouquet
This felt flowers DIY will be your new centerpiece . . . on every table.

Love the look of flowers, but not the upkeep? These dainty felt rosebud bouquets are perfect for everyone who has a struggling green thumb! These DIY home décor accessories look great in home, office or dorm – and they don’t need sunlight to shine!
You can choose to add them to small vases, teacups and more – these would make great table centerpieces if you created larger bouquets. These rosebuds have a bit of sparkle with the addition of a crystal flatback center – if you prefer them not as glam, keep them plain. The more sparkly the better, I always say though!


Step 1: Gather materials.
You’ll need felt in a variety of colors, 18g aluminum wire in green, scissors, flatback gemstones and wire cutters. You’ll also need hot glue and a hot glue gun.
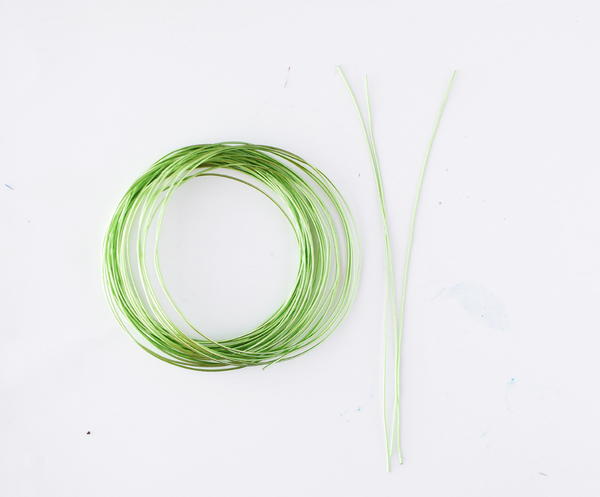
Step 2: Cut a few 8” pieces of aluminum wire.
These will act as your stems.

Step 3: Cut various squares of felt from different colors.
These will be your roses, and the size of your square will affect the final size of your rose. I made mine about 4”, give or take.
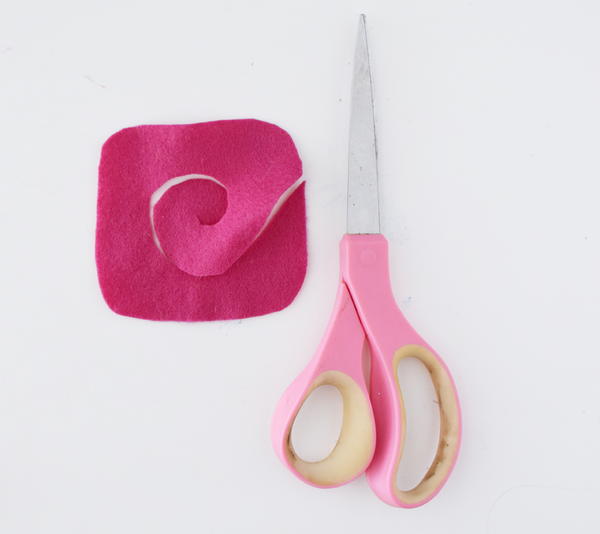
Step 4: Round the corners of your felt piece.
Cut a spiral into the center of your square. Make sure the widths are somewhat even!
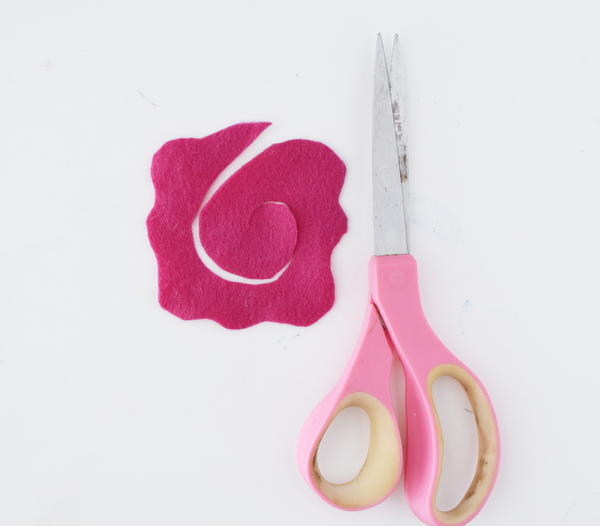
Step 5: Cut a fluted edge into the outer edges.
…..this gives a more realistic look.
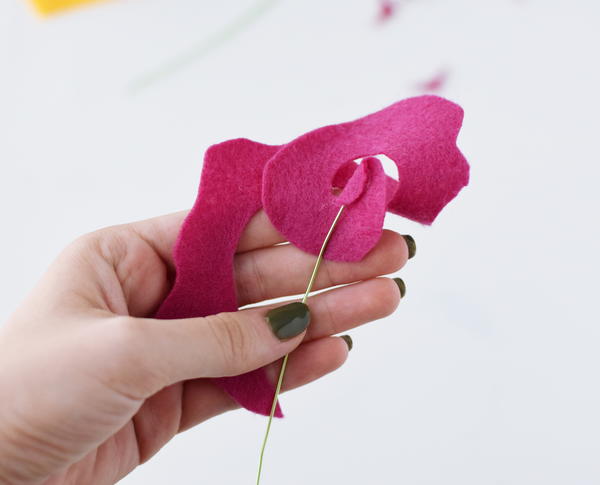
Step 6: Glue the very center of the spiral onto the end of a wire piece.
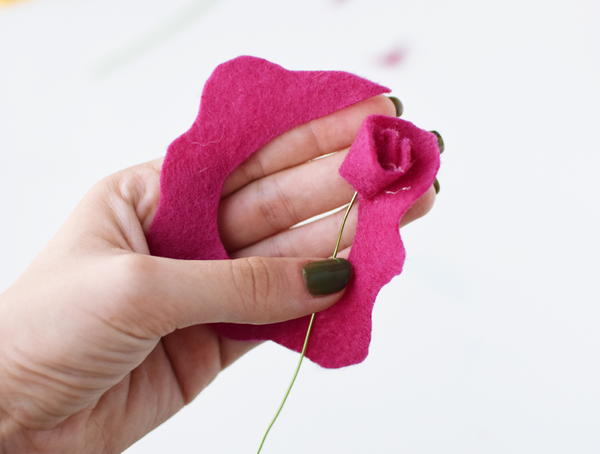
Step 7: Continue wrapping the felt around the wire, gluing down with every wrap for added strength.
Don’t wrap too tightly or too loosely!

Step 8: Glue down the very end of the spiral to finish off your rosebud.
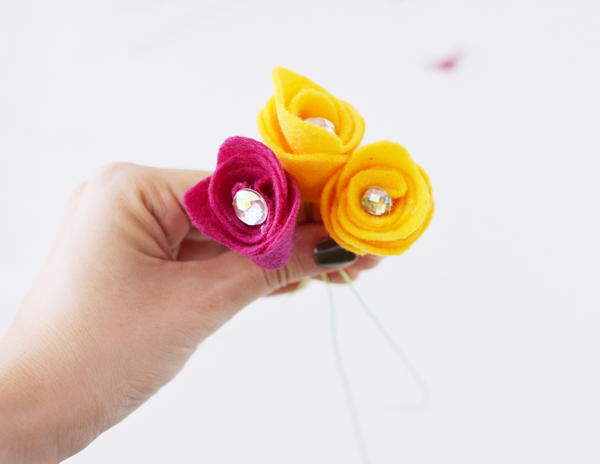
Step 9: Glue in crystal flatbacks to the center of the roses for added sparkle.
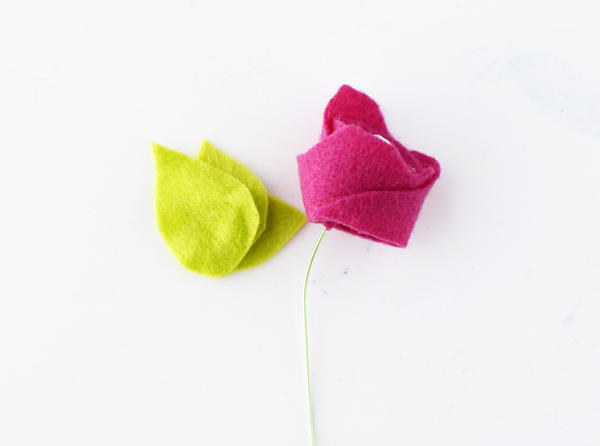
Step 10: Cut a few leaf-shaped pieces out of green felt.
Step 11: Glue the small leaves under each rose, for a bit of greenery!
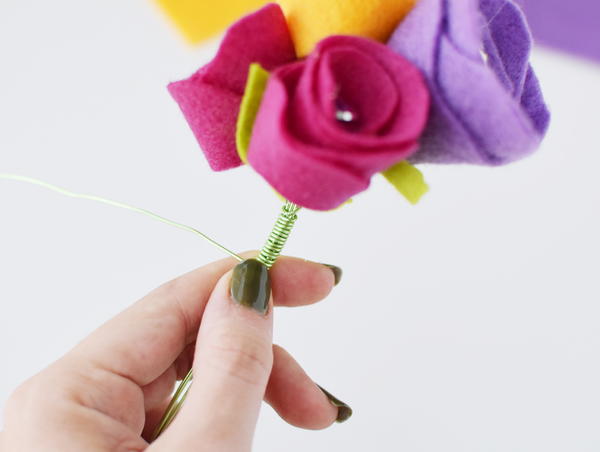
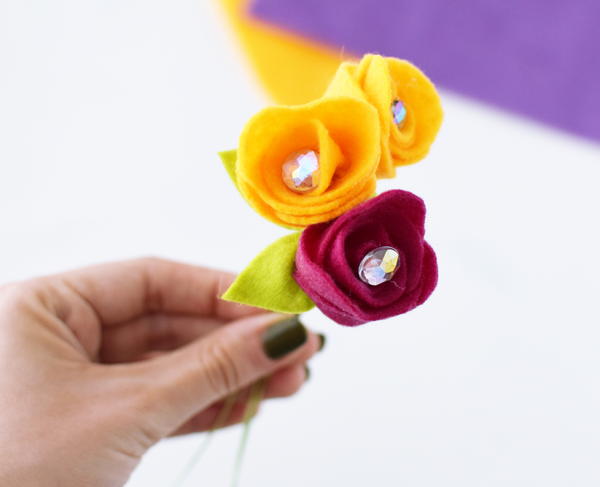
Step 12: Group your roses together and wrap green aluminum wire around the stems for a cleaner look.
This also makes it much easier to place in your chosen vase.

Step 13: Cut any excess wire off the ends to fit your vase.
Simply place in bouquet- if you want to gently move any of the rosebuds, bend the aluminum wires to your liking.

Hope you enjoyed the tutorial! Check out more of my DIYs at quietlioncreations.com!
Read NextTropical Hibiscus Felt Wreath
Your Recently Viewed Projects

Thanks for your comment. Don't forget to share!
savspizza 0985038
Mar 13, 2020
I love the craft I gave it to my mom and she loved it thank you so much!!!!!!!!!!!!!!!!!!!!!!!!!!!!!!!!!!!!!!!!!!!!!! == !!!!!!!!!!!!!!!!!!!!!!!!!!!!!!!!!!!!!!!!!!!!
Editor Dana
Mar 17, 2020
So glad to hear this!! Thank you so much for your sweet comment. Have a great day!
Report Inappropriate Comment
Are you sure you would like to report this comment? It will be flagged for our moderators to take action.
Thank you for taking the time to improve the content on our site.