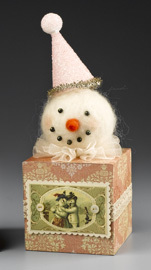
Smiling Snowman in a Box
From his carefully rouged cheeks to his tiny bow, adorable embellishments make this smiling snowman a great project for the dedicated crafter. A wonderful holiday decoration!

Materials:
- STYROFOAM™ Brand Foam:
- Balls: 3-1/2"; 1"
- Block, 18" x 4" x 4"
- Cone, 3" x 2"
- Wool fiber: natural; orange
- Pink decorative paper, 12" x 12"
- Cream card stock
- Vintage snowman image
- Cream lace trim, 1" x 18"
- Cream organza ribbon, 1-1/2" x 1 yd.
- Small mother-of-pearl buttons, two
- Silver chenille stem
- Ultra-fine pink/iridescent glitter
- White/iridescent glitter glue
- Cosmetic blush
- Serrated knife
- Candle stub or paraffin
- Pencil
- Ruler
- Round paintbrush
- Disposable palette
- Round wooden toothpicks, five
- Scissors: standard; decorative-edge
- Needlefelting tool
- Sewing needle and cream button thread
- Black-head corsage pins, seven
- Low-temp glue gun and glue sticks
- Thick, white craft glue
- Foam mounting tape, squares, or dots
Instructions:
-
Wax serrated knife with candle stub or paraffin; cut 4" cube from foam block. Set aside remainder of foam block for future project.
-
Cut two 4-1/2" x 8-1/4" strips and one 3-3/4" square from pink paper. Overlap and glue two short ends of 4-1/2"-wide strips 1/4" to create one 4-1/2" x 16-1/4" strip. Score and fold paper strip 1/2" from top long edge to make sharp crease.
-
Beginning and ending in center of one side of cube to prevent visible seams, wrap paper strip around four sides, allowing paper to extend 1/2" above top edge of cube; do not glue yet. Use fingers to crimp paper at cube corners; remove paper and crisply fold at crimp marks.
-
Glue paper strip around cube sides, overlapping ends. Clip paper corners above foam and fold excess down to top of cube; glue to secure. Glue paper square to top of cube. Position cube with paper seam at center back. Wrap and glue lace trim around center of cube as shown.
-
Cut out desired snowman image and mat on slightly larger piece of cream card stock. Trim edges with decorative-edge scissors. Adhere buttons to image as shown and outline image with glitter glue; let dry. Mount image to front of cube with foam tape.
-
Place small amount of natural wool fiber against large foam ball and attach to surface using felting needle; follow manufacturer instructions to ensure safety. Continue felting fiber to foam until completely covered.
-
Glue two toothpicks halfway into bottom of ball. Apply glue to free ends and insert into top of paper-covered cube; let dry.
-
Sew gathering stitch along one long edge of ribbon and pull up gathers tightly to create ruffle. Wrap ribbon around neck and tie off threads.
-
Refer to photo to blush cheeks and insert pins for eyes and mouth. For nose, wrap and glue small amount of orange wool fiber around tip of third toothpick to form carrot shape. Glue and insert free end of toothpick into face.
-
Use paintbrush to apply white glue to foam cone and 1" ball; sprinkle with pink glitter while wet and shake off excess. Let dry completely. Glue fourth toothpick into tip of cone, leaving 3/4" exposed. Glue ball onto toothpick; let dry.
- Glue remaining toothpick halfway into center bottom of hat; glue free end into head on angle as shown. Glue chenille stem around bottom edge of hat; trim excess.
Note: Felting needles are extremely sharp; use caution. Follow manufacturer's instructions.
®™ Trademark of The Dow Chemical Company ("Dow") or an affiliated company of Dow. For more project ideas, please see styrofoamstyle.com.
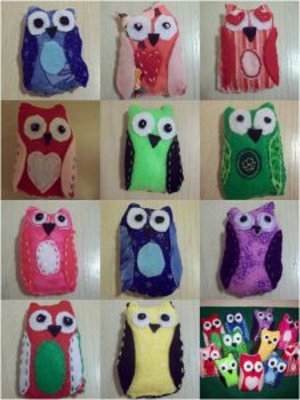
Read NextHand Sewn Felt Owls
Your Recently Viewed Projects


Thanks for your comment. Don't forget to share!
Sigo
Dec 27, 2017
This is really cute and has a quaint vintage look to it! It also made me think about a Jack-in-a-Box.
mulberrygalprinces s
Oct 12, 2016
This is adorable. What a happy little guy. I just have to have him. And it would be so easy to make this into a Santa coming out of the chimney. A few color changes, add a beard, and the box becomes a chimney. I am excited to get started on this.
gebah
Aug 19, 2010
Very, very cute! I could also see using a wooden spool instead of making the box. It would take much less time!!!
Report Inappropriate Comment
Are you sure you would like to report this comment? It will be flagged for our moderators to take action.
Thank you for taking the time to improve the content on our site.