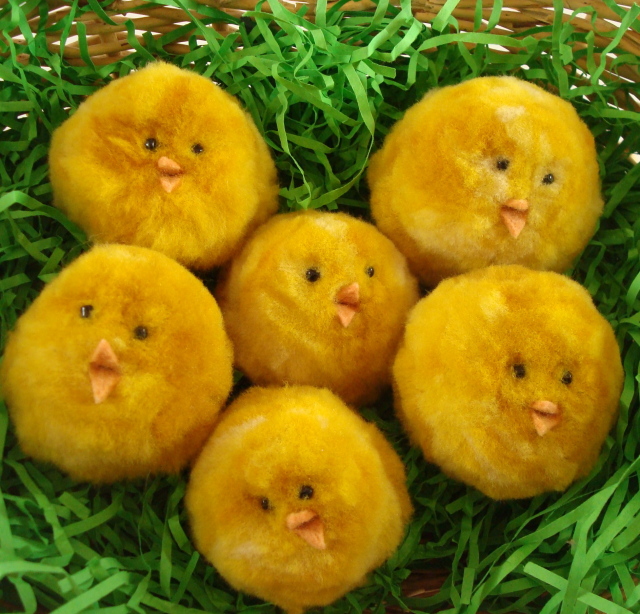
Easter Pom Pom Chicks
You can't help but smile at these adorable balls of yellow wool turned into chirping Easter chicks. Fill a basket with them for silly fun Easter decor.
Materials:
- yellow wool roving-1 ounce will make 3 chicks
- orange felt-just a tiny scrap for the beak
- black beads -I used size E glass seed beads
- pom pom maker-or use the instructions below to make using cardboard circles
- strong string-I used cotton rug warp-you can use thick embroidery cotton or heavy string.
- sharp scissors
- thread and needle that will fit through your beads.
Steps:
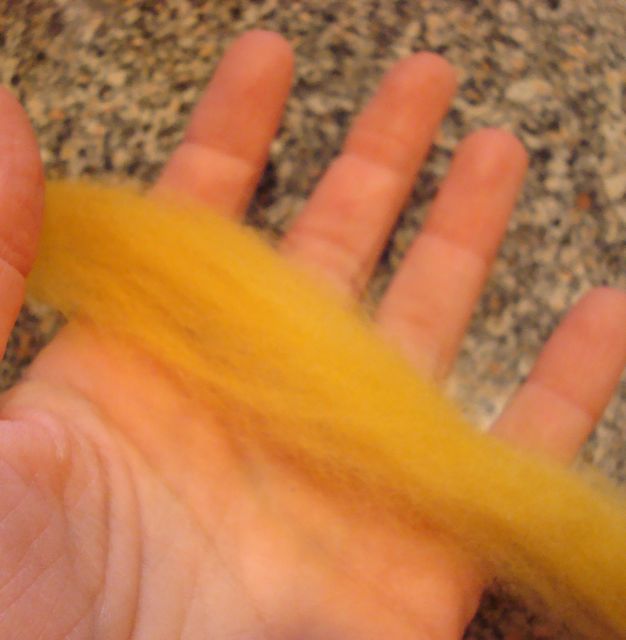
- The first step is to prepare the roving. Split the roving lengthwise into half inch wide strips.
- Begin to make a pom pom by wrapping the roving around the pom maker. Instructions for making a pom pom using cardboard are at the bottom of the page following the chick instructions.
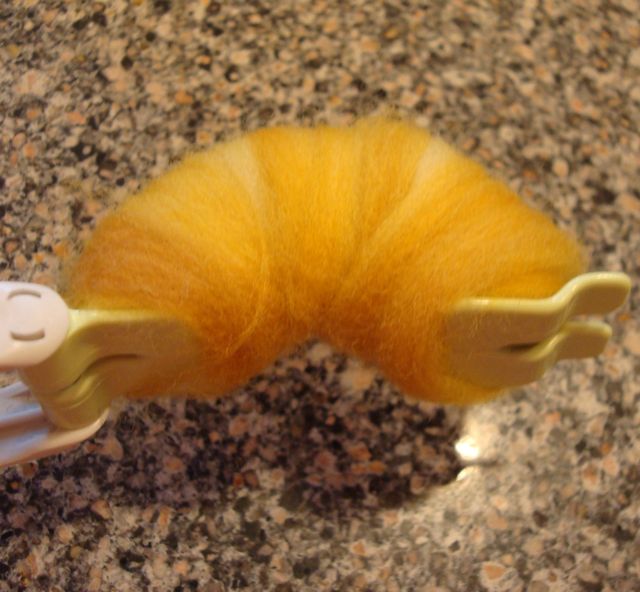
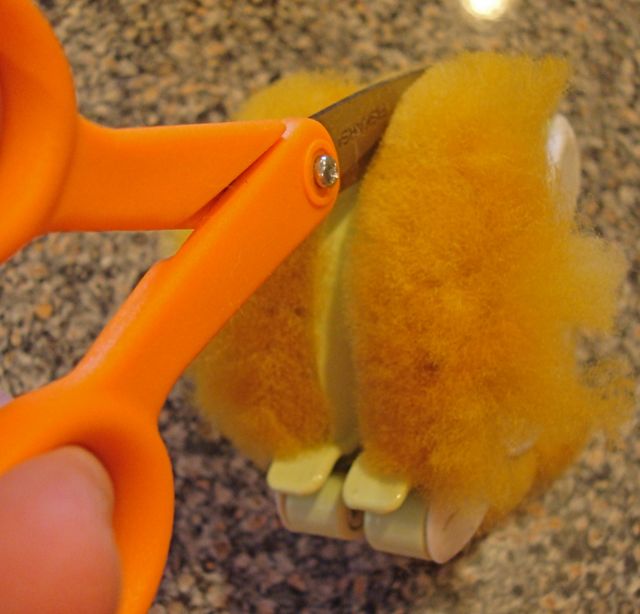
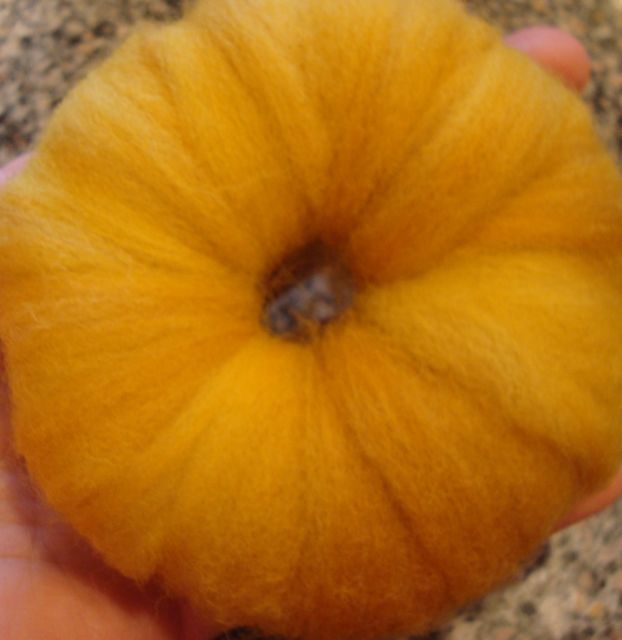
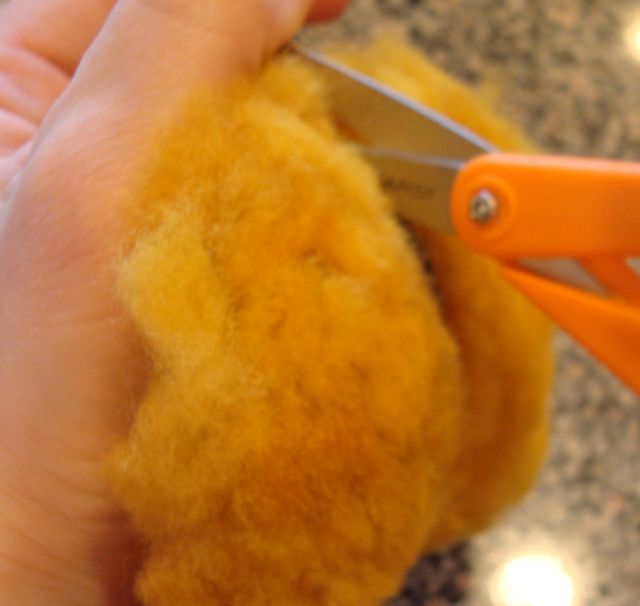
- When the pom pom maker is fairly full, close both side together and cut down the center of the fibers all around the circle
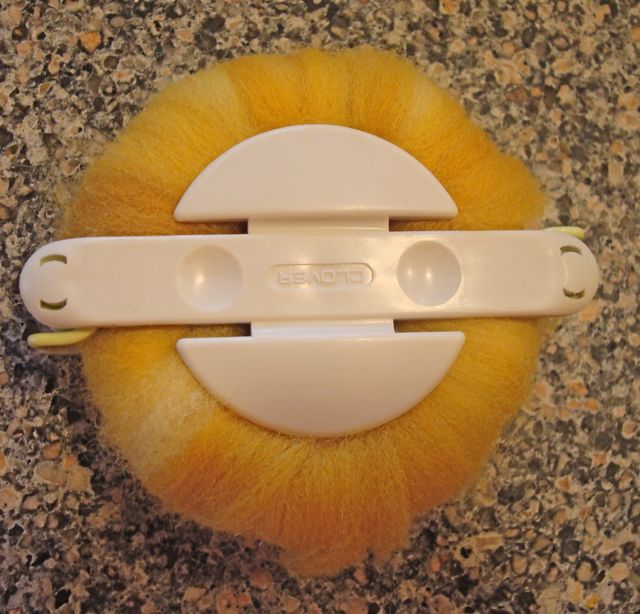
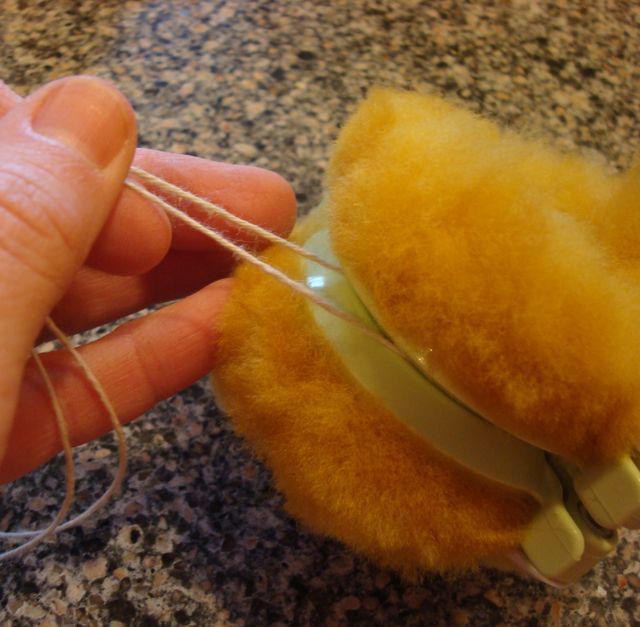
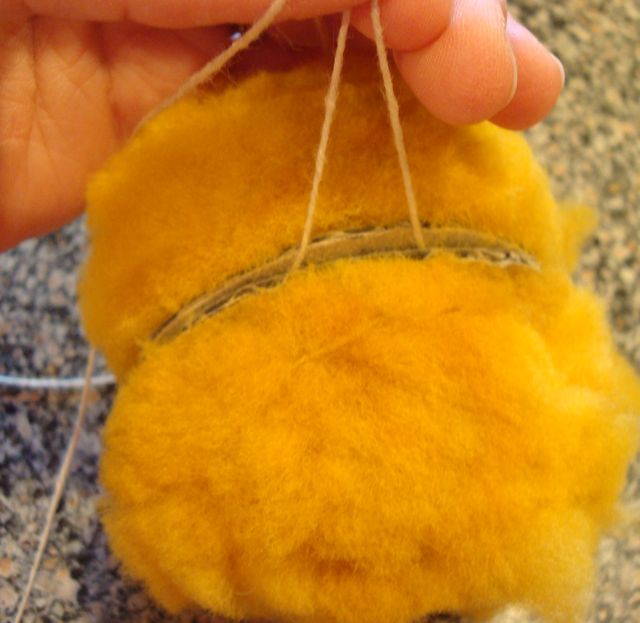
- Cut about a 2 ft length of string and wrap around center of the pom pom, pull tightly (not so tight you snap the string) and tie a double knot, bring threads around to other side and tie another double knot. Snip off extra string close to center of pom pom.
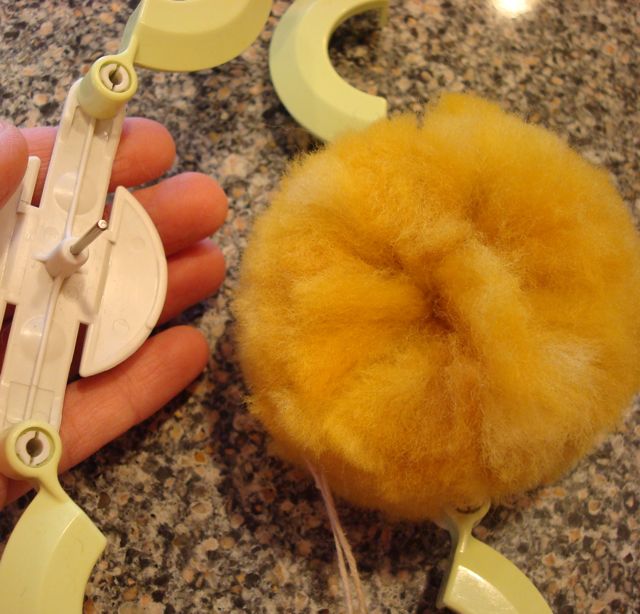
- Open the pom maker to release the pom pom.
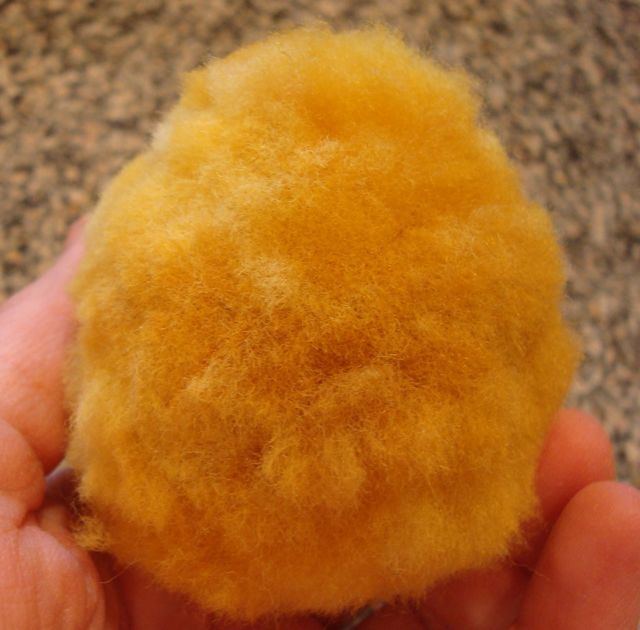
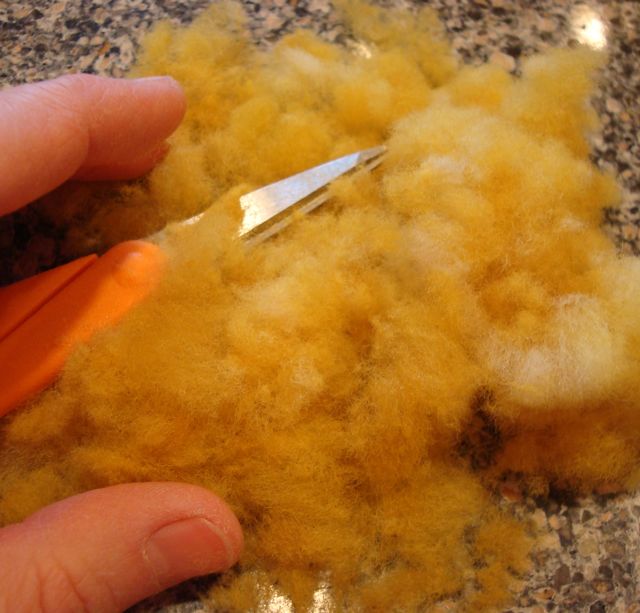
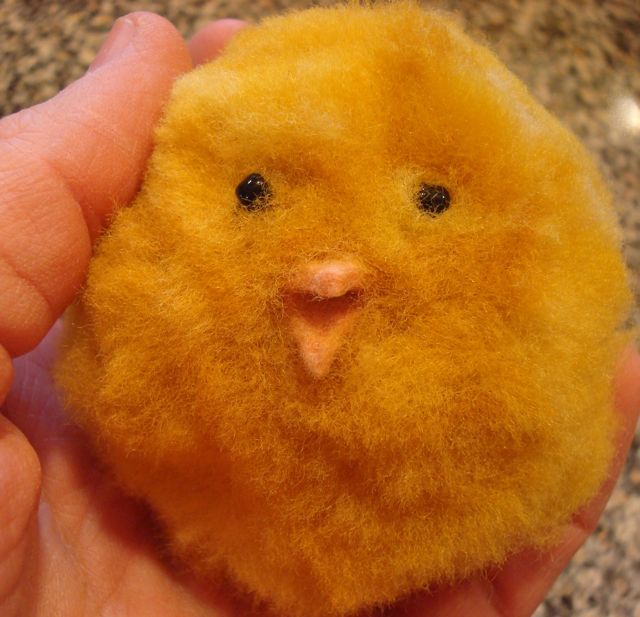
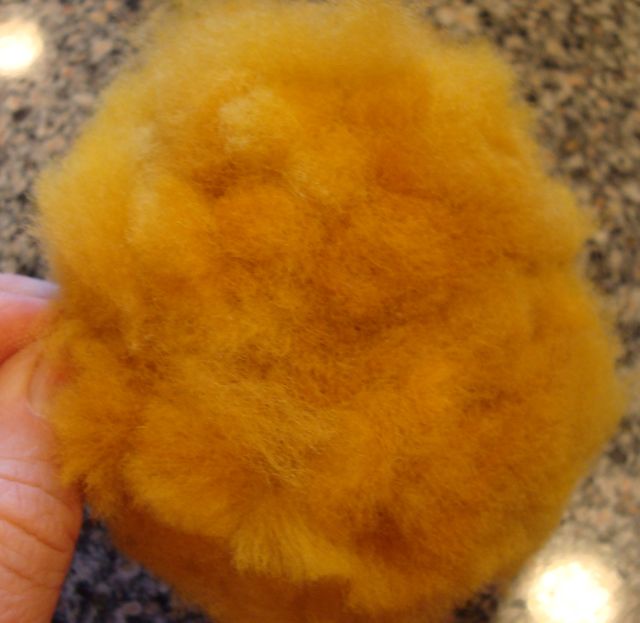
- Now you will begin trimming and shaping the pom pom. Decide which way will be up, and shear some fiber off the bottom so the chick will sit nicely. Shear off about 1/2 of fiber off the top of the chick, tapering the top to be smaller at the head.

- You should end up with a shape something like this:
- And you will end up with a big pile of yellow fluff like this. You can save this to use as stuffing in another project or for a wet felting project....or maybe put it out for the birds to use for nesting this spring!
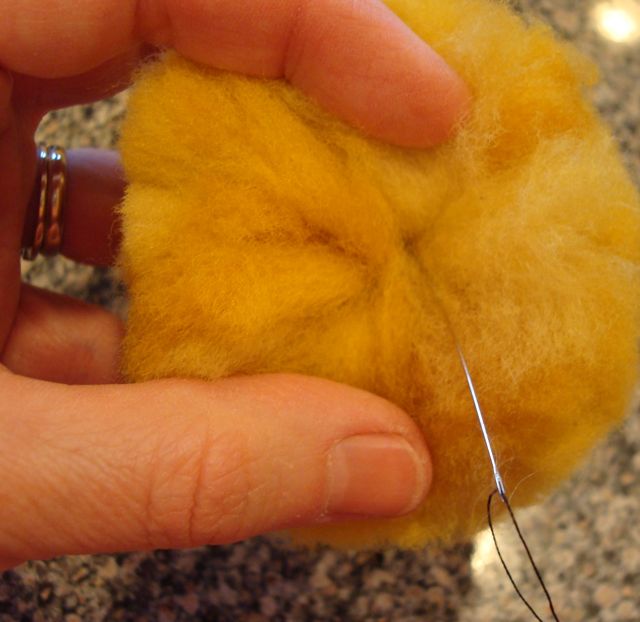
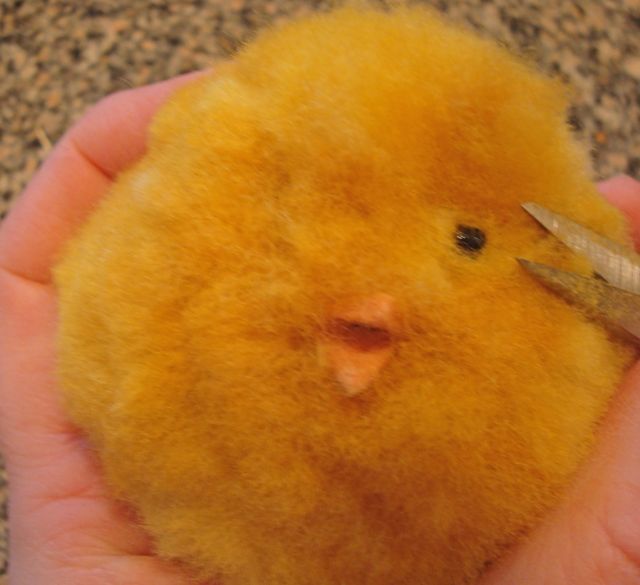
- Thread needle with black thread and knot the end. Insert the needle in the bottom of the chick and go through the center and come out at the first eye position. Sew first bead on. Then go through the bottom of the chick again and come up at the other eye position to sew on the second eye. Insert needle through bottom and center of chick and come out at beak position.
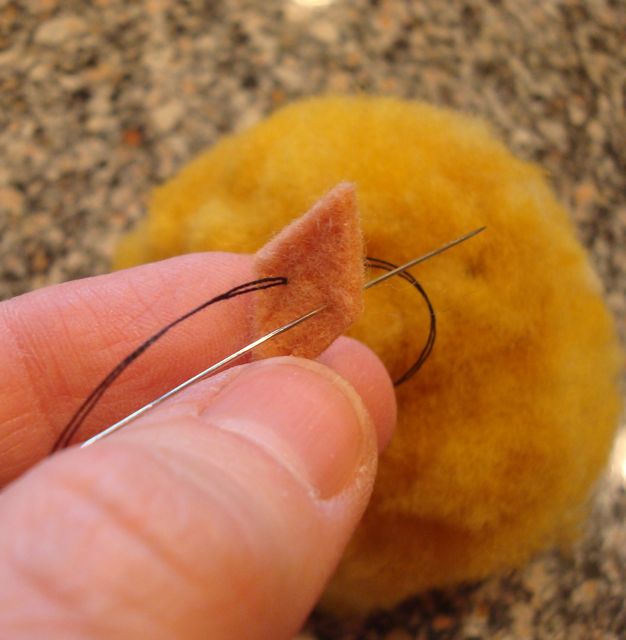
- Cut a diamond shape out of orange felt.

- Make one stitch in center of diamond, fold piece in half to form beak shape and stitch firmly in place below the eyes. You may need to open out the fluff of the pom pom to position it in between the fibers correctly.
- The eyes and beak will be hard to see.
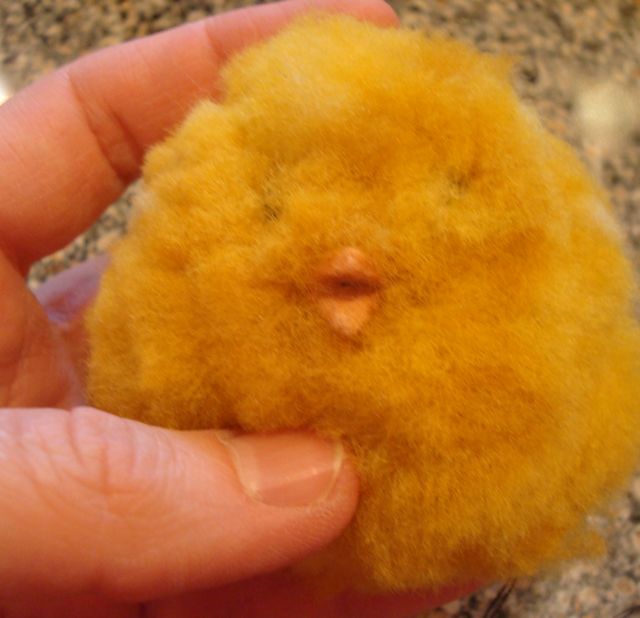
- They seem to have sunk into the fluff, so now you need to clip the fibers around the eyes and beak so they can be seen.
- "Cheep Cheep!"
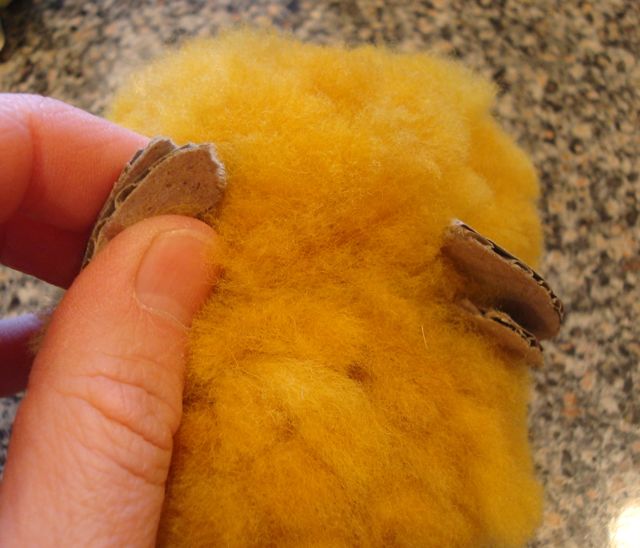
- If you do not have a nifty pom pom maker you can easily make pom poms just using cardboard. Cut two donut shapes out of cardboard. I just traced around my spool of twine for the outside and a spool of thread for the inside circle. No need to cut these out perfectly as they will just get thrown out in a few minutes.
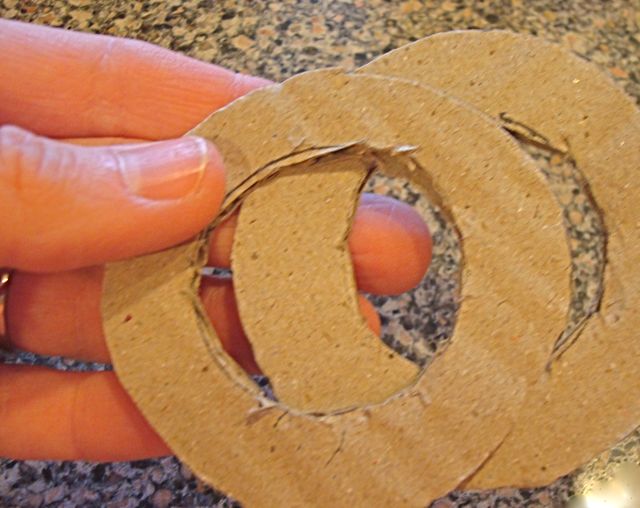
- Hold the two cardboard circles together and wrap roving around the outside edges so you get a nice thick layer all around.
- Clip the fibers in between the two pieces of cardboard all around the circle.
- Tie the fibers together in the center with strong string, using a double knot.
- Cut away the cardboard and fluff up your pom pom.
- Trim and finish the same way you would using the pom pom maker.
Kerstin sells amazing needle-felted creations, custom dyed roving and handspun yarn in her Esty shop.
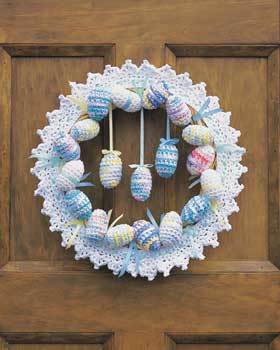
Find this project and many more Easter crafts in the 95-page Easter Craft and Recipe eBook.
Read NextBunny Printable Appliques
Your Recently Viewed Projects

Thanks for your comment. Don't forget to share!
Ask93 7929298
Mar 21, 2016
These chicks are so cute! The tutorial is well explained. I appreciate all the pictures that accompany the instructions. I learned how to make pom poms with roving wool, never thought of it before! But honestly I am going to cheat on this project and just use store bought pom pom's. I don't have enough time to make each pom, nor do I have the wool. Nonetheless, this is a great idea.
Weberme
Apr 04, 2017
Wow what a great idea to use the store bought pompom's. I almost got caught up in the roving(which I have never heard about). Can you make the pompom fluffy like the roving wool looks? These little chicks look so cute and real.This is a very good tutorial and I also like the video or step by step pictures. These will look cute in an Easter basket too.
Report Inappropriate Comment
Are you sure you would like to report this comment? It will be flagged for our moderators to take action.
Thank you for taking the time to improve the content on our site.