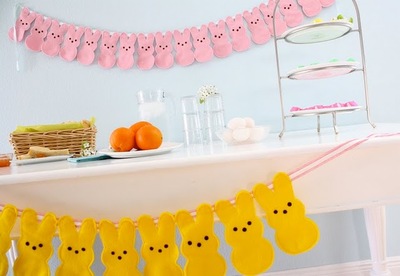
Bunny Peeps Bunting

Decorating for Easter does not mean you have to craft up serious and fancy DIY Easter egg ideas or other décor ideas. Have some fun with Easter craft ideas when you learn how to make these Peeps-inspired pieces of décor. This DIY bunting tutorial is perfect for brunches and Easter egg hunts, because it is both extra cute and out of the way. The Bunny Peeps Bunting are made out of pastel felts and require a basic knowledge of a sewing machine. If you do not have a machine, you could easily hand sew the bunnies or even use a hot glue gun.

Looking for even more Easter craft ideas? Head on over to our full collection of Easter craft ideas for Easter egg designs, DIY bunnies, Peeps-inspired crafts, and even more homemade cuties.
How to Make Bunny Peeps Bunting
Materials:
- Felt- 1/2 yard or less, yellow or pink
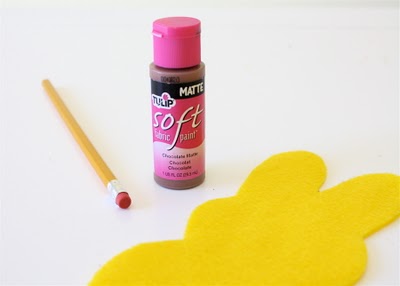
- brown fabric paint
- pencil (or other round object)
- ribbon/fabric for bunting
- sewing machine
Instructions:
- First, cut out your pattern. Click on pattern to open pattern in new window. Then "save as" to you computer. Open it in a Word doc and insert the picture so you can adjust the size for your needs. If you don't have a printer, just put a piece of paper up to your computer screen and trace the image right on top! You can also grab the pdf pattern here.
- Okay, with your bunny pattern printed and cut out (I usually print on paper and then trace/cut an additional pattern out of cardstock or from a file folder. MUCH easier to trace around a stiffer bunny over and over again).
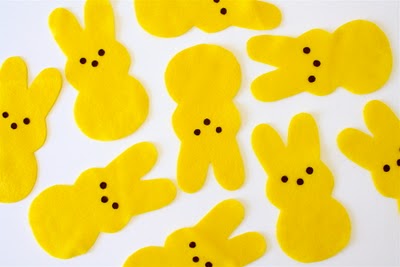
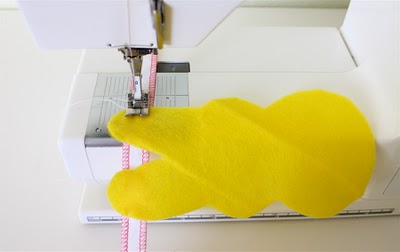
- Fold your felt in half (because each bunny is a double-layer). You can make them single layered if you want the cheap/easy way. But it's less polished looking and a bit see-through. So I recommend double-layers. Then trace and cut out as many bunnies as you'd like. The pink bunting has 18 bunnies. The small yellow bunting has 9:

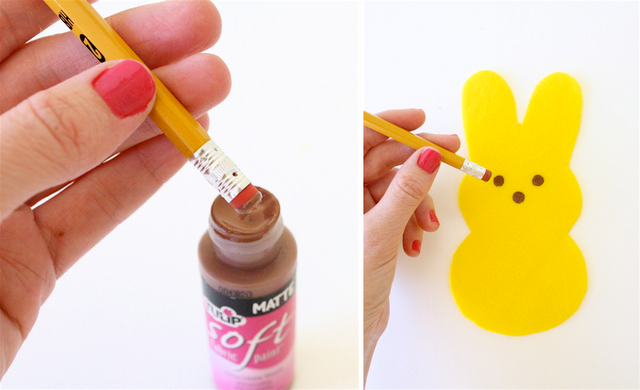
- Time to decorate their faces. You'll only be decorating the front bunnies (the back bunnies are left plain). You'll need a pencil eraser or something round. And brown fabric paint. I prefer Tulip brand, Matte, Chocolate. Its cheap, $1.50 at most craft stores.
- Dip your pencil eraser in the paint, and dab it right onto each bunny. The beauty of Peeps is that they're far from perfect. If you look at a box, each face is slightly different. So don't worry about being precise or even symmetrical!
Make sure you place a piece of paper under your bunny because paint may seep through to the back.
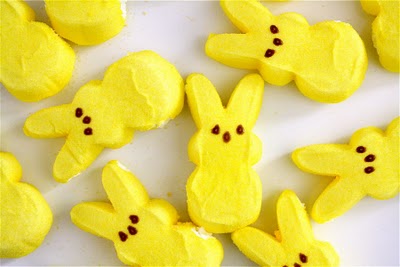
Starting to see a resemblance......
- Let your bunnies dry for a hour or longer. If you're antsy, you can speed up the process by drying them with a blow dryer, but be careful that they don't fly all over the place!
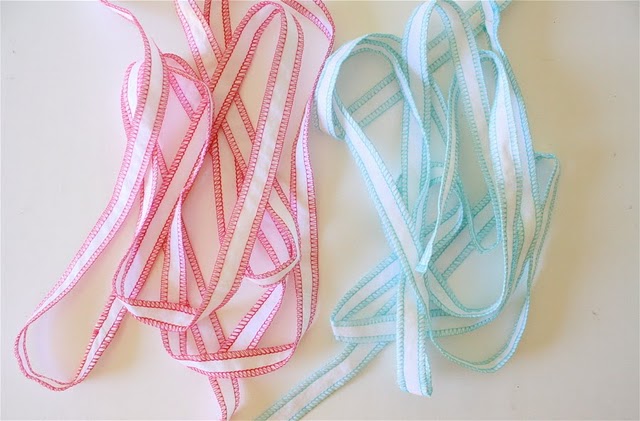
- While you're waiting for the faces to dry, prep your bunting ribbon. You can use fabric, ribbon, rope, colorful twine (THIS stuff is totally cute). My favorite method for making "ribbon" is to cut strips of fabric (I used double-layered white muslin in this case), sew the strips together to make a very long strip, and then I serge the edges. Perfect for wrapping gifts and in this case, for making a bunting. Each finished "ribbon" is about 100 inches long but that was much longer than needed.
- Time to sew on your bunnies.
If you want the quick and easy way, grab a bunny back and a bunny front and sew that double-layered bunny to your ribbon and keep on going till you're bunnied out.
But if you want the slightly longer method that I did (it only took a bit longer)...
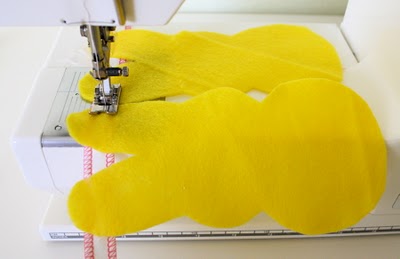
I sewed each bunny back on to the ribbon while the faces were drying. Just lay one down and sew across the ears:
- Then grab the next bunny back and repeat:
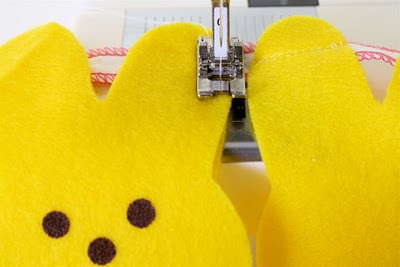
- Sewing the backs on first makes the bunting a bit stronger, the bunnies are likely to be straighter, and it's more polished looking. After sewing the back bunnies on by their ears, you sew the front bunnies on top, sewing an outline around each one.
(Okay, okay...so I was just bored and couldn't wait to get started while those blasted faces were drying! Either method you use, your bunnies will look great.)
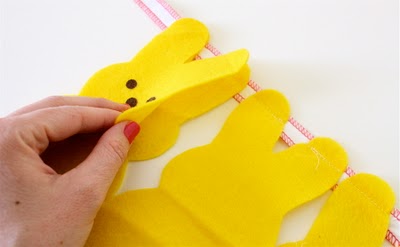
- Here's where I laid the front bunnies on top of the back bunnies and sewed all the way around each one. Repeat this step till all your bunnies are on!
- And, you're done!


Find even more gorgeous Easter craft ideas in our eBook12 Easter Egg Ideas & Easter Crafts for Adults. These DIY crafts are all designed especially for grown-ups, offering you stunning ways to decorate for spring's favorite holiday.
Read NextDollar Store Easter Bunny
Your Recently Viewed Projects
Thanks for your comment. Don't forget to share!
princess6860504
Feb 28, 2018
Wow, these are so dang cute! I don't have a sewing machine, and even if I did I would not be able to remember how to use it- it has been decades. However, they can easily be put together with a hot glue gun. I think I'd even fill them with fiber fill just a tad, to add dimension.ADORBS!
Morehouse17
Sep 30, 2017
This Easter bunny peeps bunting to just too adorable. Considering making this bunny but not as a bunting but as a pillow, something like a little toy to place in the basket. Thanks for the inspiration.
Delphine Bryant
Mar 31, 2017
My favorite Easter candy is the yellow chick peeps but these bunny cutouts are to die for. They look so professional. Sewing the two pieces together really provided a finished look. Thank you for giving all the details in the instructions. Next time, maybe paint the faces in the end?
quanahs 5032097
Mar 08, 2016
How cute is this? I love this idea. Peeps are my favorite Easter candy. I found a similar idea for the little chick peeps banner by searching for "chicken peeps outline" on Google and Bing. That should give you the pattern to create the peep banner. Happy Easter crafting.
butterfly530
Mar 20, 2012
I love these, do you make a little chick peep banner also??? would love to combine the two...Grammy Ruth
ttracen 8719961
Mar 12, 2012
I have been doing something quite similar for years only it is with ginger colored felt and the shape is gingerbread men and women I make the form and then dress the female with hair and a ballerina skirt and top for Xmas or Pilgrim outfit for thanksgiving and the boy in white shirt red tie and black pants for Xmas with a red cumberbun and a pilgrim suit for Thanksgiving I also make a snowman the same way and give it a piece of toothpick dyed orange for a nose felt buttons black beads for mouth sequins and beads for eyes a scarfe made from ribbon and I make a top hat for the head All have a ring of ribbon the comes out of the top of the head To make the top hat is rings about of an inch a inch tube in height then cut slits in…Read More one end about of an inch deep Stick tube in the center of ring and glue bent slits to under side then glue other ring onto the glued slits Now cut a disc a little larger than the tube and cut slits aroung the parimiter to the size of the tube Bend the slit flaps put glue on top of them and slide the flaps down inside the tube Press flaps against inside of tube to secure and now you should have a hat
givemeachance2009 6483473
Apr 05, 2011
Super cute!! Now, why didn't I think of this? Great instructions.
Tamar
Apr 05, 2011
These are the gosh darn cutest things I have ever seen!!! I have to make a few of these to send to my youngest daughter in South Korea who is, at this moment, having a Peep's craving! I can send these and know that they'll arrive in fine shape, whereas sending the real thing will arrive stale and hard as a rock! Thank you for sharing such a cute project.
three4me4now 73745 30
Mar 30, 2011
So sweet! Love it! And one of my favorite treats too! Thanks for sharing.
Report Inappropriate Comment
Are you sure you would like to report this comment? It will be flagged for our moderators to take action.
Thank you for taking the time to improve the content on our site.