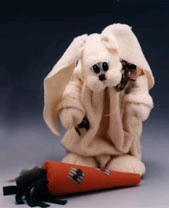
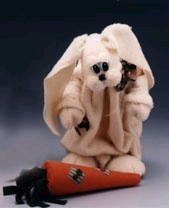
Buster the Bunny
Floppy bunny eyeing a (what else?) larger-than-life carrot. Make this cute bunny for Easter.
Materials:
- STYROFOAM Brand Products:
- 2 Cones,12" x 4"
- 2 Eggs, 5 7/8" x 3 7/8"
- 2 Eggs, 3 1/16" x 2 5/16"
- 1 Ball, 3"
- 1 Ball, 2"
- Felt: 1 yds. antique white shaggy plush; 1- 18" square orange; 1- 9" x 12" sheet Kelly green
- 1 Pair of comical mouse eyes, 28 x 42mm
- 1 Animal nose with shank, 18 mm black
- 8 Buttons, assorted
- Cotton fabric: 1- 3" x 1 yd. torn strip; 5 coordinating scraps for patches
- Permanent marker, black
- 2 yds. of pearl cotton or crochet thread, tan
- Quilting thread, tan (very strong)
- Needle
- Wire: 26-gauge and 18-gauge
- Serrated knife
- Table knife
- Scissors
- Wire cutters
- Low temperature glue gun and glue sticks
- Thick, white craft glue
For pattern, click here. (pdf)
Steps:
- Using serrated knife, cut the foam pieces as follows (hint: for smoother cuts, wax the knife blade first with an old candle):
a. Cut one large egg in half lengthwise. Cut off 2" from pointed end. See Diagram 1. (Feet)
b. Cut in half the 3" and 2" balls. (Tail and cheeks)
c. Cut a notch out of the pointed end of each 3 1/16" egg. See Diagram 2. (Hands)
- Feet: Place foot, round side down, in center of 8" square of shaggy plush felt (SP). Pull SP as flat as possible around the front, rounded edge (toes); glue to bottom of foot. Stretch and gather the remaining SP toward the back of the foot; glue to bottom of foot. Trim excess SP, making sure the bottom of foot is as flat as possible. Using a table knife, press toe lines into the front of foot. Repeat for other foot.
- Hands: Bend over 1" on ends of 18" length of 16-gauge wire. Insert and glue wire loop into the wide end of a hand. Place the hand in the center of a 9" square of SP. Using white craft glue, securely glue the center of SP into the notch of the hand. Let dry. Carefully pull and stretch the SP around the egg towards the wire twist. Wire tightly with another length of wire; cut off excess wire. Repeat for other hand.
- Arms: With right sides together, glue the long edge of a 10" x 36" piece of SP. Let dry. Turn right side out and thread onto hands. Fold under 2" on each end; wire tightly at the wrist. Glue a 1" x 8" SP strip around wrist over wire; cut off excess SP. Bend a 9" length of 16-gauge wire around center of the arm piece. Glue and insert ends into the top of the cone from the sides; secure with another piece of wire if needed. (Be careful not to break the top of the cone.)
- Tail: Cover the 3" half ball with a 5" square of SP as in Step 2 for the feet.
- Center and glue a 9"square of SP to the bottom and sides of one large cone.
- Head: Bend a 1" loop into end of 12" length of 16-gauge wire. Following Diagram 3, glue and insert wire loop into large egg (head). Glue the 1 1/2" half balls on head for cheeks. Cut a 15" x 22" piece of SP. Spread craft glue on and around cheeks. Center SP over cheeks, positioning felt lengthwise; press and shape felt onto cheeks. When securely attached to cheeks, stretch SP around head, pullng tightly to the neck. Secure with wire tie; cut off excess fabric. Cut neck wire to 6"; glue and insert wire into top of cone in front of the arm piece (Do not break off the top of the cone.)
- Body: With right sides together, glue together the short sides of a 20" x 36" piece of SP. Let dry; turn right side out. Lay SP tube on work surface with the glued seam in the center. Following Diagram 4, cut a 6" slit in each side at one end of the tube (arm holes). Using a doubled or tripled thread, tightly gather the uncut end of the tube; knot and secure. Insert wide end of cone into fabric tube; glue. Gather the top edge of tube, placing arms through the arm slits; gather tightly around the neck. Knot and secure the thread.
- Insert and glue a 3" length of 16-gauge wire into the center of the tail. Glue tail to bunny. Glue feet to front of the bunny using 5" lengths of wire.
- Cut two 4" x 15" strips of SP; round edges on one end for ears. Gather opposite end together and wire rightly with a 2" length of 16-gauge wire. Poke a small hole in head, slightly off center; glue and insert wired end of ear. Repeat for other ear.
- Tie together in the center five 12" lengths of cotton thread. Using fingers, spread craft glue on threads, wiping off excess. When dry, glue knot to face where the tops of cheeks meet. In the same location, poke a small hole and glue nose shank into hole. Poke two small holes in head for eyes; glue shanks into head. Cut eyelids using Pattern A; glue onto eyes.
- Tie fabric strip around neck, making a bow; trim ends. Glue three patches onto bunny; embellish patches with buttons.
- Carrot: Cut orange felt into a triangle, following Diagram 5. Place cone on felt, with points going in the same direction. Fold the felt point up onto the cone and glue. Fold the sides of the felt in and roll cone in felt. Using serrated knife, carve a 1" deep hole into center top of carrot; pull felt tightly and glue into hole. Cut green felt into six 12" long x 1" wide strips; fold in half and wire together. Glue wired center into hole in top of carrot. Glue two, 2" square patches onto carrot; embellish with buttons. Draw stitch lines on patches.
®™ Trademark of The Dow Chemical Company ("Dow") or an affiliated company of Dow. For more project ideas, please see styrofoamstyle.com.
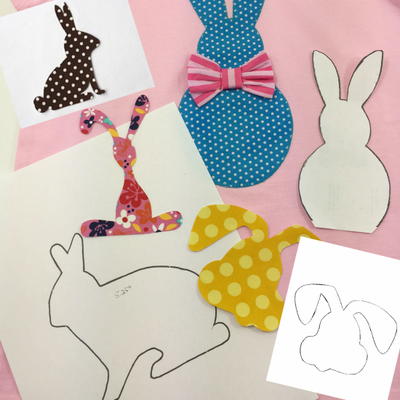
Read NextBunny Printable Appliques
Your Recently Viewed Projects
Thanks for your comment. Don't forget to share!
Report Inappropriate Comment
Are you sure you would like to report this comment? It will be flagged for our moderators to take action.
Thank you for taking the time to improve the content on our site.