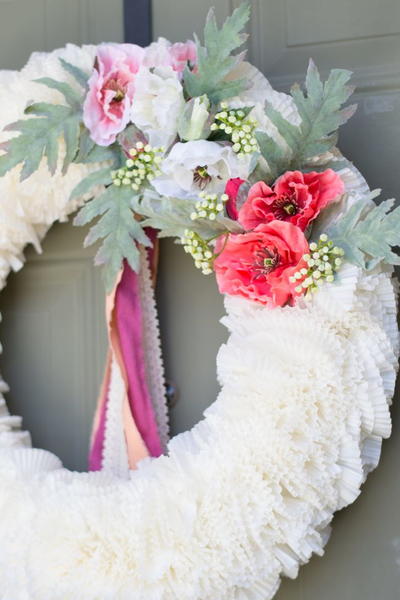
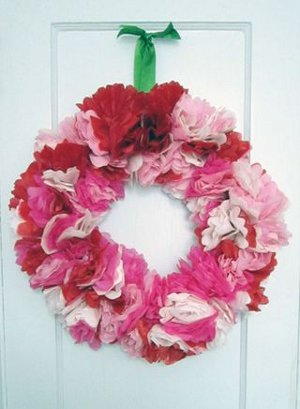
Peony Wreath
This tissue Peony Wreath from Lindsay Obermeyer is perfect for displaying indoors and out. Making paper wreaths is easy and fun, and you can show this wreath off any time of year! You can even get your kids involved in making these beautiful peony wreaths!

Materials:
- 1 pack each of 10 sheets of 20x20 inch tissue paper in red, hot pink, pale pink, white
- 1 spool of 26 guage green wire or 36 green pipe cleaners (chenilles)
- 1 18" wire wreath frame
- 1 1/2 yard of 2" wide green satin ribbon
- 1 wire cutters
- 1 scissors
Instructions:
- Cut 36 12" pieces of wire or set aside 36 pipe cleaners.
- Open a tissue paper pack, flatten it out and cut a straight line down the center vertically. You will now have 20 sheets of paper, each 10" x 20".
- Take the first pile of 10" x 20" paper strips and cut horizotally across the stack every 4". This will make 100 strips of tissue paper each 4" x 10". I didn't use a ruler, so some were slightly smaller while others were slightly larger.
- Repeat the previous step until all the paper is cut.
- Stack 6-10 strips ontop of each other. They can be all one color or two-toned.
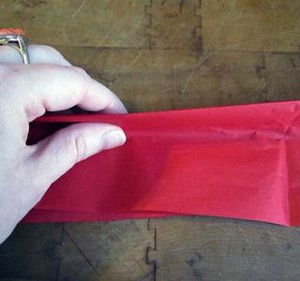
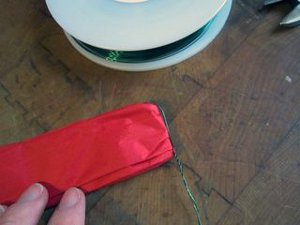
- Proceed to fold them into accordian pleats.
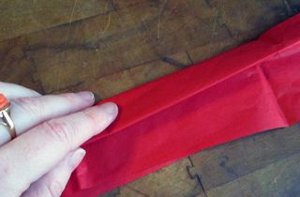
- Once completed, fold in half like a fan.
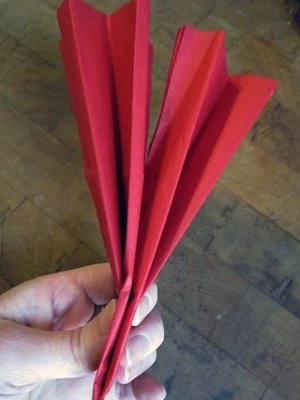
- Slip a wire through the center of the fold and twist together
- Cut a semi-circle around the edge of the open end.
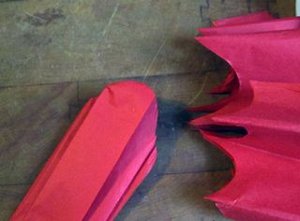
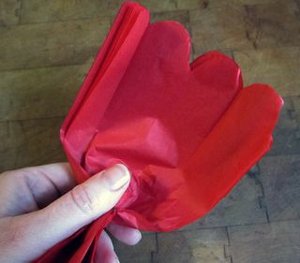
- Open up one side and smooth it flat as much as possible without tearing the tissue paper.
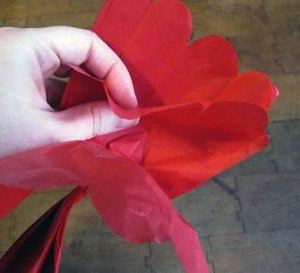
- Pull one sheet at a time gently toward the center.
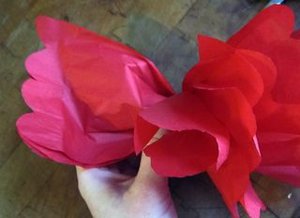
- When you finish one side, repeat the previous step on the other side.
- Wrap the wire stem around the frame.
- Continue making flowers and wrapping their stems around the frame until is full.

- If you still have tissue paper remaining after making 36 flowers, feel free to make more. I kept going until my wreath was very "fluffy" and full. You may like a slightly looser look or want to purchase even more paper to make more flowers.
- Once the wreath is full of flowers, slip the ribbon onto the back of the top of your wreath. Pull it through until folded in half.
- Cut a V into the ends of the ribbon and tie them together.
- Hang it up and enjoy!
Click here to view on Lindsay's blog.
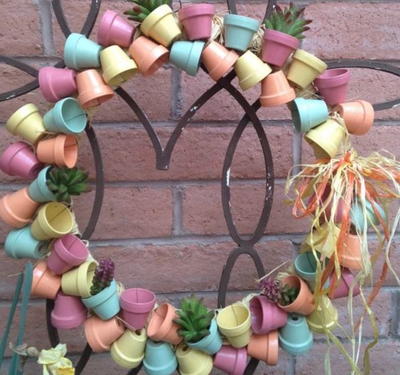
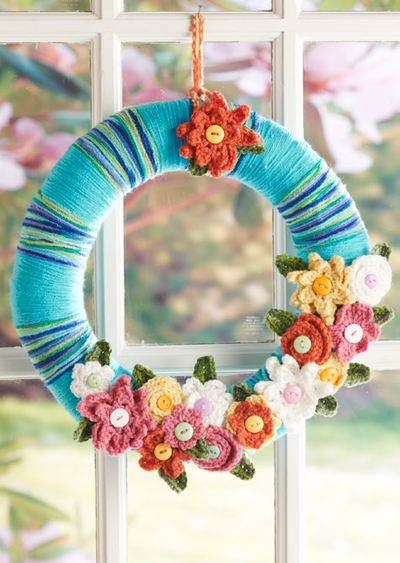
Read NextWatercolor DIY Yarn Wreath
Your Recently Viewed Projects

Thanks for your comment. Don't forget to share!
meshee238
Jun 06, 2012
I love this wreath idea, you can make it any color to fit the occasion.
Knittingdancer on Ravelry
Jun 02, 2012
I like the Peony Wreath better. I have a row of peonies beside my driveway. I love to walk to the mailbox when they are blooming in the spring.
grand30 5881817
Jun 02, 2012
This Peony wreath is far prettier than the other wreath even if it looks a look harder and longer to do it looks worth it.
Teariana Designs
Apr 15, 2012
This is really pretty but I think I will combine the techniques of the Butterfly Wreath with this one. That way I won't have to go out and buy a scalloped hole punch. http://www.jaseyscrazydaisy.com/2010/03/butterfly-wreath.html
Report Inappropriate Comment
Are you sure you would like to report this comment? It will be flagged for our moderators to take action.
Thank you for taking the time to improve the content on our site.