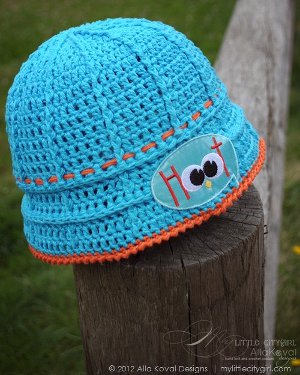
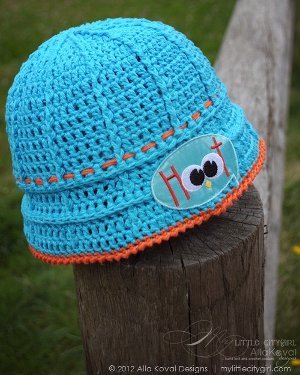
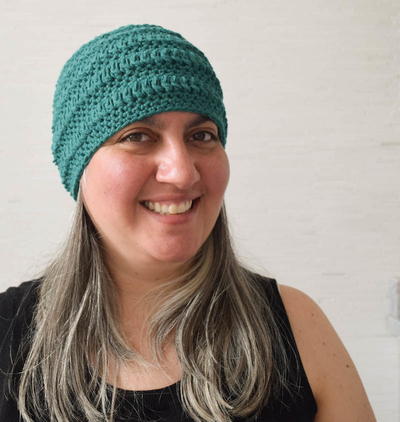
Cute Hoot Hat
This Cute Hoot Hat from Alla Koval is great for kids and adults alike. It uses 3 simple crochet stitches so it's a great hat for someone who's still new to crochet. I love the little "Hoot" badge on the front, but you can easily omit that if you'd like.
Materials:
- Omega Perle (100% cotton; 178 yd [163 m]/1.76 oz [50 g]): 2 (2, 2, 2, 3) balls of #515 turquoise (MC), 1 ball of #517 orange (CC1)
- D/3 (3.25 mm) crochet hook, or size to obtain gauge
- 2.5” (6.5 cm) applique (shown: Boutique applique by Babyville item #35068)
- Sewing needle and thread
- Tapestry needle for weaving in ends
- Diagram 1
- Diagram 2
SIZES
- X-Small/Baby, (Small/Toddler, Medium/Child, Large/Woman, X-Large/Man).
- FINISHED MEASUREMENTS: 14 (16, 18, 20, 22)” (35.5 [40.5, 45.5, 50.5, 56] cm) head circumferences. Hat shown is a size Child (18” [45.5 cm] circumference).
GAUGE
- 17 sts x 12 rows = 4” (10 cm).
- Take time to check gauge.
The hat is worked in rounds, do not turn at the end of round.
NOTE
- Magic (adjustable) ring: Make a large loop with yarn. Holding the loop with your fingers, insert hook into loop and pull working yarn through loop on hook. Continue to work indicated number of stitches into loop. Pull on yarn tail to close loop.
- FPdc (front post double crochet): Yarn over, insert hook from front to back to front around post of stitch indicated and pull up a loop, (yarn over and pull through 2 loops on hook) two times.
- BPdc (back post double crochet): Yarn over, insert hook from back to front to back around post of stitch indicated and pull up a loop, (yarn over and pull through 2 loops on hook) two times.
- BPsc (back post single crochet): Insert hook from back to front to back around post of stitch indicated and pull up a loop, yarn over and draw through two loops on hook.
- Reverse sc: Keeping hook pointing to the left, insert hook into next stitch to the right and pull up a loop, yarn over and pull through 2 loops.
Instructions:
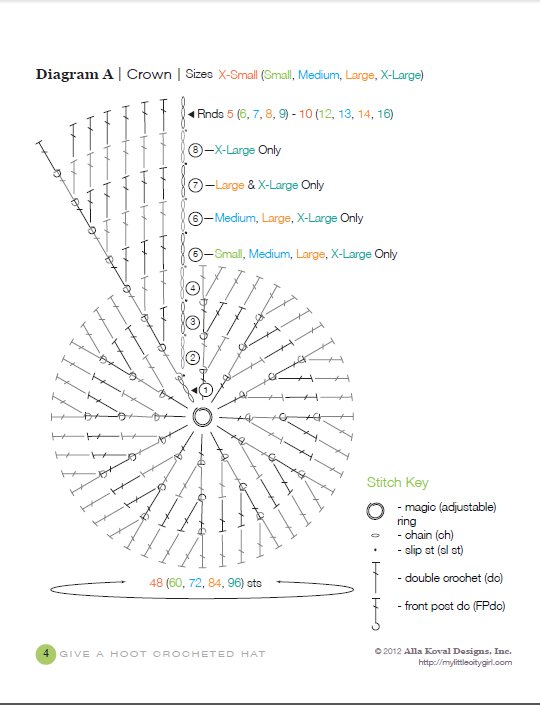
CROWN
-
Rnd 1(RS): With 2 strands of MC held together, magic ring, ch 3 (counts as first dc here and throughout), work 11 more dc in ring, join with sl st in top of beg ch-3—12 dc.
-
Rnd 2: Ch 3, FPdc around first dc, [dc in next dc, FPdc around same dc] around, join with sl st in top of beg ch-3—24 sts.
-
Rnd 3: Ch 3, dc in next FPdc, FPdc around same FPdc, [dc in next dc and next FPdc, FPdc around same FPdc] around, join with sl st in top of beg ch-3—36 sts.
- Rnd 4: Ch 3, dc in next dc and next FPdc, FPdc around same FPdc, [dc in next 2 dc and next FPdc, FPdc around same FPdc] around, join with sl st in top of beg ch-3—48 sts.
Small (Medium, Large, X-Large) Only
- Rnd 5: Ch 3, dc in next 2 dc and next FPdc, FPdc around same FPdc, [dc in next 3 dc and next FPdc, FPdc around same FPdc] around, join with sl st in top of beg ch-3—60 sts.
Medium (Large, X-Large) Only
- Rnd 6: Ch 3, dc in next 3 dc and next FPdc, FPdc around same FPdc, [dc in next 4 dc and next FPdc, FPdc around same FPdc] around, join with sl st in top of beg ch-3—72 sts.
Large & X-Large Only
- Rnd 7: Ch 3, dc in next 4 dc and next FPdc, FPdc around same FPdc, [dc in next 5 dc and next FPdc, FPdc around same FPdc] around, join with sl st in top of beg ch-3—84 sts.
X-Large Only
- Rnd 8: Ch 3, dc in next 5 dc and next FPdc, FPdc around same FPdc, [dc in next 6 dc and next FPdc, FPdc around same FPdc] around, join with sl st in top of beg ch-3—96 sts.
All Sizes
- Rnds 5 (6, 7, 8, 9) - 10 (12, 13, 14, 16): Ch 3, dc in next 3 (4, 5, 6, 7) dc, FPdc around next FPdc, [dc in next 3 (4, 5, 6, 7) dc, FPdc around next FPdc] around, join with sl st in top of beg ch-3. At end of last rnd, DO NOT fasten off.
BRIM
-
Rnd 1(RS): BPsc around first dc, ch 2, BPdc around each st around, join with st st to top of beg ch-2.
-
Rnd 2: Ch 3, [dc in next 2 (3, 4, 5, 6) BPdc, dc in next BPdc, FBdc around same BPdc] around, join with sl st to top of beg ch-3—60 (72, 84, 96, 108) sts.
- Rnd 3: Ch 3, [dc in next 4 (5, 6, 7, 8) dc, FBdc around next FBdc] around, join with sl st to top of beg ch-3. For size X-Small, fasten off.
Small (Medium, Large, X-Large) Only
-
Rnd 4: Rep Rnd 1.
-
Rnd 5: Ch 3, [dc in next 3 (4, 5, 6, 7) BPdc, dc in next BPdc, FBdc around same BPdc] around, join with sl st to top of beg ch-3—84 (96, 108, 120) sts.
- Rnd 6: Ch 3, [dc in next 5 (6, 7, 8, 9) dc, FBdc around next FBdc] around, join with sl st to top of beg ch-3. For sizes Small and Medium, fasten off.
Large & X-Large Only
-
Rnd 7: Rep Rnd 1.
-
Rnd 8: Ch 3, [dc in next 7 (8) BPdc, dc in next BPdc, FBdc around same BPdc] around, join with sl st to top of beg ch-3—120 (132) sts.
- Rnd 9: Ch 3, [dc in next 9 (10) dc, FBdc around next FBdc] around, join with sl st to top of beg ch- 3. Fasten off.
FINISHING
-
Rnd 1: With RS facing, join with sl st 2 strands of CC1 held together to beg st of last rnd of Brim, ch 1, sc in each st around, join with sl st to first sc.
-
Rnd 2: Working from left to right, ch 1, reverse sc in each st around, join with sl st to first sc. Fasten off.
-
Wet or steam block to finished measurements.
-
Weave in loose ends with a tapestry needle. With 2 strands of CC1, thread tapestry needle, and weave yarn through every other dc of last rnd of Crown.
- With sewing needle and thread, sew applique to center of Brim.
ABBREVIATIONS
beg - beginning
BPdc - back post double crochet
FPdc - front post double crochet
BPsc - back post single crochet
CC1 - contrasting color
ch - chain
dc – double crochet
MC - main color
rep - repeat
rnd - round
RS - right side
sc - single crochet
sl st - slip stitch
st (s) - stitch (es)
WS - wrong side
Your Recently Viewed Projects


Thanks for your comment. Don't forget to share!
elocin1104 2800379
Jun 03, 2018
This is such a cute hat pattern. I love when patterns include sizes from baby to adult. This makes it really easy to make matching hats for yourself and your kids, or a new mom and her baby. I would probably omit the appliqu shown in the picture, but include something important to the recipient of the hat.
Love Crafts
Sep 23, 2013
Sorry about the TYPO, I meant when my girl & her friends were little a long time ago!
Love Crafts
Sep 23, 2013
I use to make this hat for my girl when and her friends long ago, but somewhere a long the line I lost it, so Thanks for the pattern!
Report Inappropriate Comment
Are you sure you would like to report this comment? It will be flagged for our moderators to take action.
Thank you for taking the time to improve the content on our site.


