Charming Crochet Hat
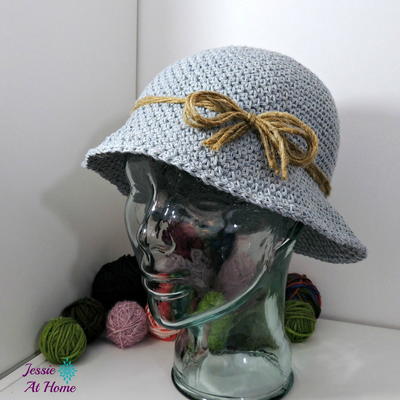
There's nothing better than wearing an adorable accessory that you actually made. This Charming Crochet Hat is a great way to learn how to crochet a hat that you will be able to wear with any outfit. It's also a great skill to have when you're thinking of a gift to give to a family member or friend. This free crochet hat pattern is charmingly simple and will have you smiling from ear to ear, while you work and while you wear it. Find a few of your favorite colors and start crocheting.

Materials:
- Red Heart Soft, or any worsted weight #4 yarn, 150-175 yards.
- Hook Size – J/6.0
- Tapestry needle for weaving in the ends.
Gauge:
- Band – 1 sc row (width) and 2 rows of sc (length) = 1”
- 4 dc/4fpdc and 6 rows = 2”
Abbreviations:
- ch – chain
- dc – double crochet
- fpdc – front post double crochet
- sc – single crochet
- sl st – slip stitch
Instructions:
Band
- Leave a long tail (4”) before making your beginning ch. This will be used to join the band of the hat.
- Ch 6
- Row 1: Sc in 2nd ch from hook and in each st across, ch 1 turn. (5 st)
- Row 2: sc in first sc and each sc across, ch 1 turn (5 st)
- Row 3 – 72: Repeat row 2
- At the end of row 72 do not cut the yarn. Take you tapestry needle and join the ends of your rows using the whipstitch method. Insert your hook once again and begin with round 1.
Body of Hat
- Round 1: sc evenly around, join with sl st to first sc (72st)
- Round 2: Ch 3, dc in next sc and around, join with sl st to top of 3rd ch. (72st)
- Round 3: Ch 1 and sc in same sp, sc in next dc and around, join with sl st to first sc (72st)
- Round 4: Ch 3 skip next sc and fpdc in round below skipped sc , *dc in next sc, skip next sc and fpdc in round below skipped sc* repeat from *to*, sl st to top of 3rd ch. (72st)
- Round 5: Ch 1 and sc in same sp, *sc in next fpdc, sc in next dc*, repeat from *to*, join with sl st to first sc, (72st)
- Round 6: Sl st in next sc, ch 3, skip next sc and fpdc in round below skipped sc , *dc in next sc, skip next sc and fpdc in round below skipped sc*, sl st to top of 3rd ch.
- Round 7: Ch 1 and sc in same sp, *sc in next fpdc, sc in next dc*, repeat from *to*, join with sl st to first sc.
- Round 8 – 22: Repeat Rounds 6 & 7 or until you have reached your desired length.
- Do not fasten off. Measure out enough yarn to weave through every other sc. I’m an overachiever and probably cut around 20” of material.
- Take your tapestry needle and weave under the loops of every other sc around, pull the yarn tightly. This will close up the hat. Sew the top of the hat with a few stitches for security. Fasten off.
- Optional Round: Holding the hat upside down, insert hook into bottom row and form a sl st, ch 1 and sc in same st, sc in each st around, join with sl st to first sc. (72st)

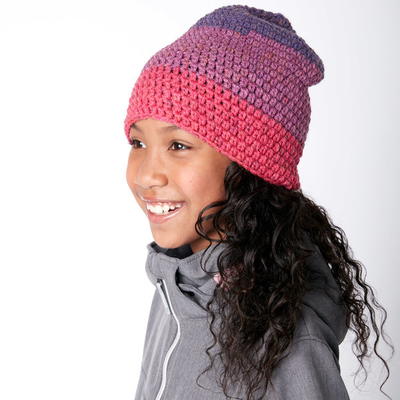
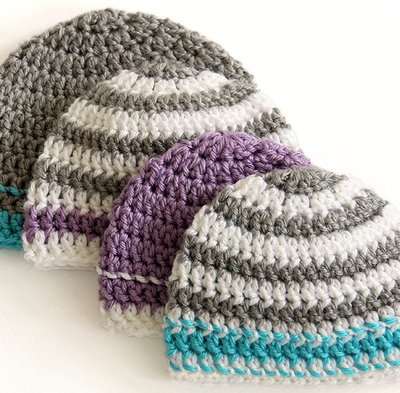
- On this hat, you can see white is the “background” color. To get this look, on each round (not rows which is the band) that instructs you to sc, use white. So what that means is all your odd # rows are white.

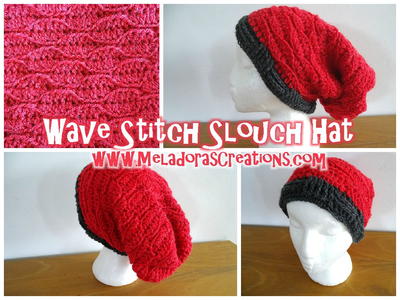
- For this hat, the band is also multi-colored. Change your color for each row, carrying your yarn along with you. I have shown you how to do this in my Houndstooth Scarf pattern with some photos, so this will help you if you don’t understand how to carry the yarn. Once you finish the band, you will follow the same instructions as above on the raspberry/white hat.