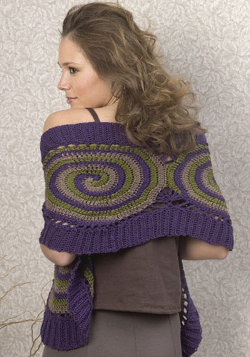
Belize Wrap
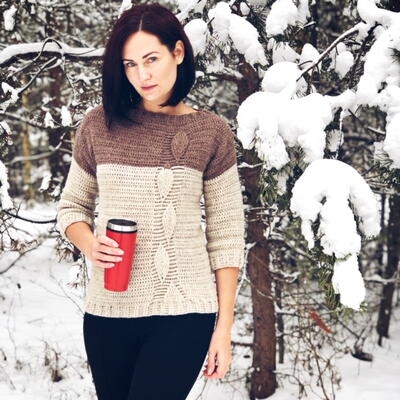
Easy-to-crochet Belize Wrap can liven up any outfit. It's also a great free easy pattern for all seasons, looking just as appropriate over a summer tank as it does over a heavy winter dress.
Materials:
- Naturally Caron.com Country (75% microdenier acrylic/25% merino wool; 3 oz/85 g, 185 yds/170m skein): 6 oz (A), 3 oz (B), 3 oz (C). Shown in: #0014 Deep Purple (A), #0020 Loden Forest (B), #0015 Deep Taupe (C).
- One size US I-9 (5.5 mm), or size to obtain gauge.
- Three safety pins or split-ring stitch markers (for temporarily holding colors not in use)
- Stitch marker (for marking beginning of round)
- Yarn needle
FINISHED MEASUREMENTS:
Shawl measures approximately 52"/132 cm long x 14"/35.5 cm wide
GAUGE
In single crochet, using I-9 (5.5 mm) hook, 13 sts and 20 rows = 4"/10 cm.
Gauge is not critical for this project.
STITCHES USED
Chain (ch), double crochet (dc), double treble crochet (dtr), half double crochet (hdc), single crochet (sc), slip stitch (slip st), treble crochet (tr),
SPECIAL TERM
dtr8tog: Double treble crochet 8 together –*Yarn over 3 times, insert hook in next st and pull up a loop, [yarn over and draw through 2 loops] 3 times; repeat from * 7 more times, yarn over and draw through 9 loops on hook.
NOTE
Instructions for Swirl Motif use color sequence: A, B, C. Vary the look of the piece by varying the color sequence in some of the motifs.
Instructions:
SWIRL MOTIF (make 4)
With A, chain 2.
Round 1: (Sc, hdc, 2 dc) in second ch from hook; drop A and place loop on safety pin (or split-ring marker); join B with sc in same ch, (hdc, 2 dc) in same ch, drop B and place loop on safety pin (or split-ring marker); join C with sc in same ch, (hdc, 2 dc) in same ch, drop C and place loop on safety pin; gently tighten chain into which stitches have been worked so that tight circle is formed—12 sts (4 sts each with A, B, and C).
Note: Place a stitch marker to denote beginning of round. Rounds will begin and end with different colors from now on. The color used at the end of a previous round will be the color used at the beginning of the next round.
Round 2: With C, 2 dc in next 4 sts; drop C and pick up A; with A, 2 dc in next 4 sts; drop A and pick up B; with B, 2 dc in next 4 sts—24 sts (8 sts each with A, B, and C).
Round 3: With B, [2 dc in next st, dc in next st] 4 times; drop B and pick up C; with C, [2 dc in next st, dc in next st] 4 times; drop C and pick up A; with A, [2 dc in next st, dc in next st] 4 times—36 sts (12 sts each with A, B, and C).
Round 4: With A, *[2 dc in next st, dc in next 2 sts] 4 times; repeat from * with B, then repeat from * with C—48 sts (16 sts each with A, B, and C).
Round 5: With C, *[2 dc in next st, dc in next 3 sts] 4 times; repeat from * with A, then repeat from * with B—60 sts (20 sts each with A, B, and C).
Round 6: With B, *[2 dc in next st, dc in next 4 sts] 4 times; repeat from * with C, then repeat from * with A—72 sts (24 sts each with A, B, and C).
Round 7: With A, *[2 dc in next st, dc in next 5 sts] 4 times; repeat from * with B, then repeat from * with C—84 sts (28 sts each with A, B, and C).
Round 8: With C, *[2 dc in next st, dc in next 6 sts] 4 times; repeat from * with A, then repeat from * with B—96 sts (32 sts each with A, B, and C).
Round 9: With B, *[2 dc in next st, dc in next 7 sts] 4 times; repeat from * with C, then repeat from * with A—108 sts (36 sts each with A, B, and C).
Last Round: With A, hdc in next st, sc in next st, slip st in next st; fasten off A; pick up B, hdc in next st, sc in next st, slip st in next st; fasten off B; pick up C, hdc in next st, sc in next st, slip st in next st; fasten off C.
FINISHING
Arrange motifs in a long strip. Sew edges of motifs together, sewing only 4 sts together along each edge (approx 1 1/2"/4 cm seams).
Edging
With RS facing, join A with slip st in the 14th st before a seam.
Round 1: Ch 5 (counts as dc, ch 2), skip next st,* tr in next st, ch 2, skip next st, dtr in next st, ch 2, skip next st; skipping every other st, work dtr8tog over the next 16 sts (8 sts of current motif and 8 sts of next motif); ch 1 (to tighten dtr8tog); ch 2, skip next st, dtr in next st, ch 2, skip next st, tr in next st, ch 2, skip next st, [dc in next st, ch 2, skip next st] to 14th st before next seam; repeat from * around; join with slip st in 3rd ch of beginning ch. Fasten off.
Ribbing
Note: Ribbing is worked in rows perpendicular to edging. Work in back loops only throughout.
Row 1: Ch 11, hdc in third ch from hook and in each ch across, slip st in next ch-2 space of Edging, slip st in next dc of Edging, turn—9 hdc and 2 slip sts.
Row 2: Skip 2 slip sts; working in back loops only, hdc in each st across, turn—9 hdc.
Row 3: Ch 2, hdc in each st across, slip st in next ch-2 space of Edging, slip st in next st of edging, turn.
Note: Take care to work slip sts of Row 3 as follows: one into next ch-2 space, and one into next stitch (which may be a dc, tr, dtr, or dtr8tog).
Repeat Rows 2 and 3, working ribbing evenly spaced around entire perimeter of shawl. Fasten off, leaving a long tail for sewing first row of ribbing to last row.
Using yarn needle, weave in all ends. Wash piece and block to size.
Read NextGranny Squares Crochet Jacket
Your Recently Viewed Projects

Thanks for your comment. Don't forget to share!
lwiley205 5830499
Aug 06, 2014
This looks interesting but I would not call it "great easy." Just trying to keep track of 3 colors at the same time isn't easy, and then you throw in "double treble 8 together." What's easy about this? I also don't like the big holes that show in the triangles between the spirals and the border. If I would ever do this, I would try to figure out something more solid for this area, or perhaps still lacy but with smaller holes. I would also do a different border because I don't really like crocheted ribbing. I prefer the look of crocheting into the front loops instead of the back ones. In other words, the spirals look interesting and impressive but I would change completely how they're put together and finished.
faeriequeen2002 56 43277
Nov 09, 2014
I fully agree about the hole. One's fingers will be caught there all the time, not to speak of the cold breeze. One could make a tiny triangle in the wrap's colours to even out the indentation and then continue with the border.
Fairfax Avenue
Jun 22, 2014
This was fun! I needed to understand that each yarn color provides one third of the "row". Once I had that in my head, it worked. The ribbing felt endless, but it's all done. I then used the same spiral design for a 32" diameter baby blanket.
landryjoanne7 3103 538
Sep 05, 2013
Beautiful but NOT easy. Bought all supplies, but cannot even do round one... Help, anyone???
jamontagne 4081302
Apr 25, 2012
this looks amazing but difficult! I am up for the challenge tho! Will post back with pictures when i complete this
landryjoanne7 3103 538
Sep 08, 2013
Did you complete this? I'm having trouble with it. In round one, how do you begin B, when A has been dropped and looped on a safety pin?
teresateixido 3775 984
Mar 06, 2011
me parece mui original voi a provar, espero conseguirlo.por cierto soy espaola
Report Inappropriate Comment
Are you sure you would like to report this comment? It will be flagged for our moderators to take action.
Thank you for taking the time to improve the content on our site.