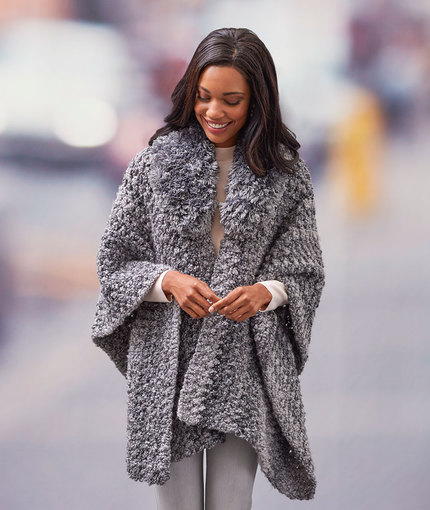
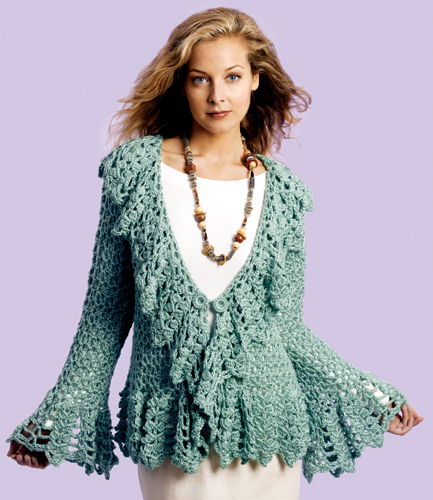
Lightweight Zen Jacket

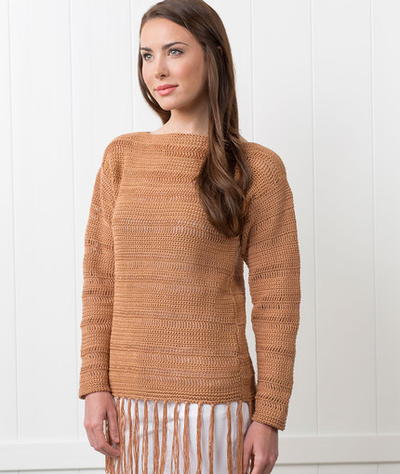
Crochet this amazing Lightweight Zen Jacket to wear any time of year. The lacy design is elegant, yet casual, and it would also make a great gift. Free crochet patterns like this one are brilliant. You can rest assured that this crochet sweater pattern will keep you warm during the coldest winter months. Best of all, it's super stylish, so you can wear it to any event. Make one for yourself and watch as you turn heads. This free crochet pattern looks like something you could buy at a fancy boutique.
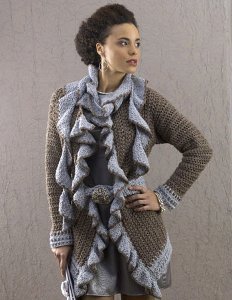
If you are looking for warmth without the weight this fall, consider adding this crochet jacket pattern to the mix. Chic and delicate, the lacy design allows the wearable to breath while still snuggling you up tight with always-insulating yarn. This gorgeous example is worked up in the Naturally Caron Spa Collection's Ocean Spray yarn color, but you could easily transform its look by using something in a new hue like a green, pink, or even a darker, trendier charcol grey. No matter how you wear it, this crochet jacket is sure to make its way into your staple pieces.
Plus, scroll down to see more free crochet jacket patterns!

Crochet HookI/9 or 5.5 mm hook
Yarn Weight(3) Light/DK (21-24 stitches to 4 inches)
Crochet GaugeUsing US size I/9 (5.5 mm) crochet hook, 14 Fsc = 4"/10 cm; one lace stitch pattern repeat and 4 pattern rows = 2 1/4" as crocheted, lace will grow slightly in length with blocking.
Finished SizeBust 38 (46, 54)" : Small-Medium (S/M), Large-XLarge (L/XL), 2XLarge-3XLarge (2XL/3XL)
Materials List
- NaturallyCaron.com Spa (75% Microdenier Acrylic/25% Bamboo;): #0005 Ocean Spray, 16 (19, 23) oz
- One size US I/9 (5.5 mm) crochet hook, or size to obtain gauge
- Stitch markers
- Yarn needle
- Pattern
Instructions:
Lace Stitch Pattern--worked in rows (increases at fronts and center back)
-
PATT ROW 1: Ch 5, V in first tr (front increase made), ch 6, [V in next sc, ch 6] across to sc at center back corner, INC-V in corner sc, ch 6, [V in next sc, ch 6] across, ending with (V, ch 1, tr) in fourth ch of turning ch (front increase made), turn.
-
PATT ROW 2: Ch 4, skip first ch-1 sp, [FAN in next V, SPsc in middle tr of next fan 2 rows below] across to INC-V at center back; over corner, work [FAN in next V, sc in corner ch-3 sp, FAN in V], SPsc, [FAN in next V, SPsc in middle tr of next fan 2 rows below] across, working FAN in last V, tr in fourth ch of turning ch, turn.
LACE STITCH PATTERN worked in rounds (for sleeves)
-
PATT RND 1: Ch 1, skip beginning ch, sc in next tr, ch 3, [V in next sc, ch 6] around to last sc, V in last sc, ch 3, join with slip st in beginning sc, turn.
-
PATT RND 2: Ch 1, sc in first sc, [FAN in next V, SPsc in next fan] around to last V, FAN in last V, join with slip st in beginning sc, turn.
-
PATT RND 3: Ch 10 (counts as tr, ch 6), [V in next sc, ch 6] around, ending with tr in same sc as beginning, sc in fourth ch of beginning ch to complete beginning V, turn.
-
PATT RND 4: Ch 4, 3 tr in beginning sp, SPsc, [FAN in next V, SPsc in next fan] around, ending with 5 tr in same sp as beginning, join with slip st in top of beginning ch to complete beginning fan, turn.
NOTES
-
The Jacket is made from the neck down, seamlessly. The body is shaped like a diamond, with a slit left open at the front, with a point at each front and "corners" at center back and at top of each shoulder. Fronts will hang slightly longer than center back point.
JACKET BODY
-
Neck Foundation Row: With size US I/9 (5.5 mm, Fsc 33 (33, 49) times to measure 9 (9, 14)", turn.
-
Note: Increases are set at each front edge, at top of each shoulder and at center back. Mark the center of these increases and move markers up as you go.
For Sizes S/M (L/XL)
-
Row 1 (WS): Ch 5 (counts as tr and ch 1), V in first sc for front increase, *ch 6, skip next 7 sc, INC-V in next sc for shoulder corner, ch 6, skip next 7 sc*, INC-V in next sc for center back corner; repeat from * to *, [V, ch 1, tr] in last sc for front increase, turn.
-
Row 2 (RS): Ch 4 (counts as tr), skip first ch-1 sp, FAN in ch-1 sp of next V, *skip next 3 Fsc, SPsc in next Fsc; over next corner, work [FAN in ch-1 sp of next V, sc in next corner ch-3 sp, FAN in ch-1 sp of next V]*; repeat from * to * 2 more times, skip next 3 Fsc, SPsc in next Fsc, FAN in ch-1 sp of last V, tr in fourth ch of turning ch, turn—8 fans.
For Size 2XL/3XL
-
Row 1 (WS): Ch 5 (counts as tr and ch 1), V in first sc for front increase, *ch 6, skip next 5 sc, V in next sc, ch 6, skip next 5 sc, INC-V in next sc for corner*; repeat from * to * 3 more times, ending last repeat with [V, ch 1, tr] in last sc for front increase, turn.
-
Row 2 (RS): Ch 4 (counts as tr), skip first ch-1 sp, FAN in ch-1 sp of next V, *skip next 2 Fsc, SPsc in next Fsc, FAN in ch-1 sp of next V, skip next 2 Fsc, SPsc in next Fsc**; over next corner, work [FAN in V, sc in corner ch-3 sp, FAN in V]*; repeat from * to * 2 more times, then repeat from * to ** once, FAN in ch-1 sp of last V, tr in fourth ch of turning ch, turn—12 fans.
For All Sizes
-
Row 3: Ch 5, V in first tr for front increase, ch 6, *[V in next sc, ch 6] to sc at next corner, INC-V in corner sc, ch 6*; repeat from * to * 2 more times, [V in next sc, ch 6] across, ending with (V, ch 1, tr) in fourth ch of turning ch for front increase, turn.
-
Row 4: Ch 4, skip first ch-1 sp, *[FAN in next V, SPsc in fifth tr of next fan 2 rows below] across to next corner INC-V; over corner, work [FAN in V, sc in corner ch-3 sp, FAN in V, SPsc in next fan]*; repeat from * to * 2 more times, [FAN in next V, SPsc in next fan] across, working FAN in last V, tr in fourth ch of turning ch, turn—12 (12, 16) fans.
-
Rows 5–8 (5–10, 5–10): Repeat Rows 3–4 a total of 2 (3, 3) times—20 (24, 28) fans.
Shoulder Cap For All Sizes
Maintain increases as established at fronts and center back; increase more gradually at shoulder corners. Continue to move markers up as you work rows evenly across shoulder corners.
-
Row 1: Ch 5, V in first tr for front increase, ch 6, *[V in next sc, ch 6] across to sc at next shoulder corner, (tr, ch 3, tr) in corner sc, ch 6*, [V in next sc, ch 6] across to sc at center back corner, INC-V in corner sc, ch 6*; repeat from * to * once, [V in next sc, ch 6] across, ending with (V, ch 1, tr) in fourth ch of turning ch for front increase, turn.
-
Row 2: Work as PATT ROW 2, making FAN in ch-3 sp at each shoulder corner—22 (26, 30) fans.
-
Row 3: Work as PATT ROW 1, working ch-6 even over shoulder corners.
-
Row 4: Work as PATT ROW 2, making SPsc even over shoulder corners—24 (28, 32) fans.
-
Row 5: Work as PATT ROW 1, making INC-V in sc at each shoulder corner.
-
Row 6: Ch 4, skip first ch-1 sp, *[FAN in next V, SPsc in next fan] across to INC-V at next shoulder corner; over corner, work [7 tr in V, sc in corner ch-3 sp, 7 tr in V], SPsc in next fan*, [FAN in next V, SPsc in next fan] across to INC-V at center back; over corner, work [FAN in V, sc in corner ch-3 sp, FAN in V], SPsc; repeat from * to * once, [FAN in next V, SPsc in next fan] across, with FAN in last V, tr in fourth ch of turning ch, turn—28 (32, 36) fans.
-
Rows 7–10: Repeat Rows 1–4 once—32 (36, 40) fans.
Join Fronts And Back
Note: Maintain increases as established at fronts and center back. Join fronts and back with additional stitches at each underarm, leaving armholes unworked. Leave shoulder corner markers in place for sleeve shaping later.
-
Row 11 (join row): Ch 5, V in first tr for front increase, *[ch 6, V in next sc] 5 (6, 7) times, Fsc 5 (13, 21) for underarm, skip next 6 fans, [V in next sc, ch 6] 5 (6, 7) times* to sc at center back corner, INC-V in corner sc; repeat from * to *, ending with (V, ch 1, tr) in fourth ch of turning ch for front increase, turn.
-
Row 12: Ch 4, skip first ch-1 sp, *[FAN in next V, SPsc in next fan] across to V before underarm, FAN in next V, skip next 2 Fsc, sc in next sc, [skip next 3 sc, FAN in next sc, skip next 3 sc, sc in next sc] 0 (1, 2) times, skip remaining 2 sc*, [FAN in next V, SPsc in next fan] across to INC-V at center back; over corner, work [FAN in next V, sc in corner ch-3 sp, FAN in next V], SPsc in next fan; repeat from * to * once, [FAN in next V, SPsc in next fan] across, ending with FAN in last V, tr in fourth ch of turning ch, turn—24 (30, 36) fans.
-
Rows 13–26: Work PATT ROWS 1–2 a total of 7 times—38 (44, 50) fans.
-
Do not turn or fasten off.
Front Edging
Work a row of Fans evenly spaced across front and neck edges of Jacket as follows:
-
With RS facing and working in ends of rows across right-hand front edge, FAN in first tr row, [sc in next tr row, FAN in next tr row] 16 (17, 17) times across to neck foundation, sc in first foundation ch, [skip next 3 ch, FAN in next ch, skip next 3 ch, sc in next ch] 4 (4, 6) times, sc in last foundation ch; working in ends of rows across left-hand edge, [FAN in next tr row, sc in next tr row] across left-hand, FAN in last tr row, slip st in top of beginning ch of Row 26; fasten off.
SLEEVES
Note: Maintain gradual increases at shoulder corner (now running down the outside of sleeve) to shape flare. Begin to add sleeves onto armhole, completing a round of V's across underarm chain.
-
With WS of one underarm facing, join with slip st in third (seventh, 11th) ch at center of underarm.
For Size S/M
-
Rnd 1 (WS): Ch 1, sc in same ch, skip remaining 2 ch, V in edge of V at end of tr row past underarm, ch 6, [V in next sc, ch 6] 2 times to sc at shoulder corner, INC-V in corner sc, ch 6, [V in next sc, ch 6] 2 times to underarm, V in edge of V at end of tr row before underarm, ch 3, skip next 2 ch, slip st in beginning sc, turn.
-
Rnd 2 (RS): Work as PATT RND 2, except over INC-V at corner work [7 tr in V, sc in ch-3 sp, 7 tr in V] —8 fans.
-
Rnd 3: Work as PATT RND 3, except at sc at corner work [tr, ch 3, tr].
-
Rnd 4: Work as PATT RND 4, making FAN in corner ch-3 sp.
-
Rnd 5: Work as PATT RND 1, working ch-6 even over corner.
-
Rnd 6: Work as PATT RND 2, working SPsc even over corner.
-
Rnd 7: Work as PATT RND 3, working INC-V in sc at corner.
-
Rnd 8: Work as PATT RND 4, except over INC-V at corner work [7 tr in V, sc in ch-3 sp, 7 tr in V] —9 fans.
-
Rnd 9: Work as PATT RND 1, except at sc at corner work [tr, ch 3, tr].
-
Rnd 10: Work as PATT RND 2, making FAN in corner ch-3 sp.
-
Rnd 11: Work as PATT RND 3, working ch-6 even over corner.
-
Rnd 12: Work as PATT RND 4, working SPsc even over corner, fasten off—9 fans.
For Size L/XL
-
Rnd 1 (WS): Ch 10 (counts as tr, ch 6), skip remaining 6 ch, V in edge of V at end of tr row past underarm, ch 6, [V in next sc, ch 6] 2 times to sc at shoulder corner, INC-V in corner sc, ch 6, [V in next sc, ch 6] 2 times to underarm, V in edge of V at end of tr row before underarm, ch 6, skip remaining 6 ch of underarm, tr in same ch as beg, sc in 4th ch of beginning ch to complete beginning V, turn.
-
Rnd 2 (RS): Work as PATT RND 4, except over INC-V at corner work [7 tr in V, sc in ch-3 sp, 7 tr in V] —9 fans.
-
Rnd 3: Work as PATT RND 1, except at sc at corner work [tr, ch 3, tr].
-
Rnd 4: Work as PATT RND 2, making FAN in corner ch-3 sp.
-
Rnd 5: Work as PATT RND 3, working ch-6 even over corner.
-
Rnd 6: Work as PATT RND 4, working SPsc even over corner.
-
Rnd 7: Work as PATT RND 1, working INC-V in sc at corner.
-
Rnd 8: Work as PATT RND 2, except over INC-V at corner work [7 tr in V, sc in ch-3 sp, 7 tr in V] —10 fans.
-
Rnd 9: Work as PATT RND 3, except at sc at corner work [tr, ch 3, tr].
-
Rnd 10: Work as PATT RND 4, making FAN in corner ch-3 sp.
-
Rnd 11: Work as PATT RND 1, working ch-6 even over corner.
-
Rnd 12: Work as PATT RND 2, working SPsc even over corner, fasten off—10 fans.
For Size 2XL/3XL
-
Rnd 1 (WS): Ch 1, sc in same ch, ch 3, skip next 3 ch, V in next ch, ch 6, skip remaining 6 ch, V in edge of V at end of tr row past underarm, ch 6, [V in next sc, ch 6] 2 times to sc at shoulder corner, INC-V in corner sc, ch 6, [V in next sc, ch 6] 2 times to underarm, V in edge of V at end of tr row before underarm, ch 6, skip next 6 ch, V in next ch, ch 3, skip remaining 3 ch, sl st in beginning sc, turn.
-
Rnds 2–12: Same as Size S/M Rnds 2–12 except with 2 additional repeats in each round—11 fans.
-
Repeat Sleeve around other armhole.
-
Weave ends, block Jacket.
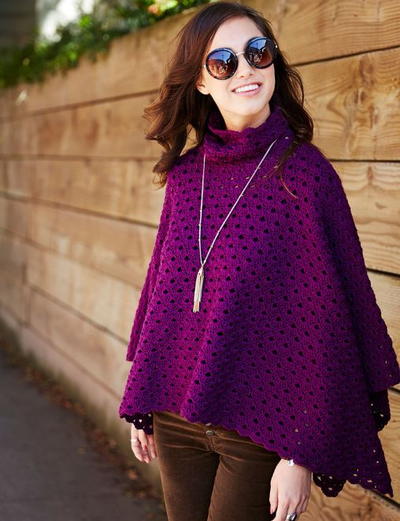
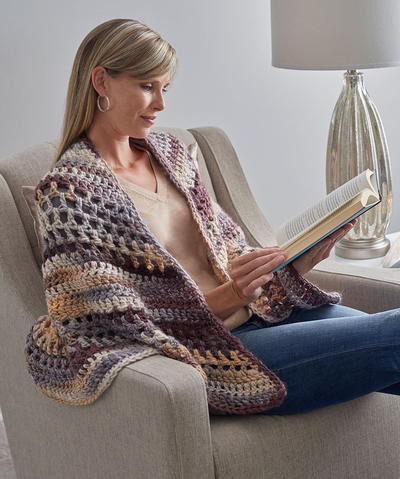
Free Crochet Jacket Patterns
Keep cozy during the cooler months with crochet jackets! These gorgeous patterns are as stylish as they are cozy. Jacket patterns tend to challenge crocheters, so they're absolutely perfect for curling up with inside while the weather outside is frightful. Try any of these jacket patterns today!
Abbreviations
- (ch)
- Chain
- (sc)
- Single crochet
- (slip st)
- Slip stitch
- (tr)
- Treble crochet
- Foundation single crochet (Fsc)
- Start with a slip knot, ch 2, insert hook in second ch from hook, yarn over and draw up a loop, yarn over and draw through one loop (the chain made); yarn over and draw through 2 loops (the sc made); *insert hook into the face of the previous chain and under the nub at the back of the chain, yarn over and draw up a loop, yarn over and draw through one loop (next chain made), yarn over and draw through 2 loops (the next sc made); repeat from * number of times needed for the length of foundation.
- Adding stitches at end of a row with Fsc
- Ch 1, insert hook into the front loop and left bar on side of the tr just made, yarn over and draw up a loop (chain made), yarn over and draw through one loop, yarn over and draw through 2 loops (sc made); repeat from * for number of sts needed.
- Fan
- Work 9 tr all in one space or stitch.
- V
- Work (tr, ch 1, tr) all in one space or stitch.
- INC-V
- Work (V, ch 3, V) all in one space or stitch.
- Spike single crochet (SPsc)
- Insert hook in the required stitch two rows below (usually the middle tr of next fan); enclosing the ch-6 sp on previous row as you work, yarn over and pull up a loop, yarn over and pull through both loops on hook.
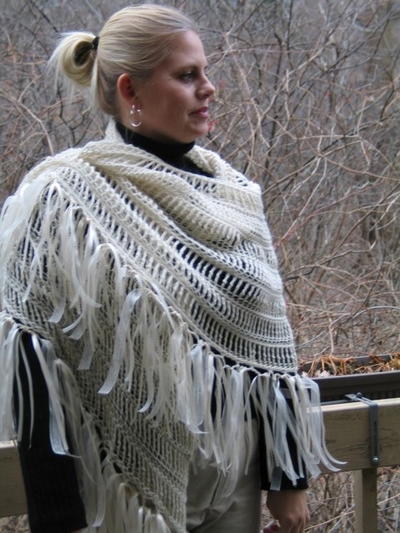
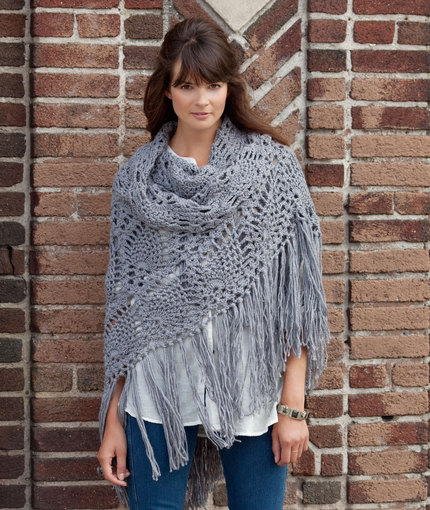
Read NextButterfly Crochet Shawl
Your Recently Viewed Projects
Thanks for your comment. Don't forget to share!
chillwthme
Dec 03, 2023
As the yarn is not made anymore, can you give me a general description of what Caron yarn would be a substitute???? I would really appreciate it!!! Thank you Cheryl Hill
Jan
Sep 05, 2020
This is one of th WORST written patterns I've ever seen! It's scattered and all over the board!! I can't believe this designer is a CGOA member. Whe people have to leave comments asking for help, it's a sure sign that there is something wrong with the written pattern. Designers shold never write the pattern. Leave it to the experts.
Annette
Nov 17, 2019
Is there a YouTube for this pattern.
Editor Dana
Nov 18, 2019
Hi there! This is an older pattern so unfortunately there isn't a YouTube video for it. I apologize for the inconvenience!
Jan
Sep 07, 2020
No, sadly. I finally gave up on this because the written pattern is sob poorly organized and written. It's very scattered and jumbled. Good thing it is free, because I would never pay for this. Disappointed that the designer doesn't know what's she's doing or how to write a pattern that's readable.
Gina64
Sep 10, 2017
Can some one please help me am stuck On this part of the pattern don't understand what to do thanks Gina br /br /Leave a Cap For All Sizesbr /br /Maintain increases as established at fronts and center back increase more gradually at shoulder corners. Continue to move markers up as you work rows evenly across shoulder corners.br /Row 1 Ch 5, V in first tr for front increase, ch 6, V in next sc, ch 6 across to sc at next shoulder corner, (tr, ch 3, tr) in corner sc, ch 6, V in next sc, ch 6 across to sc at center back corner, INC-V in corner sc, ch 6 repeat from to once, V in next sc, ch 6 across, ending with (V, ch 1, tr) in fourth ch of turning ch for front increase, turn....
Tricia108
Apr 29, 2017
You can never have too many jackets. It adds a nice touch to an outfit and looks very becoming. I can use it in the warm and cold weather. I have the yarn already. Thank you for offering the pattern.
Mistress of All Ev il
Feb 24, 2017
This pattern is so cute. I would 100% pay someone to make this for me (within reason). It would look so nice... in black or a wine color. I NEED IT.
hillhouse97 924844 1
Apr 02, 2016
This is a really cute pattern. The shell charted stitches on the "pattern" hyperlink next to the picture on this page are pretty clear. Doing it in a nice cotton or bamboo yarn would make it multi-seasonal.
annettebarron 7395 338
Feb 12, 2016
I am having major problems with directions, I have pulled out 4-5 times and the instructions are not matching up on row 1-2 of body 2XL. Directions are scattered in different directions. Do you have a chart or pictures of the stitches? Otherwise I will have to fake it my way, very disappointing.
Kaylee
Feb 15, 2016
Unfortunately, I have not made this pattern and cannot be of much help. The comment below yours offers a place to look where other crochets have tried this pattern. Maybe that will offer some guidance. Here's the link for your convenience: http//www.ravelry.com/patterns/library/zen-jacket/ Hope that helps! - Kaylee, Editor of FaveCrafts
amayita
Oct 16, 2015
For more details, or to read other's crocheted notes on doing this, for more pics, just visit the pattern page on ravelry http//www.ravelry.com/patterns/library/zen-jacket/
detroitrapunzel
Oct 09, 2014
I got stuck on row 4. Is there a tutorial or video on starting this? I Sooooo want to make this. I understand most of the directions and the repeat rows. Not sure why I can't understand this row.
FaveCrafts Editor JL
Oct 13, 2014
Hi there - Unfortunately we don't have a video tutorial for this patter. What seems to be the problem? Perhaps we can help you out! Thanks! - Julia from FaveCrafts
carolcandido77 193 1355
Nov 03, 2015
Hi Detroit, I got stuck on row 4 also. Did you get any answer or figure it out? Any help please!
December27
Sep 20, 2014
Can we get a back view? Layout? How am I supposed to know what I'll be making without some more details? And what *size* is the yarn? Thank you.
FaveCrafts Editor JL
Sep 22, 2014
Hi there, Unfortunately this was the only image that Caron provided us. Also, this is Light yarn (3). Thanks! - Julia from FaveCrafts
catdancer24 944945 6
Apr 09, 2014
on row 12, what do you mean across to v at undrarm, those stiches were skpd on row 11.???
catdancer24 944945 6
Apr 09, 2014
I got to row 12, and it is confusing about the continue to v before underarm, can yu explain???
Melissa Ryan
Apr 10, 2014
Hi Catdancer24--I think the pattern is saying to continue crocheting until the v-stitch (from the previous row) located right before the underarm. If you're still confused, you can check out the original pattern on the Caron website. Hope that helps!
hughstammy 8311911
Nov 27, 2013
I would love to make this but I am having difficulty is there or do you have a Tutorial on this Jacket I so pray that there is. Thank you
goodmanvirginia7 0 448061
Oct 24, 2012
THIS LOOKS BEAUTIFUL!! Will let you know more when I finish making it. THANKS
mewz76 6324361
Oct 02, 2012
I'm stuck on the shoulder caps. I go around from one shoulder corner to the other, and then I'm stumped. Help??
etizm 3910734
Oct 01, 2012
I am having difficulty with understanding the pattern. I have got as far as row six and my crochet does not match the instructions. Is there a pattern of the shoulder instructions in a graph. I have looked at the Naturally Caron site and that shows the graph just for the back.I can send a photograph or post it online of what I have done so far but I feel I have gone wrong and don't know where. Can you help please? I am new to reading crochet patterns but am learning from this one!
etizm 3910734
Oct 02, 2012
Is this closed for comments or is help still available. If not on here can someone give me a link to where someone can help me please?
jenny 9876068
Apr 03, 2013
I made this jacket and it came out wonderful and the pattern is written really well so hang in there. The shoulders are shaped as a raglan sleeve would be. So you are starting from the neck working and increasing on your way down, you will increase on both ends and at the 4 points that consist of the raglan portion of the sleeves. It should look like a square/rectangle with a circle in the middle for the neck. Good luck!! :)
LilBitKnits
Aug 06, 2012
I want to make myself on of these jackets! Since I have little experience in 'shaping' garments, this would get me started. Nearly everything I make is given away, so this would be a special treat to me! Then I can feel confident in making it again for a gift.
tkaepetras 0874953
Jul 05, 2012
Knew this was a Doris Chan pattern after reading the first sentence! A hint for those of you who had trouble with the pattern - read all the "fine print" information that appears before the main pattern instructions: you'll find all the answers there! This is the way of Doris Chan's beautiful garments. No diagram? Be daring, my darlings! Just jump in and give it a whirl ... the joy of crochet means you can easily unravel and start fresh. (If life could be so forgiving!) - Tracie
kaysie
May 02, 2012
I think you should show a drawing of how this piece is shaped and how the parts are made. I do not understand the "points" described in the pattern. Can someone come up with a picture?
etizm 3910734
Oct 01, 2012
Hi Did anyone ever send you a diagram? I an very confused about the shoulder shaping rows. I think I have missed something somewhere. I looked at the diagrams on the Naturally Caron site but they do not show the shoulders.
fancyfree36
Apr 10, 2012
I'm beginning to think that I've forgotten how to read a pattern. I can't even get off the ground with this one. There needs to be a diagram of how the FSC is done. Two of us have not been able to come up with it. Can anyone help?
ladyswan
Jul 29, 2012
Check out youtube.com for a tutorial of FSC. This one might help http://www.youtube.com/watch?v=oZrabIcA8C8
Semisweet333
Feb 18, 2012
I am having trouble starting this jacket. It has been a few years since I have crocheted, and I am having trouble understanding this pattern. Do I start on the neck foundation row or the pattern row 1. I am so confused. HELP!
stampartist 109245 8
Jan 08, 2012
Just started making this jacket as a gift. Having trouble with row 2 on the S/M size. Row 1 only has INC V stitches and Row 2 says to work FANS in the ch 1 space of the V stitch in Row 1....help??? Thanks
bkscrafts
Jan 06, 2012
I love this pattern -- Thank you Doris Chan! It is gorgeous and Spa yarn makes it soft and drape well!
AliciaC
Oct 13, 2011
I am making this jacket and am stuck on how to start the sleeves. Can anyone help me understand the directions on how to start the sleeve on the jacket? Would greatly appreciate it!
evcuev59 1454632
Feb 15, 2012
there aren't any sleeves, it just drapes over the shoulders & down the arms.
annick1960
Feb 14, 2013
I'm stuck on the sleeves too. In fact, I've been stuck on different parts of this pattern, such as the shoulder shaping, and other parts too. This pattern is very confusing and the directions are all over the place. I've never worked on such a poorly put together pattern. I'm starting to wonder if I will ever finish this one. (I've been thinking that since the first few rows!).
JessiCAN
Jul 25, 2011
@kellyww: We would suggest either experimenting with different sized hooks until you achieve the gauge listed at the top of the pattern or crocheting with laceweight yarn in a larger size than you would normally wear. Hope this helps! -- Editor of FaveCrafts
kellyww
Jul 22, 2011
I would like to make this in a lace wt. yarn. Any help on figuring the sizing would be appreciated. Thank you.
ytuckerman 7652431
Jun 15, 2011
i would love to make this in a 4ply cotton but am unsure as to the sizing as i would need to use a 3.5 hook. can anyone give me some advice please?
ytuckerman 7652431
Jun 11, 2011
I have made 2 of these jackets .1 in 8 ply magnum supersoft acrylic ,ruby red. 1 in a slightly thicker varigated jade yarn. both look great. i adapted the pattern at the sides under the armhole so that it sat straighter on the body instead of sticking out.they are very comfortable to wear and a bit different to the usual "cardi"
mewz76 6324361
Oct 01, 2012
I'm having trouble where it starts the "shoulder cap"; I was hoping you could help me figure it out. I got to "[V in next sc, ch 6] across to sc at center back corner, INC-V in corner sc, ch 6" and then I'm lost. It says to repeat from * to *, but there are 3 asterisks prior to this. Also...to continue seems to be taking me into the neck area, which I know it wrong--but it doesn't say to turn. I'm confused and getting frustrated and since you've completed at least 2, I would greatly appreciate your help!
etizm 3910734
Oct 01, 2012
HI I am having trouble there as well as I am new to "reading" crochet patterns. Is there a graph for the whole item. I am confused as it says it is a cardigan then on a reply it says there are no sleeves just a drape over the shoulders. Any help would be great....thank you.
mommymiller120 559 7428
May 13, 2011
I love this jacket. My cousin was looking for a pattern for a poncho like the one Jennifer Lopez wore in Monster-In-Law. I like this pattern more. I think it is the elegant look of a shawl with the practicality of a cardigan. I like simple, easy to wear things even when I dress up.
CreativityGoddess
May 12, 2011
@dawnshadow - If you do decide to adapt this pattern into a baby blanket, we'd love to post the new pattern on our site! You can submit the pattern by contacting us here: http://www.favecrafts.com/index.php/hct/contact_us_page Thanks! -The Editors of FaveCrafts.com
dawnshadow
May 12, 2011
Reading this pattern takes allot of jumping around in the directions AND even in the diagrams of how to do the stitches Once you have tracked each thing down tho the pattern is fairly simple To be honest now I have made it with regular yarn and a bit loose as I am a tad larger than a X I want to make it in cotton yarn or crochet thread The main drawback to doing something like this in the yarn is my arthritis I can't work on it two days in a row now that it's gotten so heavy If you are like me I would stop which I didn't at the end of the skein which fashioned the underarm of the sleeve on the body and start doing the sleeves right then Only after you finish the sleeves then go back to completing the body I have also found…Read More it has taken much more yarn than suggested but I did it in Red Heart's Monet yarn and I so very much love it Thinking of adapting the pattern to making a Baby blanket for my first born Great Grandchild who is coming soon
perthanderson 7369 963
May 10, 2011
I love the look of the Zen jacket but am unable to work out 2nd roe as there seems to be something missing in the 1st row except for beginning and end of 1st row there isnt any v rows only increase v's
stampartist 109245 8
Jan 08, 2012
Did you ever get help with this? I just started it and I find the same problem as you did. Just curious
stampartist 109245 8
Jan 08, 2012
Ahhh figured it out. Went to the Caron site.... and INC V stitch is a complete V stitch (tr, ch, tr) ch 3 and another complete V stitch. I think you and I thought that the increase was the 3 ch in between two tr. There are diagrams also on the Caron site. Hope you didn't give up.
Namiradinaice
May 05, 2011
Member 3418039 - You wrap it twice then insert it into the next stitch. Then yarn-over, pull it through one stitch, you should now have four loops on your hook, then YO pull through two loops, now you have 3 loops on hook. YO again and pull through 2 loops, you should have 2 loops left, then YO and pull through remaining 2 loops. That's one treble stitch. Hope this helps! I did it wrong the first time and had to start over.
Member 3418039
May 01, 2011
do you do the treble crochet called for in this pattern by wrapping the yarn once or twice over the hook .? Thanks
Namiradinaice
Apr 28, 2011
ksrum 3540121, there are about four more pics on the website this originally came from: http://www.naturallycaron.com/projects/zen/zen_1.html Can someone help me!?! On the 5th and 7th rows, am i supposed to alternate between the V and INC-V or am I supposed to do the INC-V only on the increases? Someone please email me at canonmous at gmail dot com Thanks!
Namiradinaice
Apr 11, 2011
I found the yarn easily at Michaels. I am a beginner, but found this pattern very simple! Love it!!!
tambgr 9366734
Apr 08, 2011
beautiful pattern.., I want to make one. I will look younger if ware this.
ghosteyes
Apr 08, 2011
I love this wraps look. I an a large woman and I think this would be a grate help in my wardrobe, I think it would help in slimming of the hips and bust line. I can't what to get started crocheting.
seb1 8904689
Apr 07, 2011
Beautiful pattern; looks a little intimidating to a beginner but I'm willing to try. Love the shape and seamless aspect of this design. Great design!
dietz
Apr 07, 2011
Like this pattern. It is great for spring. Love the style and it is so versatile. Can not wait to make this!
glennakelley 78186 21
Apr 07, 2011
This is a wonderful design. Looking forward to making it for all the ladies in my family.
moonchild888
Apr 07, 2011
I love this as you can wear it many different ways, as a jacket, belted, or as a wrap, as a neck wrap...it's simply gorgeous and practical
sunshine76670
Apr 02, 2011
This is a little difficult for a novice but a pretty pattern. I vote crochet. It is timeless and dainty. Knitting just does not compare.
ksrum 3540121
Apr 02, 2011
Love this one but would love to see other angles, like the back and sides.
Ritzimitzy
Apr 02, 2011
I love working with Caron Spa! Yum! Plus if you go to Ravelry & look up the Everyday Crochet group, there's lots of support there for Doris' patterns. Equally yummy! :)
Mary Ann Majerski
Mar 31, 2011
The pattern calls for an "I" hook. An alternative yarn could be Caron Simply Soft. It uses a "H" hook. Close enough and with the way this pattern is made, it shouldn't matter.
Auburn in Auburn
Mar 28, 2011
The yarn called for is available online at www.naturallycaron.com and is called Spa yarn. It is not wool but is 75% microdenier acrylic and 25% rayon from bamboo. Try doing a web search for "Caron Spa yarn" and you should find it.
petra 6859963
Mar 28, 2011
Im thrilled... I am just at it and although I made a mistake and cheated it is turning out nicely already (well I got yarn in diff. colour for another one ;) ) It's my bus time craft to and from work and I'm now almost at the joining under the arms it is fun to do and fast to do I just love it and by the way this beginning row of FST is just genious! from now on I will do them on all scarf/shrug projects that are lacy and its so easy to do!!! thanks for sharing this project internationally ;) Petra, Berlin Germany
AGetsinger
Mar 28, 2011
If you don't mind an acrylic, then Lion's Brand has some really soft yarns that would work perfect for this. Good luck!
jen2blu4u
Mar 21, 2011
What would be a suitable alternative to the Caron Spa wool? They no longer sell this & I cannot find any info on the wool for comparisons.
Report Inappropriate Comment
Are you sure you would like to report this comment? It will be flagged for our moderators to take action.
Thank you for taking the time to improve the content on our site.