Sewn "Crochet" Edge
Follow this technique from Sulky of America to sew an edge with the appearance of crochet onto collars, necklace, cuffs and more. This technique is quicker than crochet and creates an heirloom quality garment.

Materials:
- Sulky Heat-Away Stabilizer
- Sulky 30 wt. Rayon Threads
- Topstitching Needle
- Edge/Joining Presser Foot
- Open Toe Presser Foot
- Construct It
Instructions:
- To make the heavier, crochet-look trim, thread the top of your sewing machine with two strands of the same color of Sulky 30 wt. Rayon thread through the eye of a topstitching neeedle. also treat the two threads as one to wind a bobbin with two strands of the same Sulky 30 wt. thread.
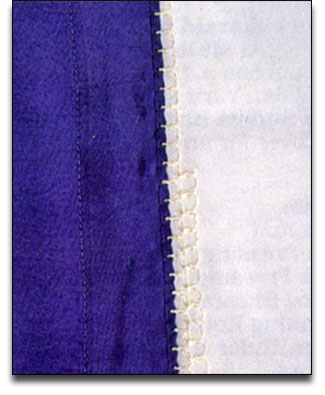
- Rotary cut strips of Heat-Away Stabilizer 3 inches wide. Snap on the edge/joining foot and baste the Heat-Away strips onto the fabric along the edge with 2 inches extending outside the fabric edge to be finished with "crochet".
- Select a stitch that sews a seam/overcast-type stitch. On a Husqvarna Viking #1+, use stitch A21, stitch length 3.0, stitch width 6.0, side-to-side mirror image, and an open-toe foot.
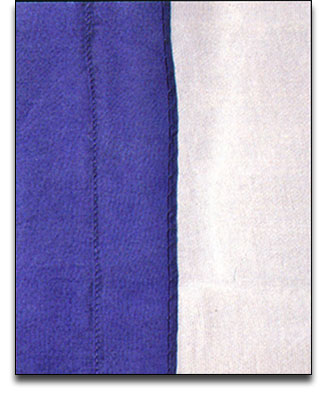
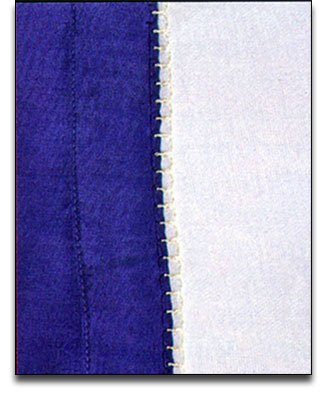
- Stitch along the edge of the collar so the side stitch catches the edge, and the rest of the stitch is on the Heat-Away. To finish the ends select a left needle (or right needle depending on which end) and straight stitch on the Heat-Away to the next row. Mirror the stitch side-to-side, turn the work around, and stitch back along the stitching. Line up the stitch with the side stitches of the first row. The stitches should look like you are laying brick. Continue to add rows as desired. The collar in the sample project has three rows.

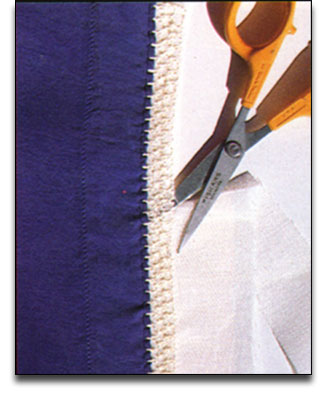
- Trim away the excess Heat-Away outside the stitching.
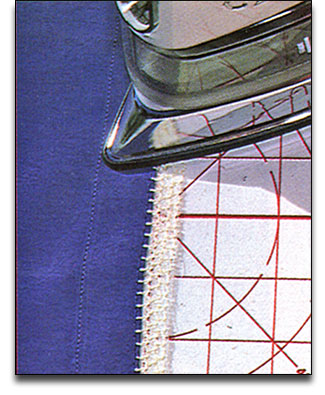
- Place a towel or press cloth on an ironing surface amd press with a DRY iron to disintegrate the Heat-Away.
- Place the collar in a plastic bag and rub the stitching gently to "flake" the Heat-Away off.
Read NextNo Sew Beach Dress
Your Recently Viewed Projects

Thanks for your comment. Don't forget to share!
Report Inappropriate Comment
Are you sure you would like to report this comment? It will be flagged for our moderators to take action.
Thank you for taking the time to improve the content on our site.