This project was submitted by one of our readers, just like you.
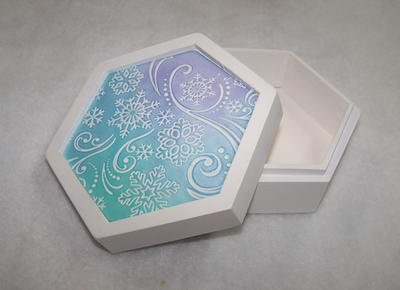
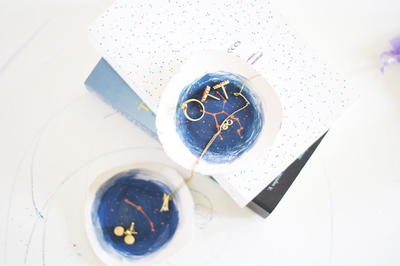
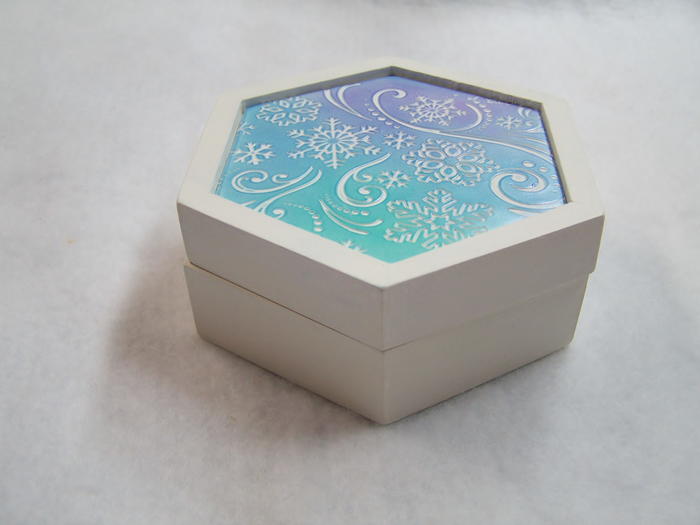
Embossed Snowflake Trinket Box

"Turn and inexpensive unfinished wood box with a recessed lid and some white polymer clay into a lovely little trinket or gift box! Never used polymer clay before? No worries...this project is easy peasy and you don't need a lot of special tools for it. If you can roll out pie dough you have this one in the bag...or in the box! The embossed design is made with paper crafting embossing folders and mica powders. Change up the theme by choosing one of so many embossing folder designs and color choices in polymer clay and mica powders. "

Materials List
- Unfinished wooden box with recessed lid
- Sculpey Soufflé (Polymer Clay)–#6001 Igloo (1.7oz. block) or color of choice
- Darice Embossing Essentials Embossing Folder- Snowflake Swirl or pattern of choice
- Jacquard Pearl Ex Powered Pigments: #644 Reflex Violet, #636 Emerald, #647 Sky Blue or colors of choice
- DecoArt Multi-Purpose Sealer
- DecoArt Americana Acrylic: Warm White
- DecoArt Sealer Finisher Spray Satin Finish
- Non porous surface for cutting such a ceramic tile or marble slab
- Clay conditioning machine (optional)
- Scupley Acrylic Roller AS8AR or rolling pin
- Scupley Super Slicer ASBSET or craft knife
- Flat paint brush
- Liner brush
- Spray bottle
- Sandpaper
- Baby Wipes
- Glue
- 2 wooden skewers
Instructions
-
Seal all areas of wooden box with Multi-Purpose Sealer. When dry, sand lightly to smooth. Base all areas of box with Warm White unto opaque. When dry all areas with sealer/finisher.
-
Cut a piece of clay and knead with hands until pliable.
-
Run clay through conditioning machine on the thickest setting or roll with the rolling pin until you have a nice smooth sheet of clay. If using a rolling pin lay skewers out on your work surface with clay between them, roll over the skewers and clay simultaneously to keep the sheet a uniform thickness.
-
Fill spray bottle with clean water and lightly spray inside of embossing folder. The water will help the clay to release from the folder. Lay clay inside folder and close. Roll over the folder with the clay roller using film pressure. Turn folder over and repeat. Gently open folder and check the impression. Gently coax clay off embossing sheet. Lay the clay sheet back on the tile with the negative design impression side facing up.
-
Lay box lid upside down over embossed clay sheet. Press to indent edges slightly. Carefully remove box top. Use Super Slicer or craft knife to cut along inside edges of impression.
-
Open the Pearl Ex powders and put a little powder into each lid. Load your fingertip with Sky Blue. Rub your fingertip lightly in a circular motion a few times on the tile. Tap your fingertip up and down a few times onto the tile to knock off loose particles. Using light pressure rub your fingertip over the center of the raw clay. Continue rubbing gently in a circular motion to smooth the color and fadeout the edges. Do not press hard enough to stretch or indent the clay. Practicing this technique on scrap clay is advisable if you are a novice with mice powders and clay. Use a baby wipe to clean your finger.
-
Repeat step 5 with Emerald. Blend color over the edge of the blue areas until a gradation of color occurs. Repeat again with Reflex Violet.
-
If Pearl ex powders settle into the embossed areas of the clay gently blow on the powder to remove it. If color remains in the embossed areas bake it then use the liner and Warm White to touch up.
-
Bake clay on tile according to manufacturer’s directions.
-
When clay has cooled insert it into the box top. If the clay does not fit well, sand edges of clay sheet until it fits. Glue clay sheet into box top.
NotesImportant Note: Once a kitchen tool has been used for polymer clay it is no longer safe to use for food.

Read NextHow To Make Your Own Paper Clay