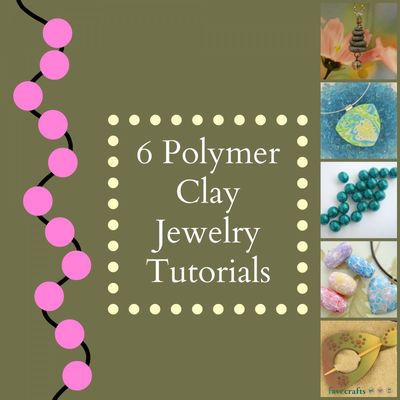
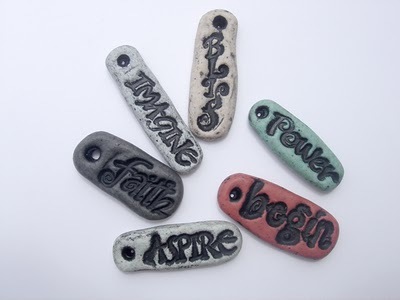
Antique Inspiration Tags
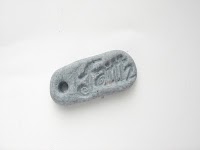
Create charms for jewelry or embellishments for scrapbooking with clay. These Antique Inspiration Tags, which were dreamed up by Marie Segal, show you how versatile polymer clay projects can be. With uplifting words like "Faith" and "Imagine" stamped on them, these tags make wonderful gifts for friends and family. Make a set for yourself so that you can wear them when you're feeling uninspired. The clay used for these tags has a natural, earthy look that works with almost any outfit.

Materials:
- Cernit Nature colors in your choice (link above)
- Clay Words Sheet stamps 269-001, 30 words- ERAGraphics
- A Bic stic pen
- Black or Brown Ne-opaque- Clay Factory
- A piece of old towel
- Brush
Instructions:
-
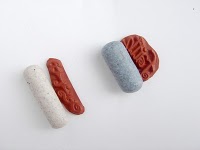
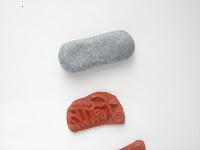
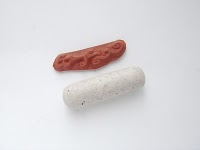
Condition the color of clay. Roll coils that are a little longer than the stamp you are going to use. If the words are skinny, make the coil smaller in diameter. If the words are thick, make the coil thicker.
-
Flatten and lengthen the coil.
-
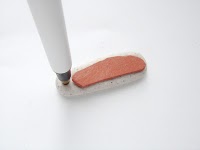
Lay one end of the coil at the bottom or end of the word. Allow excess coil to extend over the beginning of the word. Do not press the stamp all the way in. It looks better if you do not have the outline of the rubber on the clay.
-
Use the point of the pen to make the hole in the top of the tag.
-
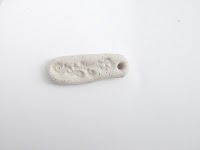
Peel off the stamp.
-
Repeat the process to create a smaller, thinner stamp using a smaller coil.
.jpg)
-
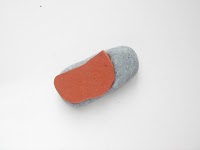
Press the smaller stamp into the bigger one.
-
Use the point of the pen to make the hole in the top of the tag.
-
Peel off the stamp.
-
Bake these tags at 275 degrees for 30 minutes. Turn off the oven and leave the tags in to cool. When cool, paint with black or brown ne-opaque and let partially dry. Rub off excess paint with damp towel.
Read NextHow To Make Your Own Paper Clay
Your Recently Viewed Projects
Thanks for your comment. Don't forget to share!
QueenTamara
Nov 11, 2011
These are really nice. I like that you can use an oven to bake the clay. I want to buy a kiln, but I do not have the room for it. This is just as creative. Thanks so much for sharing. Tamara :)
sculptsmith 074828 2
Nov 25, 2010
Where do you get "Clay Words Sheet stamps 269-001, 30 words- ERAGraphics "?
Report Inappropriate Comment
Are you sure you would like to report this comment? It will be flagged for our moderators to take action.
Thank you for taking the time to improve the content on our site.