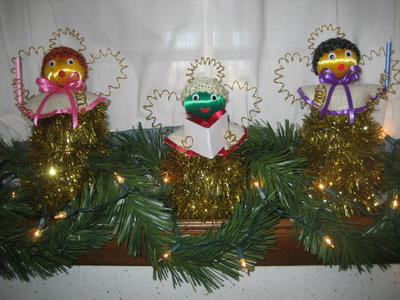
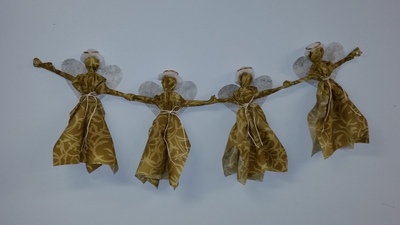
Colorful Christmas Angels

"I believe in angels and I love them. That's why I made this cute, easy- to-make holiday craft project. It's a good thing to talk to children about angels. You can ask them to do this cute project and write a wish this holiday season. This project can hold a small letter (size of a calling card) with the angels spiraled hand. When they do this easy-to-make project, they can become proud of themselves that they did something nice and good. At the same time, its a nice decorative figure in your house this holiday season. "
Estimated Cost$11-$20
Time to CompleteIn an evening
Main MaterialRecycled Materials

Materials List
- 8 Empty Activia non-fat yogurt cups 4 oz
- 6 Wiggly eyes (medium)
- 3 Old Christmas balls (with colored threads)
- 8 packs of metal tone wire 4.925 / 1.5 m
- Home Spun yarns (leftovers)
- Gravel or small stones
- Gold tinsel garland 15ft (old)
- Basket weave cloth (old)
- Ribbon (Offray)
- Needle nose plier
- Ice pick
- Glue gun and glue stick
- Elmers glue
- scrap styrofoam
- Ball pen and marker pen
- Ball pen and marker pen
- Scissor
- Floral wire
- scotch tape
- Small birthday candles (used)
- Green garland (used)
- Christmas lights (used)
You can arrange them in the best place you like to display with green garland and Christmas lights settings. I also put a small birthday candle in one hand of each two tall angels, while the small angel holds my wish card. In my case, I arrange them in the kitchen window which is in front of my kitchen sink. So I can always see them and easily turn on the Christmas lights while I wash the dishes. I also have a plate with the Lords prayer hanging above. They make me smile and feel happy for the day.
Instructions
-
SMALL ANGEL- FACE - The one with the pin should be the bottom part of the head. Glue the wiggly eyes into the Christmas ball with super glue to make a face of an angle. Be sure both eyes are well aligned on the face. Cut a lip shape on any red colored page of a magazine and glue it on the face. Put the Christmas ball on top of one Activia cup to let it dry first. Set it aside.
-
HEAD Cut 4 inches metal tone wire and insert one end into the hole of the pin of the Christmas ball. Bend and press the wires together with needle nose plier and twist them. Hold the wire with one hand while you carefully attach the yarn around the head with Elmers glue. Start gluing from the lower back of the head until you reach the top end. Filled one cup with gravel temporarily and stick the wire into the gravel to keep the head standing. Set it aside.
-
Cut a round-shape basket weave cloth with 5 inches circumference. Find the diameter and run the scissor through it. With your glue gun, carefully attach the ribbon around its edges up to the cut diameter. Be sure to apply small amount of glue only and make some adjustments as you curved around the edges of the cloth. Trim any excess cloth. Make a separate red ribbon and dont cut the excess floral wire. Set them aside.
-
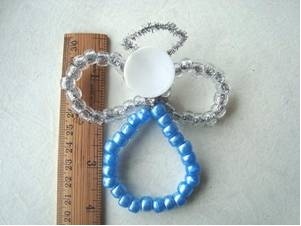
Divide one pack of metal tone wire into 2 parts and cut them with a needle nose plier. This will be the HANDS. Divide another one pack of metal tone wire again into 2 parts and cut them with a needle nose plier. This will be the WINGS. Cut 20 inches metal tone wire. This will be the HALO. Cut (3) 1 in (L) X in (W) X in (thickness) styrofoam. Set them aside.
-
HALO - Using your ball pen, tie one end of the wire around it until you reach the end to make a spiral shape and then remove the pen. Stretch out both ends of the wire a little bit and twist them together. Carefully poke the ice pick into the upper back center of the head to make a small hole, but not going through deep enough. Insert the end wires into the hole of the head. Set aside the HEAD on an empty cup.
-
HANDS - Cut the edges of the one cup to make it round. Carefully poke the ice pick into the center side of one Activia cup to make a small hole. Do the same on the other side. Insert the metal tone wire into the first hole. With the styrofoam on hand, insert the wire through its center and passing through its other side. Put the styrofoam inside the cup and finish inserting the wire passing through the second hole. Balance both wire ends. Using your marker pen, tie one end of the wire around it to make a spiral shape and remove the pen. Do the same procedure with the other end. This will be the FRONT SIDE. Do not glue any crumpled page on this part.
-
WINGS Using the same cup where the HANDS are, carefully poke the ice pick into the back side of the cup to make a small hole. The holes should be leveled with the styrofoam inside. Using your marker pen, tie one end of the wire around it until you reach the end to make a spiral shape also and then remove the marker pen. Do the same with the other wire. Stretch out one end of each wire a little bit and twist them together. Insert them into the hole passing through the end of the styrofoam. Using your needle nose plier, bend both ends of the wire at the side of the styrofoam. Bend the other end of the wire outside the cup to close one wing. Do the same with the other end. Be sure to connect both wings as you close the last wire to make it stable. Insert 2 chunks of styrofoam on top and carefully poke the wire of the HEAD into the center of the two chunks of Styrofoam and carefully press down .
-
Insert the basket weave cloth on the neck area with the cut diameter running through at the back. With your glue gun, attach the cloth around the edges of the cup. Attach the ribbon by inserting the floral wire into the cloth and glue it.
-
BODY - Crumple a page of old magazine. With the glue gun, apply only small amount of glue on one spot of the side of the first cup as you attach one crumpled page. Too much glue can damage the cup. Glue another crumpled page on top of the previous page more time. Half filled the first cup with gravel or small stones. Attach the next cup (HAND part) on top of the first cup. Glue the gold garland around the body starting from the bottom part going up. Keep the garland from being tangled around the wings, hands, and halo. Cut the excess garland and put a scotch tape at the end to keep it from getting loose and then glue its end. Stretch out all the wires of the hands, wings, and halo to form their respective shapes.
-
TALL ANGEL- Do the same instructions from #1 to #7 except the #8. When it comes to BODY, add another cup to make the angel taller. On the first cup, glue one crumpled paper around its side. Glue another crumpled page on top of the previous crumpled page. On the second cup, glue one crumpled page only. Partially filled in the first cup with gravel or small stone. Put the second cup on top of it and then the last cup (HAND part). Do the same instruction as per #9. Do the same procedures for another tall angel.
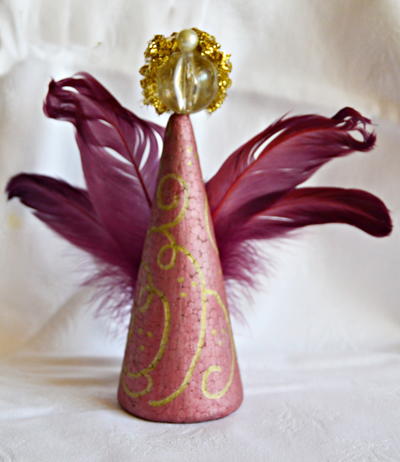
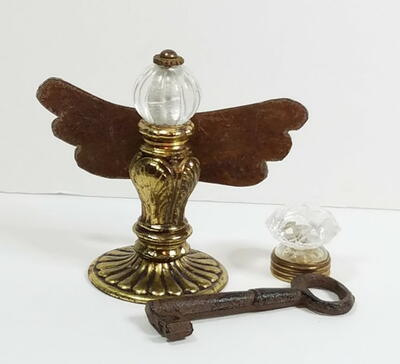
Read NextRepurposed Lighting Antique Angel