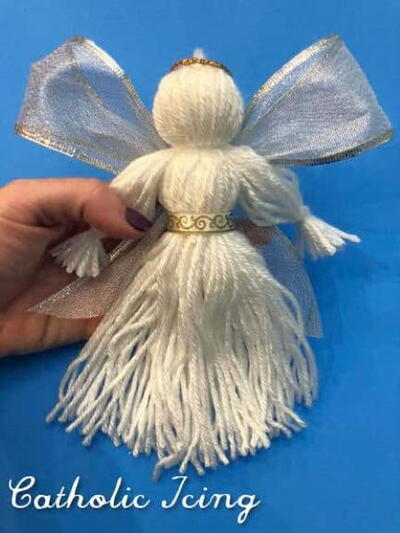
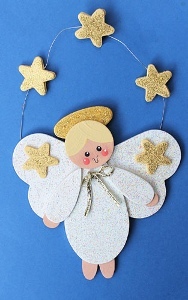
Grandma's Angel Garland

Whether you are looking to decorate your mantel or your tree, this Grandma's Angel Garland is a great way to add a touch of Christmas class to your decor. Made with fabric scraps, these angels are great for any home decor. You can string as many angels on this garland as you'd like...and you can even make each angel out of a different fabric for a more unique look. This is a great project for a cold dreary winter day, and your Christmas decor will thank you for adding this to your home!
Primary TechniqueFabric Crafts

SeasonWinter
Sewn byMachine
Materials:
Makes 4 Angels
- 2/3 yd. cotton fabric for arms and bodies
- ¼ yd. or fat quarter cotton fabric for wings
- 8 cotton balls
- 2 yds. satin ribbon or cord for waist sashes 1/8” to ¼” wide
- 18” gold cord for halos
- Piece of fusible web the size of 4 of the wing template below
- Thick tacky glue
- Scissors
- Tube turning tool such as QuiltWoman.com Quick Fabric Tube Turner (optional)
- Angel Wing Pattern
Instructions:
Read all instructions below before beginning so you can plan the length of your garland.
- Creating the Arms: Cut a strip of fabric 2 ½” x width of fabric (approx. 42”). Fold strip in half lengthwise, right sides together, and sew a long tube using a ¼” seam, including one end. Turn tube right side out. Tie a loose knot close to the closed end of the tube. Continue to tie knots with approx. 6” space between them to form the hands. Space them evenly. Turn the raw end inside and stitch closed. If you want a longer garland, just cut more 2 ½ strips and add them to the end of the first one.
- Angel Body: Cut a piece of fabric 10” x 20”. Place a cotton ball in the center of the wrong side and smooth the fabric around the ball to form the head. Tie around the fabric at the neck with thread. Place body over arms, centering between two knots. Tie around waste with thread. Tie ribbon around waist and tie with a bow. Cut the ribbon ends at an angle or knot cord ends to avoid fraying.
- Hair and Halo: Apply glue to top of head and attach a cotton ball for hair. Cut halo cord into 4 even pieces. Form one into a circle and glue to hair. Let dry.
- Wings: Fuse two pieces of wing fabric wrong sides together with fusible web following package instructions. Cut out wings. Fold on line and glue along line to back of body with top of fold starting just below head.
 You can find this project-and many more-in our new free eBook, 11 DIY Christmas Decorations and Ideas.
Read NextMesh Ribbon Christmas Angel
Your Recently Viewed Projects

Thanks for your comment. Don't forget to share!
paver2
Oct 10, 2018
That's unique and very pretty and not nearly as hard as it looks at least the instructions don't look that hard. I haven't tried it yet because I don't have the kind of material I want to use for it. This is neat because the angels can be any color you want them.
Report Inappropriate Comment
Are you sure you would like to report this comment? It will be flagged for our moderators to take action.
Thank you for taking the time to improve the content on our site.