No-Brainer Crochet Chair Mats
Give your patio chairs a makeover without spending a bundle. These No-Brainer Crochet Chair Mats are so easy to make - you don't have to be a crochet effort to make some for yourself. Save your favorite t-shirts and use them for this quick and easy project. Scour your local thrift store for old chairs or head to a garage sale. No matter what, you'll spend less than you would at a big-box home goods store.

Materials:
- Light to medium weight cotton fabric
- Scissors
- Rotary cutter and mat (optional)
- Ruler
- Crochet hook-size N
Note:
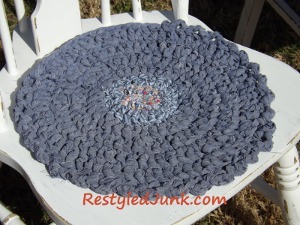
The amount of fabric needed depends on the size of the chair rug desired and the weight and texture of your fabrics. I used sheets, bed skirts and fabric scraps for my examples. My rugs are 15 inches in diameter and were made to fit my chairs.
Preparing the Fabric Yarn:
- Working across the length of your fabric, cut strips. For lightweight fabric I cut 1-inch-wide strips. To get stitches with approximately the same gauge, I cut 1/2-inch-wide strips from medium weight fabric. A rotary cutter and ruler will give you precise cuts, but the cut edges do not necessarily need to be straight and crisp since they will not be seen in the finished rug, cutting with scissors works just fine. Turn on a movie and snuggle up on the couch with a pile of fabric scraps and your scissors to make the job of strip cutting a little less tedious.
- Fold one end of a strip over 1/2 inch. Snip the center of the fold with a 1/4-inch slit. Unfold the end and you will have a 1/2-inch hole. Repeat on the other end of the strip and on both ends of each of your cut strips.
- With the end of one strip in one hand and the end of another strip in the other hand, place the right end over the left end. Line up the cut holes. Bring the other end of the right strip under the holes. Insert the strip into the holes and pull it through to the top. Continue to pull the entire strip through, locking the ends in place. You will have one continuous fabric yarn strip. Add the remaining strips in the same way. Roll the fabric yarn into a ball to prevent tangling. Note: If you run out of fabric yarn before you have completed your rug, you can easily add additional strips to the end as needed.
Crocheting the Chair Rugs:

Abbreviations:
ch = chain
dc = double crochet
sl st = slip stitch
Round 1
Loop the end of the fabric yarn in your hand to begin a magic ring. Using a size N crochet hook, ch 3 (counts as first dc) in the ring. Crochet 11 dc in the magic ring for a total of 12 dc. Pull the tail of the fabric yarn to close up the center. Sl st to the top of the beginning ch 3.
Round 2
Ch 3. 2 dc in each stitch for a total of 24 dc. Sl st in the top of the beginning ch 3.
Round 3
Ch 3. *Crochet one dc in the first stitch and 2 dc in the next stitch. Repeat from * around the rug for a total of 36 dc. Sl st in the beginning ch 3.
Increase rounds are done by adding dc stitches in a series before ending with 2 dc in the final stitch of the series.

Examples:
Crochet one dc in the next two stitches and 2 dc in the next. Continue around. (48 dc)
Crochet one dc in the next three stitches and 2 dc in the next. Continue around. (60 dc)
Continue rounds with increases until the rug is the desired diameter. Note: Each increase round will grow by 12 dc.
Last Round:
Ch 3. *skip next st, sl st in the next, ch 3. Repeat from * around the rug. Sl st to the base of the first ch 3.
Finish off and weave in the end on the back of the rug.

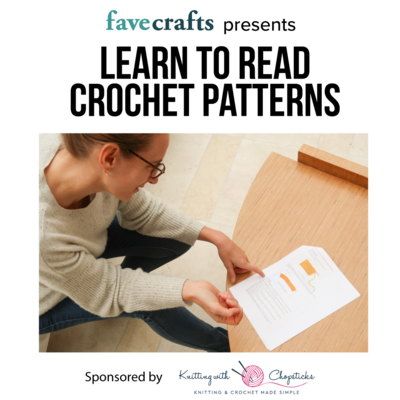
Read NextLearn to Read Crochet Patterns
Your Recently Viewed Projects
Thanks for your comment. Don't forget to share!
princess6860504
Jan 14, 2018
Personally, I would not have the patience to tear up into strips all those tee shirts. I would want to get started on my chair cushions right away! These are adorable. Can I use the Bernat Handicrafter for this instead? Yes. They seem like they will work up so fast. The look on those country chic wooden chairs is so, so right! I could make a bigger sized one very easily by just doing a couple more increased rounds and it'll make a good sized one for my mom's rocking chair. Thanks for posting this pattern!
Zeemer
Jun 03, 2016
Old t-shirts for this project?Really? Sounds interesting. I need to see how it goes with an old t-shirt for the yarn. Goo thing the pattern is just right on the same page. Thanks.
Heidi Lorene
Mar 21, 2016
This is a really fun idea. Its nice to see the instructions for making the fabric yarn also. I had wondered how that was done
kmlrtime 9158011
Apr 07, 2014
This looks like a fun and very practical project for 4 ice cream table/chairs I have on my front porch, but I'm wondering if I couldn't just use a thick acryllic yarn instead of fabric. What are your thoughts?
Melissa Ryan
Apr 07, 2014
Hi kmlrtime--I think you could easily do that! The cushions might come out smaller or larger depending on the gauge, but I think that is an easy swap for making these cute cushions! Be sure to let us know how it goes! Thanks!--FaveCrafts Editor
Report Inappropriate Comment
Are you sure you would like to report this comment? It will be flagged for our moderators to take action.
Thank you for taking the time to improve the content on our site.