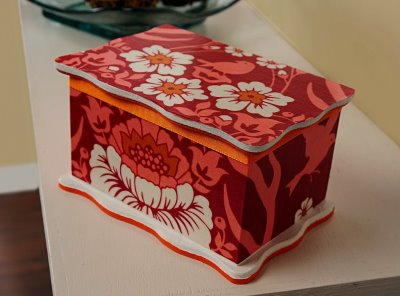
Fabric Floral Trinket Box
Use fabric to decoupage a plain wood box in this fun project from Amy Anderson. Follow the technique to create a home decorating accent or a gift for a friend.

Materials:
- FolkArt® Acrylic Paint
Bright Baby Pink (optional)
Glazed Carrots
Wicker White
- Mod Podge® Fabric & Gloss
- Small Wood Trinket Box
- Joel Dewberry “Deer Valley Antler” Fabric, Peony – 1/2 yard
- 1/2" Orange Ribbon – enough to fit around your box
- 1” Flat Paint Brush
- Craft Glue
- Craft Knife
- Pencil
- Ruler
- Scissors
- Wax paper
- Acrylic Sealer (optional)
Instructions:
- You will first want to prepare the fabric before painting. To do this, wash and dry the fabric (do not use fabric softener). Iron and then lay out on a covered work surface. Wax paper is preferable for covering your table. Using a brush, paint a light coat of Fabric Mod Podge onto your fabric. Allow to dry. This will allow you to cut the fabric like paper without frayed edges.
- Time to cut out your fabric pieces. Lay the lid top down onto the fabric and trace. Cut out using the scissors. Measure the rest of the box from top to bottom and side to side with the ruler. Add up the inches and cut one strip to completely go around the middle of the box – remember to leave 1/2" extra for your seam in the back. Set aside.
- Time to paint. I basecoated the inside with Bright Baby Pink, but if you only want to buy a few colors, just use Glazed Carrots. Allow to dry.
- Basecoat the lid and the outside of the box with Wicker White. Allow to dry.
- Around the bottom rim, paint Glazed Carrots as an accent. You can do this with the 1” brush, but you may also want to go smaller. Your choice. Allow to dry.
- This is my favorite part! Adhere the lid and main body fabric using the Gloss Mod Podge. Completely smooth out all air bubbles and allow to dry for 15 – 20 minutes.
- Coat the entire box (inside and out) with at least two coats of Gloss Mod Podge. Allow to dry.
- Go back to the lid and trim any excess fabric around the edge with a craft knife.
- Cut the ribbon and glue around the top with the craft glue. I cut out spaces to fit the hinges in the back.
- Allow the trinket box to dry for at least 24 hours before using. I recommend spraying with several coats of acrylic sealer to completely finish your project and add durability.
Want more fun decoupage projects to try out? We've got you covered in our collection of 33 Fabulous Decoupage Ideas Plus 3 Helpful Tutorails.
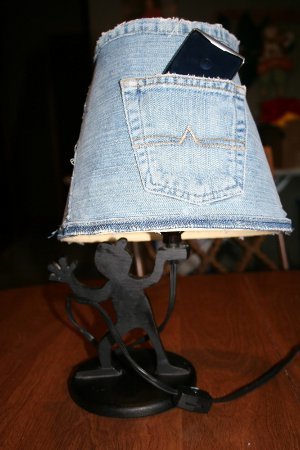
Read NextHandy Dandy Lamp Shade
Your Recently Viewed Projects
Thanks for your comment. Don't forget to share!
Weberme
Jan 26, 2018
I am getting a unfinished box next time I go too the craft store to make a fabric box for my granddaughter to put her jewelry in. I have used mod podge with scrapbook paper for decorating but not fabric yet. This is a good super easy tutorial to use to make one. I will have to make a few in different themes such as victorian,modern and one that just pops. This is going to be a blast and would be great to do with some family or friends.
flowergirl
Apr 30, 2017
I've always wanted a trinket box. I have a tonne of jewelry that sometimes get mixed up. The decoration looks amazing. I'll be sure to do it once I get a trinket box.
Report Inappropriate Comment
Are you sure you would like to report this comment? It will be flagged for our moderators to take action.
Thank you for taking the time to improve the content on our site.