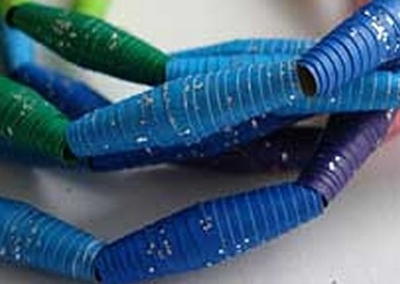
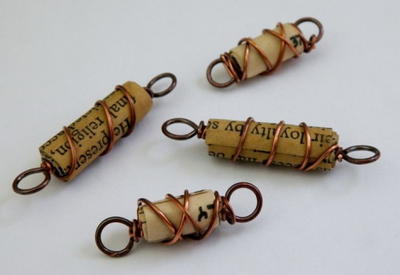
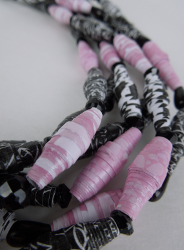
Rolled Scrapbook Paper Beads
Put away your die cuts and embellishments - it's time to change the way you look at paper. Create pretty jewelry using this technique for making Rolled Scrapbook Paper Beads from Tiffany Windsor. This is a simple and inexpensive way to create pretty baubles.
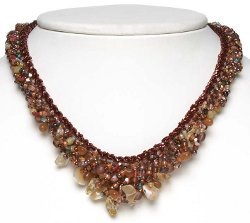
Love these beads, but not sure what to do with them? Check out How to Make an Anklet: 7 Jewelry Patterns for some inspiration.
Materials:
- Aleene’s Max Tacky Adhesive
- Scrapbook paper (I used 8-1/2″ x 11″ paper for this project but you can also use 12″ x 12″)
- Ruler
- Pencil
- Paper cutter
- Wooden skewers
- Open box (or other item to hang beads to dry)
Instructions:
-
Mark paper with pencil in 1/2″ increments at both top and bottom of paper.
-
Using marks as guide, insert paper into paper cutter and cut strips that measure 1″ wide at bottom and come to point at other end.
-
Place cut strips, one at a time, face down on work surface.
-
Starting approximately 2″ up from wide end, apply a line of Aleene’s Max Tacky Glue along center of strip all the way to the pointed end.
-
Place skewer across wide end and begin rolling paper around skewer. You want the paper to be smooth and taut but not so tight that it becomes glued to the skewer. Continue rolling until you reach pointed end.
-
If needed, apply a small dab of Max Tacky to pointed end to glue down securely.
-
Keeping bead on skewer, apply a large dab of Aleene’s Max Tacky over outside of bead and roll bead over finger to smooth the glue. This will now act as the sealer on the bead. (It will dry to a pretty, clear soft sheen finish.)
-
Immediately transfer bead to a clean skewer. Repeat to create desired number of paper beads. Let beads dry completely.
- String as desired to create necklace, earrings or bracelet.
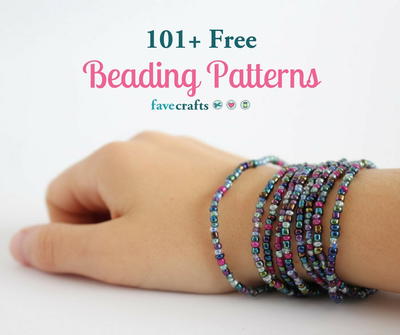
Read Next101+ Free Beading Patterns
Your Recently Viewed Projects


Thanks for your comment. Don't forget to share!
CrazyCatLadiesJewe lry on FB
Jun 02, 2013
Also, you don't need to glue down the whole bead, at least according to the YouTube videos I used to learn how to make beads. I've used just a bit at the end (which I then smear around the bead per step 7) and also Mod Podge the bead after it dries to give it a nice acrylic-type finish.
hjuliet 1548728
Jun 02, 2013
I have always used PVA glue but you can also cover the finished beads with acrylc artist varnish (matt, silk, gloss). I also use wrapping paper - save your paper from birthdays etc - you can flatten it by ironing wih a cool iron if it is really crumpled. Another alternative is to use newspaper and paint the beads with acylic paint or even decorate plain paper using marbling techniques (loads of info available on the web about that) or splatter (old toothbrush) then cut into beads. Making decorative paper first can add to the activity for kids over the holidays - decorate the paper one day, cut and make beads the next.
VeRajArt
Jun 02, 2013
I've never heard of Aleene's Max Tacky Adhesive. Would Modge-Podge work? One other tutorial I found on making paper beads suggested "white glue" but I'm not sure if she meant something like Elmer's School Glue or what. I currently have some Elmer's Glue-All and was thinking about buying some Modge-Podge for some other things as well. Would either of those work or should I buy some of this stuff, as well?
sewbeeit
Jun 01, 2013
Instead of purchasing scrapbook paper, I have made these out of colored, slick pages from magazines. The color variations are unique and so beautiful. I use toothpicks which make smaller holes and more bead like for my use.
Jeannean55 4676989
Jun 01, 2013
Some of the prettiest paper beads I ever made were from a full-sized Julia Roberts makeup ad in a magazine. She has beautiful coloring!
Report Inappropriate Comment
Are you sure you would like to report this comment? It will be flagged for our moderators to take action.
Thank you for taking the time to improve the content on our site.