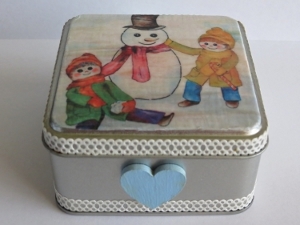
Frosty Peppermint Canister
This adorable Frosty Peppermint Canister is a great way to package little sweets and treats for your friends and family! Fill these adorable tins with handmade candies or cookies, or place a gift card or jewelry inside for a special someone. This is a fun and easy project that anyone can make, and it's sure to be a tin that is reused over and over again. Use the beautiful image provided to create your own Frosty Canister, or create your own winter image on the cover of this cute package.

Materials:
- Printout of provided artwork
- 3.3” square metal tin canister
- 0.2” wide white decorative lace tape
- Small flat-sided wooden heart
- Paper Seal
- Deco Art Glue
- Mod Podge
- Water-based varnish
- Powder-blue acrylic paint
- Super glue
- Hairdryer
- Paintbrush
- Pair of standard scissors
- Few sheets of old newspapers to protect the working area
- Old cloth
- Peppermints to fill the canister
Instructions:
Lid

-
Paint a thin layer of Paper Seal over the printout of the artwork. The Paper Seal will protect the ink from running and will make it easier to cut the printout to size without tearing it. Dry the printout thoroughly with the hairdryer.
-
Paint a substantial amount of Deco Art Glue to the back of the printout. Put it in position on the lid of the canister, but do not press it down. Note: For this project, the sides of the lid were not covered with the printout.
-
With the brush, spread glue to the front of the printout, lightly applying pressure so that the printout will stick to the lid.
-
Working from the middle of the printout, and from inside towards the outside, rub out all the air bubbles and excess glue from the back of the printout. Use an old cloth to clear any excess glue from the lid of the canister.
-
Use the hairdryer to dry the printout thoroughly.
-
Cut of any pieces of paper that may protrude over the edge of the lid.
-
Paint a thin layer of Modge Podge over the printout. The Modge Podge will protect the pictures and give the product a smoother finish. Dry the lid thoroughly with the hairdryer.
-
Gently brush some Deco Art Glue onto a section of the decorative lace tape. Glue it in place along the side of the lid, and dry it with the hairdryer so that it will stick. Use the tape to cover the whole side of the lid in this manner.
- Add a layer of water-based varnish to the top and sides of the lid, and dry with the hairdryer.
Bottom

-
Gently brush some Deco Art Glue onto a section of the decorative lace tape. Glue it in place along the bottom edge, and dry it with the hairdryer so that it will stick. Use the tape to cover the whole bottom edge in this manner.
-
Use the powder-blue paint to add color to the wooden heart. Allow to dry thoroughly.
-
To protect the paint, add a layer of water-based varnish to the wooden heart and allow to dry thoroughly.
-
Use the super glue to adhere the wooden heart to the bottom of the canister.
- Fill the canister with the peppermints.
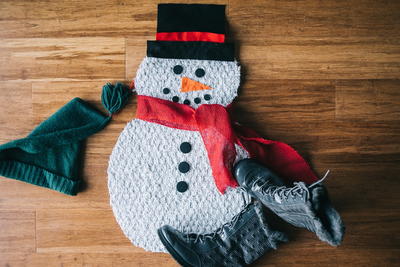
Read NextHoliday Snowman DIY Doormat