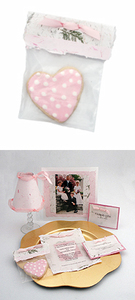
Personalized Message Tea Bags
Make tea bags with a message! It's easier than you think.
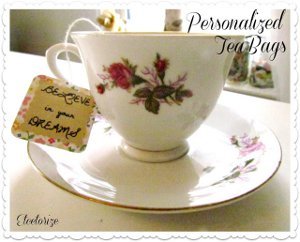
Send someone a little personalized greeting with their afternoon tea with this cute Personalized Message Tea Bags tutorial.
With a few simple materials, you can create these cute tea bags that would make great shower, wedding, or party favors. This is also a great project for using up any leftover paper scraps that you may have lying around.
The designer used these personalized tea bags as Christmas gifts. Let us know in the comments what occasion you'll make them for!
If you love tutorials like these, let us know by subscribing to one of our newsletters:
Sign Up for Quick and Crafty
Sign Up for The Wedding Planner
Sign Up for Trash to Treasure
Personalized Message Tea Bags
Materials
· Pretty papers (one sheet of two sided patterned and one sheet of plain)
· Mod Podge
· Sponge brush
· Tea (if you can find the tea that's already on a string that's best. That way you don't have to add your own.)
· Cutting machine or pen and scissors
· Tea Bag Sentiments

Instructions
1. This project is so easy but does require a tiny bit of prep work. First, you need to decide what you want your tea bags to say. I used positive affirmations but you could send more personal messages, love notes, or anything else you want! I shared mine with you to get you started (click on Tea Bag Sentiments above). Have fun, play with fonts, colors, and sizes. I use my Silhouette machine to write them all out into cute little frames and then cut them out, but you can still do it old school and just use simple shapes. Here's what they looked like all cut out:

2. Cut out small squares of pretty scrapbooking paper to use as your background. It's best if you use two sided paper. Your squares need to be just a bit bigger than the ones you made above, see pic #2 below.

3. Take your teabags out of the box and unwind all of the tags. I had to trim mine just a bit.

4. Apply some Mod Podge (or other adhesive) to the back of one of your text pieces, and place the tea bag tag on top.

5. Add just a bit more glue onto the tag you just added and place the whole thing onto one of your background papers.


6. Now just repeat until you've tagged all of your tea!


Up Next:
Read NextPersonalized Message Tea Bags
Your Recently Viewed Projects
Thanks for your comment. Don't forget to share!
Report Inappropriate Comment
Are you sure you would like to report this comment? It will be flagged for our moderators to take action.
Thank you for taking the time to improve the content on our site.