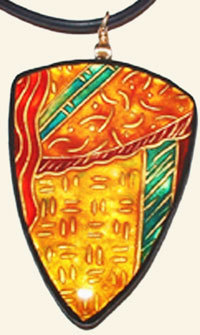
Fake Enamel Pendant
Enamel is lovely, but it is very expensive. Create a beautiful piece of jewelry at a fraction of the cost with this craft idea from Jacquard Products.

Materials:
- Gold Premo! Sculpey polymer clay
- Black Premo! Sculpey polymer clay
- Jacquard Piñata inks in variety of colors
- Jacquard Pearl Ex - Aztec Gold
- Spray mist bottle with water
- Speedball Speedy Stamp carving block
- Carving tool
- Plastic palette tool
- Liquid Sculpey
- Clay blade
- Glass or plastic sheet for palette
- 2” 19g. gold wire
- Envirotex Lite two-part epoxy resin
- Rubber cording and closure findings
- Gold accent bead
Steps:
- Carve a variety of doodle patterns in the rubber stamp. Drawing with a pencil first can help you plan the space. Carve lines about 1/16th of an inch deep.
- Mist the stamp surface with a spray of water. Roll about 1/4 of a block of gold clay into a sheet 1/16" thick. Press the clay onto the stamp, pressing firmly over the entire surface.
- Trim the sheet to a pleasing shape, being mindful of the composition created by the changing areas of pattern.
- Dust the surface thoroughly with Aztec Gold Pearl Ex powder. Bake the sheet according to the manufacterer’s recommendations on the clay package.
- While the clay is baking, squeeze several nickel-sized pools of Liquid Sculpey onto the palette. Tint each with one-two drops of Piñata ink. Stir with plastic palette knife. These colors can also be blended and mixed to create intermediate shades.
- When the clay is cool, drizzle colors into the various pattern areas on the surface. Try blending colors and adding tiny amounts of contrast colors into some areas. Bake the clay for 10 minutes or cure the Liquid Sculpey surface with an embossing heat tool.
- Press additional clay to the back of the pendant shape and bevel the edges to create a rounded back. This clay can be scrap clay or any color.
- Roll a sheet of black clay 1/16" thick and slightly larger than the pendant. Press the black to the back and wrap smoothly to the front.
- Trim the excess clay from the front even with the plane of the surface. Bake the pendant again.
- Finish with a coating of epoxy resin, following package directions carefully. After the finish has cured, drill a 1/2" deep hole in the top and glue in a hangman’s loop eyepin and accent bead. String on black rubber or satin cord.
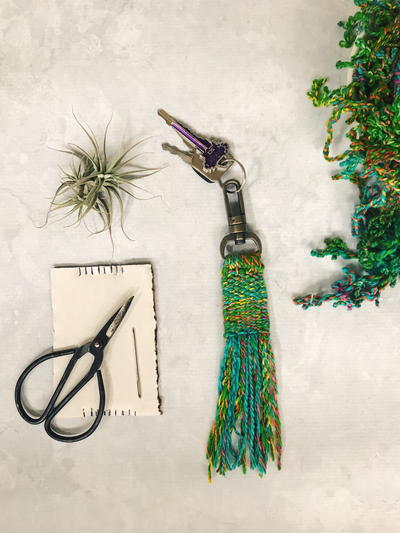
Read NextDIY Woven Tassel Keychain