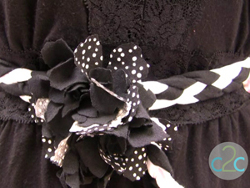
Braided Fabric Belt
Add a fun touch to a boring outfit with a Braided Fabric Belt from Heidi Borchers. Upcycle an old t-shirt and use an empty water bottle to create the base of the belt. Plastic bottle crafts help the environment and add a cool dimension to your overall look.

Materials:
- Aleene’s Fabric Fusion Peel & Stick Sheets
- Aleenes’s Fabric Fusion Permanent Dry Cleanable Adhesive
- T-shirt – cut into strips (for belt)
- Cotton fabric – to cover belt buckle and use for fabric die-cut flowers
- Flower die (to cut different sizes and shapes)
- Water bottle – smooth sided
- Craft rivets and rivet setter
- Paper punch (to match size of rivets)
- Scissors
- Circle template
- Pen
- Clothespins
Instructions:
-
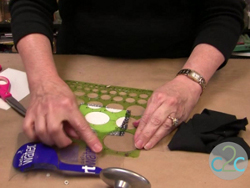
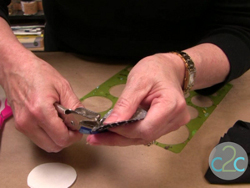
Cut water bottle apart so that it will lay flat on work surface. Lay circle template over bottle and mark circle. (For this belt buckle, I used a 2-1/4″ circle template.)
-
Cut along pattern line.
-
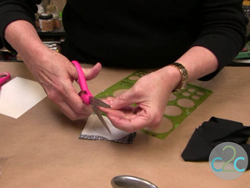
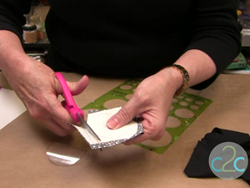
Apply Aleene’s Fabric Fusion Peel and Stick sheet to back of cotton fabric. Mark with 2-1/4″ circle. Cut along pattern line.
-
Remove paper backing and adhere to water bottle circle.

-
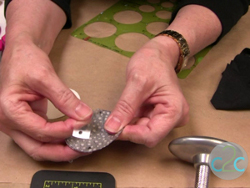
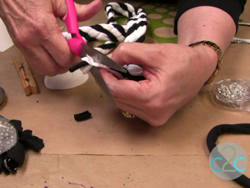
Punch two holes approximately 1/4″ from edge directly across from each other on circle. (This will be where you insert your rivets.)
-
Cut strip of water bottle approximately 1/2″ wide x 2-1/4″. Punch at ends of strip to match punched holes in circle.
-
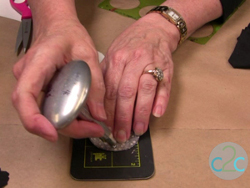
Insert rivet through front side (fabric side) of circle, add water bottle strip and rivet in place.
-
Repeat on both ends. You should now have a circle with a water bottle strip riveted to the back side.
-
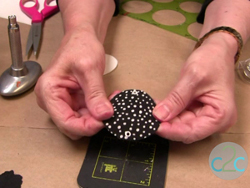
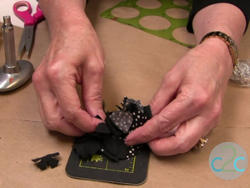
Layer flower petals of different sizes and glue together with Aleene’s Fabric Fusion Permanent Dry Cleanable Adhesive. Repeat to create several layered flowers.
-
Glue flowers closely spaced side-by-side to the front of circle. Set aside to dry completely.
-
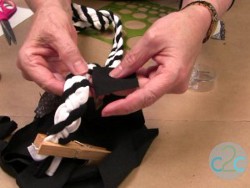
Cut strips of t-shirt to use to braid belt. The wider the strip, the more predominant it will be in the braid. Stretch cut strips. To create the 4-strand braid, go to YouTube.com and search for 4-straid braid. You will find many tutorials there to teach you this technique.
-
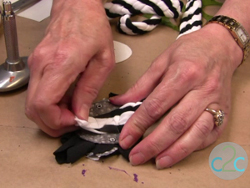
When you reach the end of your braid, stack the strips and glue together with the Aleene’s Fabric Fusion Permanent Dry Cleanable Adhesive.
-
When the glued strips are all stacked, cut ends even with scissors.
-
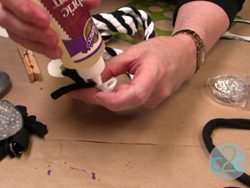
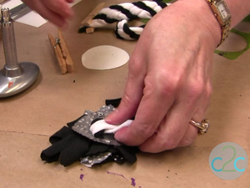
Carefully insert the cut ends underneath the strip.
-
Pull the ends through and fold back over the strip approximately 2″. Apply Aleene’s Fabric Fusion Permanent Dry Cleanable Adhesive and use a clothespin to hold in place until the glue is completely dry.
-
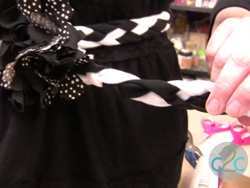
Repeat the gluing process to stack the other unfinished end of belt and let dry completely. To wear the belt, slip the end of braided belt under the loop and pull to adjust to desired length.
For a comprehensive video tutorial of this project, check out How to Make a Water Bottle and Braided Fabric Belt.
Your Recently Viewed Projects


Thanks for your comment. Don't forget to share!
Report Inappropriate Comment
Are you sure you would like to report this comment? It will be flagged for our moderators to take action.
Thank you for taking the time to improve the content on our site.