Ombre Tie Dye Shirt Wall Art
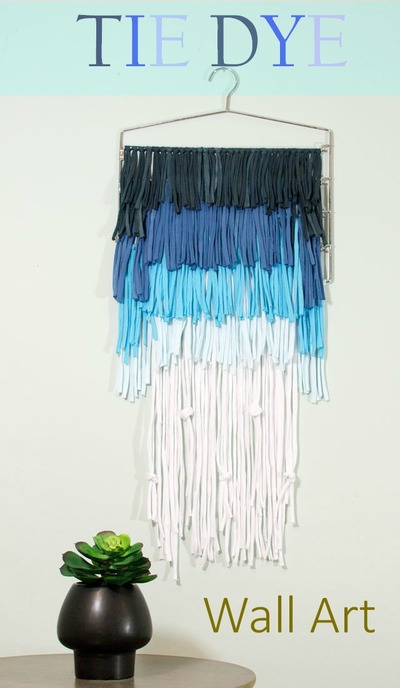
If you know how to tie dye a shirt, then you know how to make your own Ombre Tie Dye Shirt Wall Art. Instead of simply wearing the shirt, create yarn from the fabric. A multi-hanger helps bring this fun and imaginative project to life.
Primary TechniqueGeneral Crafts

Materials:
- White tee shirts (I used one tee-shirt for each row)
- Clothing multi-hanger
- Tulip Tie Dye kit - America's favorite tie dye
- Plastic sheet
- Plastic gloves
- Bowl (stainless steel or glass)
- Plastic grocery bags
Instructions:
- Select your colors of choice. For mine, I chose varying shades of blue to create a gradient pattern.
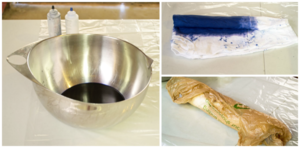
- Working with one dye at a time, fill your first bottle + shake well. For this project, you'll be using a bowl instead of the squeeze bottle, so save that bottle for your next tie dye project.
- Pour your dye into the bowl. Fill that same bottle with water again, and add to the bowl. Gently mix. Next fold your tee shirt in half length-wise. Working from the bottom up, dip the shirt into the dye. It's important to get complete coverage from the underarm of the tee shirt to the bottom hem, as that's the part you'll be using to create your tee shirt yarn. Once you've sufficiently soaked the shirt, squeeze well and wrap in a grocery bag. Let set 8-10 hours or overnight. Repeat these steps with all your remaining dyes.
- After the allotted time, follow box directions on washing and drying your tie dyed tee shirt. Once done, you can begin making your yarn. Making tee shirt yarn is easy, but there are specific steps to take. Instead of repeating those here, I'll refer you to the website I used when making mine, Craft Passion. Their step-by-step instructions are very easy to follow.
- Once you've created your yarn, come back and we'll finish up our piece. The next part is where the fun begins.
- Now wasn't making tee shirt yarn fun? I caught up on the latest episodes of Mad Men while I made mine.
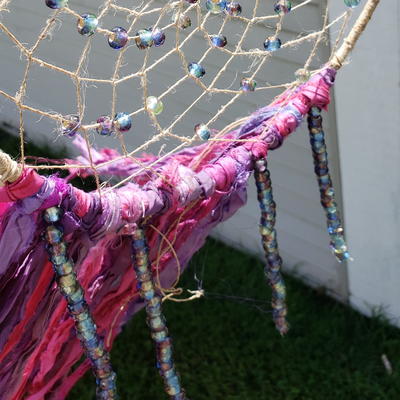
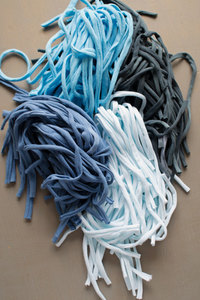
- Deciding what lengths to cut your piece of tee shirt yarn will vary on personal preference. Here's what I did with mine:
- Black: 10"
- Navy: 14"
- Aqua: 6"
- Mint: 18"
- White: 20"
- Using my multi hanger as my base, I began looping yarn onto the bottom row (white) and worked my way up.
- Simply loop your yarn over the bar and tug tightly for a snug fit. My pattern used 22 white in the center and 4 mint on either side to total 30 strings of yarn per row. Continue that pattern with each row until you come to the top row, where you'll use all black yarn to total 30.
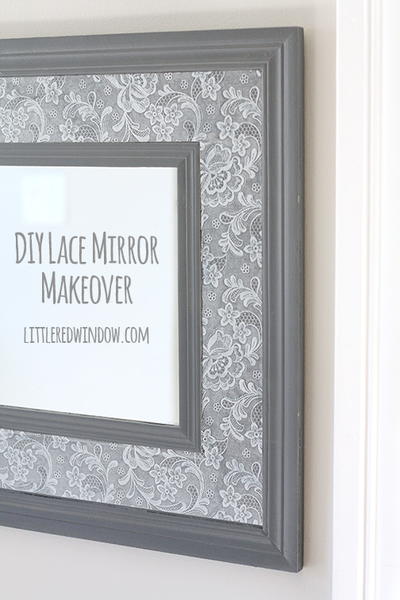
Read NextLace Mirror DIY Wall Art
Your Recently Viewed Projects
Thanks for your comment. Don't forget to share!
flowergirl
May 25, 2018
Woah! What a fun and creative use for old tees. I love the fringe detail as a wall hanging, I've been seeing these types of wall hangings but I didn't think of using t-shirts to do this. You can use up the leftover fringes to make bracelets or a t-shirts yarn bracelet in ombre.
Mrs Nesbitt
Dec 18, 2015
I've seen these everywhere lately! I feel like this would make fun dorm room decor.
Report Inappropriate Comment
Are you sure you would like to report this comment? It will be flagged for our moderators to take action.
Thank you for taking the time to improve the content on our site.