Mosaic of Paint Chips
Don't throw those old paint chips out! Arrange them artfully into a mosaic of paint chips to hang in your living room and you'll be decorating on the cheap with this paint chip craft from Jennifer Neill.

Materials:
- Plywood or a pine panel (my board is 20x20 inches)
- Paint chips
- Spray adhesive
- Acrylic paint
- Mod Podge Matte-Mat
- Stain
Instructions:
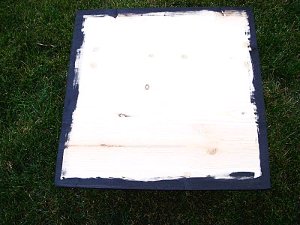
- I began by painting the sides and edges of my board black. I used a pine panel, because I had it cut out to use for a frame already, but plywood or MDF would also work. (For some reason, I began this project at nightfall, so the photos are on the dark side.)
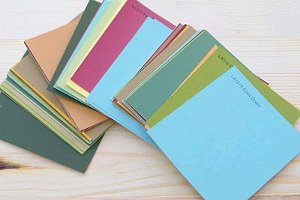
- Here is my paint chip collection, but you could easily cut squares of scrapbook paper for a similar effect. To get the randomness right, I simply shuffled the chips several times like a deck of cards:
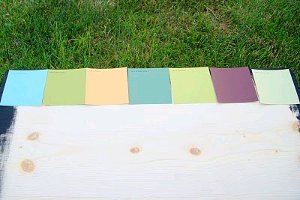
- I laid out the cards to get an idea of spacing:
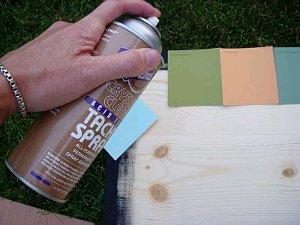
- The next step is to simply spray a line of adhesive and stick on the paint chip squares. Now repeat, again, and again:
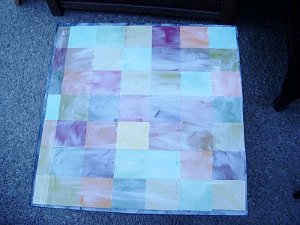
- See? All finished! Now, let this dry well. Go over it once in awhile to smooth any edges that might begin to come unstuck.

- Once the adhesive was dry, I touched up any sticky spots on the painted edges with more paint to even out the color.
- Now, apply 3 coats of Matte Mod Podge to get a nice smooth surface.
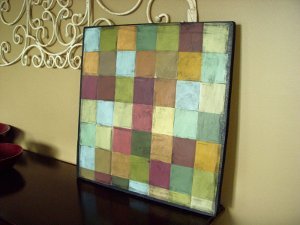
- Let dry overnight, then rub stain over the whole piece with a rag. Make sure to really get it into all the cracks and seams so they look darker and defined.
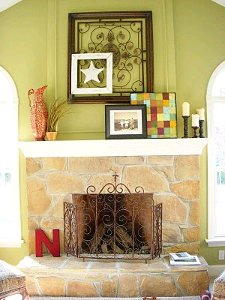
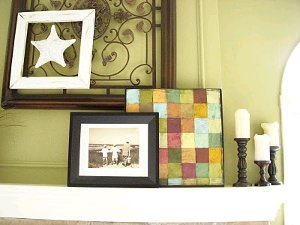
- Layered behind the photograph on my mantle, it gave the punch of color and textural interest I was looking for. And, for $10 total, the price was right, too!
Read NextBeachy Pom Pom Wall Hanging


Thanks for your comment. Don't forget to share!
Marilyn B
Jun 05, 2017
Keeping the paint chips in a row is one way of arranging this art, and you could even overlap or cut off the paint names. But is could also see arranging these sample chips in a spiral design for some different effects or even just a random pattern with some of them overlapping to give it more dimension and eye interest. I always wondered what I could do with discontinued samples.... A really fun project!
ktrainor501 753666 0
Jun 19, 2014
I do ceramics sometimes and I have used a walnut stain on them which I am quite happy with the results. I brush it on and wipe off as much as I want to take off with a clean rag. The ceramic stain comes in many shades of brown. I think that is what I will use on this project.
Melissa Ryan
Jun 13, 2014
Hello, Seems like a lot of people have had questions about what type of stain to use for this project. I checked in with the designer and she does not mention a particular type on her original project. We've reached out to her for clarification and will let you know as soon as we hear more! Thank you! --FaveCrafts Editors
truxr4me2 4062418
Jun 13, 2014
Ok i have read all the comments...no one is mentioning what kind of stain??? I'm guessing your talking about just a light wood stain??? This really does seem like something that would be fun to do, my daughter and i could both make one in different shades of colours. Thank you for the idea, and if someone has the answer about the stain....please post it!
truxr4me2 4062418
Jun 13, 2014
I love this idea for some fresh colour on a wall....tho no one has yet mentioned what stain!! Is it just regular wood stain and if so do we just pick what colour we want? I will watch for the answer :)
courtneykap 754311 9
Jan 08, 2012
I have a ton of paint chips so I will be giving this a try, but what kind of stain should I get?? I am assuming a light color? Any suggestions??
JennyBee1
Aug 31, 2011
@Karalee, Paint chips similar to the ones shown in this user-submitted project are usually are approx. 2 inches by 2 inches. To be sure, we suggest you contact the original designer of this project. The designer is specified in the byline. --Editor of FaveCrafts
Yvonne 2004
Apr 28, 2011
Hi there, A while ago I found a tip on the web of how to remove the print from paint chips. It was simple and it worked well. Unfortunately, I cannot remember what product I used. Anyone out there have any tips or ideas?
ithinkirock
Jan 24, 2011
oh this IS an awesome idea. my daughter collects paint chips every time we go to a hardware store just for fun... but now i know what to do with them LOL. thanks for sharing!!
Hope Studios
Aug 14, 2010
If you look closely you can still see the names of the colors on the chips. One of my friends got about 6 inches away from it to really inspect it and suddenly said "Oh look, you can still read the colors!" When viewed normally, you don't even notice them.
REBECKA
Aug 13, 2010
it would be cute to use the big paper punches making a variety of shapes too. Great idea! My son had just picked out paint chips a few weeks ago and said he was going to make this exact project, which is why it caught my eye. (he is 8)
Crafter 20780
Aug 12, 2010
This is a great idea! I personally will cut them down a little to take out the printed part & just have the color. Thank you for this cute idea!
sandikei
Aug 03, 2010
I would prefer to elminate the print on the chips. Does this disappear when you use the stain?
ramonacrafts
Aug 03, 2010
I like this idea, and will make one for my daughters apartment! VERY NICE.
Report Inappropriate Comment
Are you sure you would like to report this comment? It will be flagged for our moderators to take action.
Thank you for taking the time to improve the content on our site.