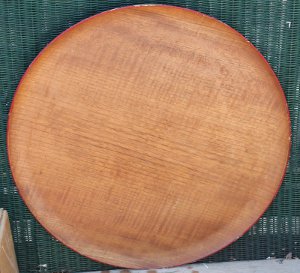
Giant Button Wall Art
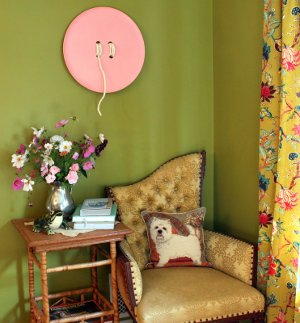
Sewists, crafters, kids, and adults will LOVE this Giant Button Wall Art from Mitzi Curi! Made with a large wooden circle, this simple DIY decor project is perfect for adding a splash of color to a small corner or your children's bedroom. This would also be an adorable addition to your future craft room. You could even use a variety of circles to create a whole wall of adorable colored buttons!

Materials:
- Round wood tray
- White spray primer (if you want to paint your button a light color)
- Spray paint in the color of your choice
- A drill with a large spade bit, about 1/2 to 3/4 inch in diameter (sometimes called a paddle bit)
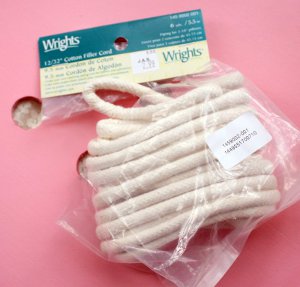
- Cotton filler cord (from the upholstery supply area of a fabric store)
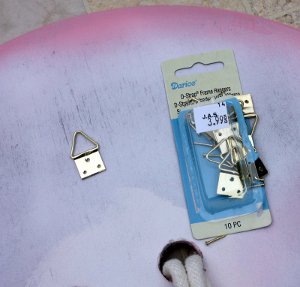
- A "D-strap" metal hanger
- Sandpaper
- E-6000 glue
Instructions:
-
I decided to prime the tray first with a couple light coats of white primer so I could see the marks for the drill holes and for better paint coverage.
-
Now I could measure the center and decide where to place marks for the four holes with a pencil. At first, I used a measuring method, then I said "heck with this" and I positioned four pennies where I wanted the holes and traced around them.
-
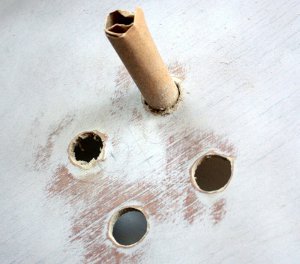
Using a drill with a spade bit, drill four holes. Tip: start drilling from the front of the tray. The inevitable splinters will show up more on the back. Of course, if you prefer two holes rather than four, that's fine too.
-
Sand the drilled holes so they are somewhat smooth. I rolled up a piece of sandpaper to get right inside. Surprisingly, the tray I used had cardboard sandwiched between the two layers of wood. Yours might not. Remove all the dust with a damp paper towel or tack cloth.
-
Now spray paint your button the color of your choice. I had to use about three coats of "Perfect Pink", waiting between each coat to dry according to manufacturer's directions.
-
Take your cording and thread it through the holes until you are satisfied with the appearance. I decided to leave a "thread" hanging out the front, and I tucked the other end in the back.
-
The package of D-strap hooks includes little nails, but I decided to use E-6000 glue instead because the tray was so thin I didn't think pounding a nail into it was a good idea.
-
FYI: I actually glued the hook closer to the top edge than what is shown in this picture. Wait 24 hours for the glue to cure before hanging.
- After the glue dries for 24 hours, your button is ready to hang!
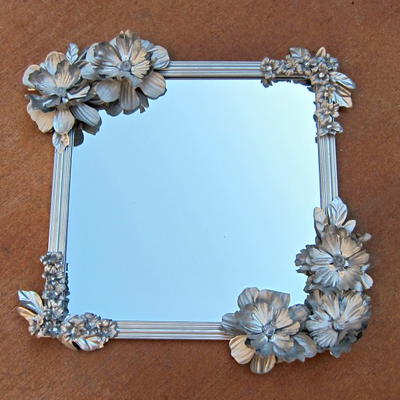
Read NextAnthropologie Inspired Mirror
Your Recently Viewed Projects


Thanks for your comment. Don't forget to share!
Weberme
Feb 11, 2018
I absolutely love this Giant Wall Button Art. What a great idea and so easy to make. This would look great in a sewing room to give it that special touch or I can see it in a kids room with some great paint colors. This would also be a super gift idea for a sewers wall and they will not believe you made it and you will not believe how easy it is. This would even be cute in different sizes to accent one wall. Great tutorial too.
Marilyn B
Jun 05, 2017
Great inspiration. In a pinch, if you could not do the wooden tray, you could opt for a circle of thick cardboard you paint and band around the edge with rid rac trim, paint on the circles and then glue on the cording for the thread. Another fun option would be to glue on real buttons all over the circle, or just in an edging pattern or design of your choice! Nice idea, thanks for sharing!
mulberrygalprinces s
Dec 15, 2016
Oh my gosh, how cute is this? I want to make it for over my craft desk. It's just so cute and fits right in. As I was looking at it, I thought how neat would the same idea be if it were made to look like a pizza and hung over my stove in the kitchen. This idea is going to have a snow ball effect on me. Thank you!
honey1 9116212
Nov 03, 2013
Joann's if you look under "Wood crafts" on line they sell the round circles. Here is the link-http://www.joann.com/crafts/general-crafts/wood-crafts/#prefn1=isProject&start=18&sz=18&prefv1=false
JPKittee51
Apr 13, 2013
This is a cute decoration that would be a conversation starter for any crafter!
marykayser 5527737
Mar 25, 2013
That really is cute. What a cute decoration for a sewing room.
caroleann77 209956 0
Nov 10, 2012
I love (wish I'd thought of) this. The perfect accent for a sewing/craft room. 'Sew' Cute, 'sew' many size and material (cardboard, styrofoam) and placement (on the door with "carole's sewing room" stenciled on it!) possibilities. Thank you 'sew' much!
thrificrafter
Nov 04, 2012
look at thrift stores...I think I've seen them before...weren't they popular in the 70's and 80's?
starry902 0373085
Nov 04, 2012
This is really cute!! My second thought was, how would it look if these giant buttons also held those curtains back?! I want to use this when we are done moving and I get to design my own craft/sewing room! thank you!!
Report Inappropriate Comment
Are you sure you would like to report this comment? It will be flagged for our moderators to take action.
Thank you for taking the time to improve the content on our site.