3D Style Wall Art Trees
Give any room in your house a unique feel with these 3D Style Wall Art Trees from Gloria Uhler. Using a stencil, you can create one or more trees on a solid colored wall for wall art decor that's sure to "stand out"!

Materials:
- Victoria Larsen stencils
- White Tub & Tile Caulking and gun - Lowe’s
- Painters tape - Lowe’s
- Yardstick or dowel
- Putty knife
- Ranger Perfect Pearls Palettes pigment powder - Michaels
Instructions:
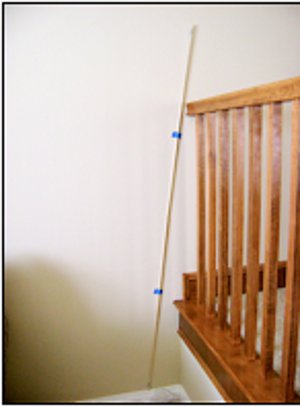
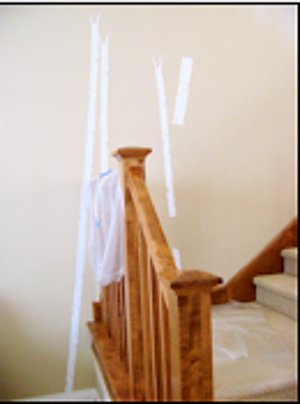
- Plan the number of trees you will create and their size. If you’re going to angle some trees, tape a yardstick or dowel against the wall as a guide and follow it as you position your stencils.
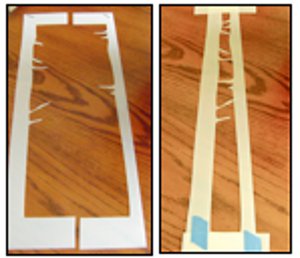
- If you won’t be using the largest tree trunk, you can cut it in half vertically to create a size that will work for your project. I taped mine back together making it only slightly larger than the smaller trunk. I also angled it so it tapered at the top.
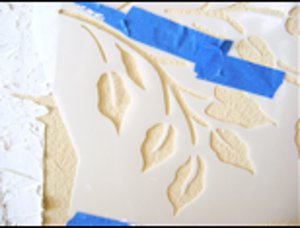
- The directions included with the stencils suggest using joint compound. Because I’ve successfully used tub caulking for this kind of job before, I chose to use it again. A caulking gun makes the application convenient. Fill in the center of the trunk stencil then use the plastic putty knife to distribute caulking to all open areas. Work in a well ventilated room and occasionally spray a good quality room deodorizer as you work to minimize the caulking smell. Glade Fresh Linen almost completely eliminates the odor.
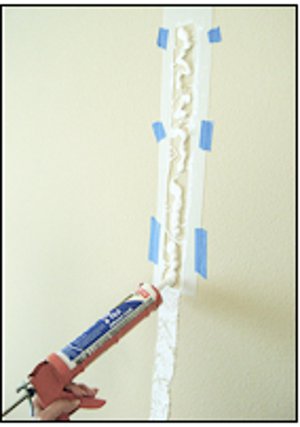
- Create all the tree trunks first by adding additional sections as you work up the wall and reach the desired height. Hold the stencil to the wall with painters tape.
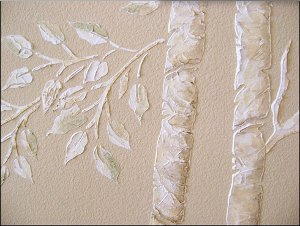
- If you like a lot of texture, the more irregularities in the caulking surface the better. Create a tree bark-like effect by dabbing at the caulking with the straight edge of the knife once the stencil is filled. Running the knife horizontally across the stencil will also create realistic ridges.

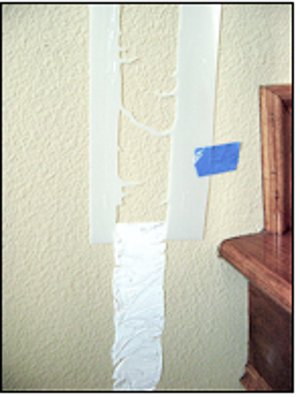
- Because you would have to wait for one trunk section to dry before repositioning the stencil again, you may want to cut off the blank margin on one edge of the stencil leaving it open at the bottom. This will allow you to align the stencil edges with the finished edges of the previous trunk and continue working. Use the knife to blend the joined ends of added trunks. Keep an oversized towel and a sink filled with sudsy warm water to wash caulking off both sides of the stencil before using it again.
- Once you have all your trunks in place, add tree tops and other branches.
- When adding leaves, keep in mind that you don’t have to use the entire stencil as is. Apply painters tape to close off openings in the stencil to create a smaller grouping. Also flip the stencil over to create leaves that bend in a different direction. Texture the leaves with the knife just as you did the trunks.
- When the caulking is thoroughly set, paint can be applied. For good color effects, determine the direction of the light source in the room. if it’s on the left as in my project, keep this in mind as you paint, making your darkest color on the right of images and lighter color on the left.
- Fill a small container with a wash made by mixing a little water with the original wall paint. Don’t dilute it too much or you will loose your color. Fleece or other similar fabrics make great paint applicators. Cut two pieces about three inches square, one for adding on, one for wiping away. Dip a portion of one of the pieces in the wash and dab it along the right side of the trunk and leaves. Create variety by painting some leaves with the dark side on the bottom and the light side on top and vice versa. Use the second fleece to wipe away excess or blend the paint from dark side to the light.
- Add green color accents to the leaves and gold to the trunks. I wanted to use pearl paint for both but couldn’t find colors I liked. Instead I found a pearl pigment powder sold for stamping and scrapbooking. Add a little water to some green powder and use the fleece add on and take away method to stain the right side of the leaves. Wipe away to the left. Add water to the gold powder. Apply the color to the right sides of the trunks. Also add gold color to the edges of the breaks in the trunks. This color is most effective when applied over surfaces painted with the wall color.
Read NextDip Dyed Macrame Wall Hanging
Your Recently Viewed Projects
Thanks for your comment. Don't forget to share!
Elizabeth J
Jun 23, 2017
I've never seen anything like this! It would totally be something that would add an interesting aspect to my home decor. I love that it's not too overbearing and the stencils are beautiful. I would love to try this on a canvas to make an art piece!
Member 0457151
Aug 02, 2015
Would love to try this in our stairwell, but does the tub caulking become a dust magnet due to its texture? Just concerned about how clean it can be kept.
Carol M 2075
May 12, 2013
Wow! What a fun and great idea!! Using the same color paint on the wall as the design is definetly more interesting without adding another color to keeps it delicate as well as subtle. One could do so many designs using your own imaginations too! Thanks for a wonderful idea.
jukeboxhero1234 25 47658
Apr 23, 2013
I love this idea and since we are painting the walls right now,I will definnetly try this.
mcconsbruck5775 43 75191
Apr 02, 2012
will try this on a smaller scale using a canvas board-maybe making a family tree
Report Inappropriate Comment
Are you sure you would like to report this comment? It will be flagged for our moderators to take action.
Thank you for taking the time to improve the content on our site.