How to Weave Without Special Equipment

Weaving can be an intimidating (and sometimes expensive) endeavor. With this simple tutorial for How to Weave Without Special Equipment, you can master this fun craft easily. You can create woven pieces without purchasing a loom or other special equipment.
All you need is an old picture frame, hammer and nails, thread, yarn, and some inspiration. This tutorial comes to us from Jenya of MyEvaForeva, who had no special knowledge of weaving before trying this out! That's how simple this is.
If you try this, leave us a comment below and tell us about your experience!

Materials List
- An old wood picture frame
- Nails
- Hammer
- Strong thread
- Yarn
- Scissors
Instructions
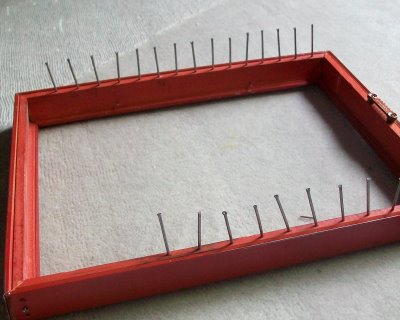
-
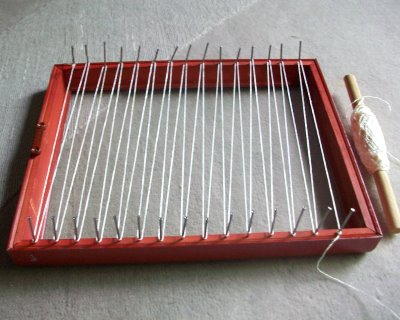
Hammer nails through the top and bottom of the frame about leaving about ¼ to ½ inch spaces between them. Please don’t judge my sewing by my nail hammering!
-
Using any type of strong thread or yarn secure one end over the first nail. Then just weave through each one making a zig-zag like in the photo. Secure the end over the last nail.
-
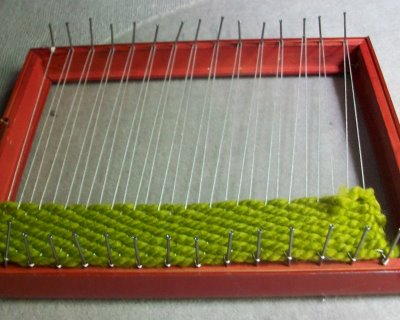
Pick a yarn (or whatever you’d like to use) and …start weaving. I just used my fingers to weave (guide) my yarn though the threads but it would be SO much easier if I’d have a special tool for that but for the purpose of this tutorial for a first time weaving experiment just put your fingers to work.
-
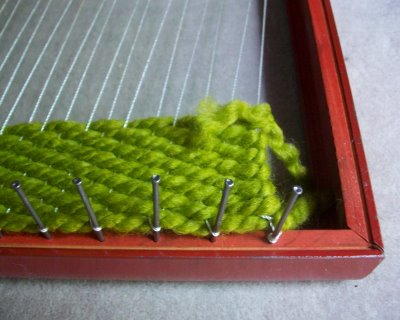
When I ran out of yarn I made knots so it doesn’t unweave.
-
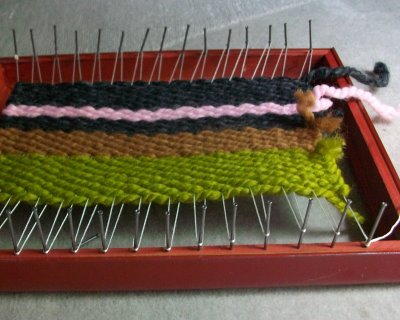
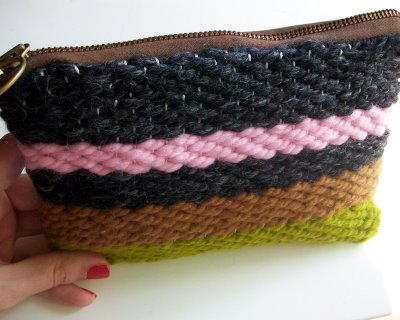
This is your finished product. Pretty!
-
I carefully took two loops of the nails at a time and made knots so they would hold. Now it's up to you what to do with this. You can make a pillow or a scarf.

Your Recently Viewed Projects
Thanks for your comment. Don't forget to share!
sjrf1131north 2737 746
Jan 16, 2018
I would love to more patterns and information on sewing with fleece
Editor Dana
Jan 18, 2018
Hi there! Here is a collection of fleece patterns. Just copy and paste this URL into your search bar. Enjoy! https://www.favecrafts.com/task/search/search_id/455
princess6860504
Jan 14, 2018
This is so dang cool! I have been interested in dabbling in the weaving of perhaps a small accent rug or a wall hanging for quite some time. I was weaving in the hands on station at the children's museum. I sat in that chair and tried it out for myself. And I instantly fell in love. It works up so quickly, it is so FUN, and i was upset that I had to walk away and let someone else try- plus they would take apart all my work! I will definetly be trying this myself!
Crafter 8580541
Feb 26, 2010
I have made this loom and it works great1 However, I used macrame yarn and would like to use that woven side as the front of a bag and material for the back. How do I sew the two sides together? There are a the exposed strings of yarn.
YIsakson
Feb 20, 2010
I was wondering how I could weave a belt with the perfect colors, I think this just might work. Thank you for the inspiration. YIsakson
reasonstreasures
Feb 19, 2010
I wasn't sure exactly what it was you were tying off. Were you tying the two loops left to right to each other, or just tying the top and bottom loops into knots? I really want to thank you for your lesson though. It was great! ReasonsTreasures
Crafter 5847112
Feb 18, 2010
i love this its great i always wanted to learn how to weave this makes it simple
Member 17093
Feb 15, 2010
Jenya - This is very clever, and ingenious. It is something that I think all of us who have wanted to weave but haven't because of the price of looms will want to do. I know I will be trying this soon. gb
NGCGSU87
Feb 14, 2010
To DEE777, When you finish the piece,tie off the warp at the ends with each other and cut off or weave with a needle back into the fabric. Fortunately, you don't have to tie the sides of the weft or woof (your yarn filler). Will that help?I'm used to larger looms that you have to roll the warp on at each end, but I' ve worked on some smaller projects too. A weaver wo a loom
Dee777
Feb 14, 2010
If you tie knots on one end, what happens to the other end? I'm having a hard time figuring out when you get to the end of a row, do you go back under the string? There for only one side would be knotted. Pleae enlighten me.
cathydp464
Feb 13, 2010
Reminds me of the cardboarde loom we used in girl scouts when i was in junior high... nice memory
dawnking
Feb 13, 2010
I love it! And by using an old picture frame as the frame for the loom, you are helping to keep it Green!
GenevieveM
Feb 05, 2010
To weave the yarn more easily any large needle with an large enough to fit the yarn through will work Or you can make a small shuttle from two pieces of heavy cardboard glued together then cut with a utility knife to shape An elongated oval with notches cut in the ends works well Wrap your yarn around the shuttle lengthwise using the notches to hold it in place Don't put too much yarn on it at a time or it will be too thick to pass between the warp threads the zig-zagged thread on the nails Before you use that old frame make sure it is 'squared up' the corners are tight If it's crooked you'll have a crooked piece of hand woven fabric -very disappointing after the effort you've put into your beautiful craft If the frame is wiggly loose at the corners you'll be fighting with it the…Read More whole time and your weave may come out uneven Use wood glue generous amout immediately wipe off excess that squeezes out Small nails help to tighten it up too Let dry at least hours This extra step will save you much time trouble
tyaljusk
Feb 05, 2010
to weave do you go in and out of the string with your yarn and what do you do with the string when you are done?
kraftymomma7
Feb 04, 2010
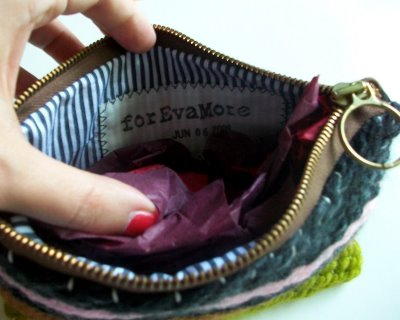
Did she sew the woven piece to a premade coin purse? I hate to put in zippers, and there are loads of cheap coin purses out there. Very cool project for all ages!
tetrahemicon
Feb 04, 2010
Try small DOUBLE headed nails, with the warp placed between the heads. This would hold the warp above the frame. It should be easier to pass the weft yarn back and forth. Double headed nails have two heads about a quarter of an inch apart. They are designed to be driven in fully, and be pulled out later using the top head. The smallest size (6d?) may be usable on a frame if small holes are pre-drilled so the nail doesn't cause the frame to split. OR, you could drive larger ones into any piece of wood, or 34" plywood. This would allow you to make ANY size shape perimeter. If your local hardware store doesn't have these nails, try a lumber yard or a home improvement center... Weave away!
ohiojo1953
Feb 04, 2010
www.woolery.com is a site you might check. I believe the item you're referring to is a weaving needle or weaving sword.
Crafter 20672
Feb 04, 2010
Thanks, Jenya. To all you child-educators, this can be a great project to get children interested in weaving. I have also seen looms made from a thick piece of cardboard. They cut slits along the top and bottom of the cardboard piece to hold the warp threads.
fate
Dec 03, 2009
Lovely .. and so easy, I remember I learned some way close to this at primary school and I made a few projects.. but now I can't even remember where they've gone... Thanks for the reminding !
Report Inappropriate Comment
Are you sure you would like to report this comment? It will be flagged for our moderators to take action.
Thank you for taking the time to improve the content on our site.