How to Shrink Plastic
Follow this technique from Heidi Borchers of Inspired at Home to shrink plastic for jewelry and other projects. Remember that any #6 plastic containers, such as most berry containers picked up at the supermarket, can be decorated and shrunk with this method. Just check the bottom of the container to recycle for crafting. For more tips on using shrink plastic, check out this article.
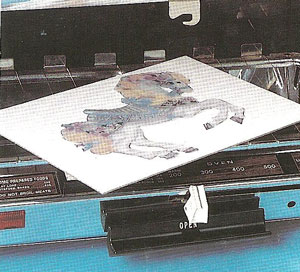
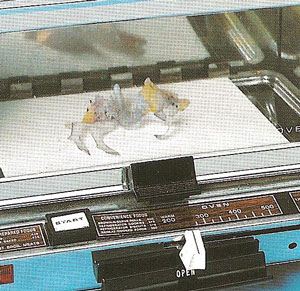
Preheat a toaster oven or conventional oven to 275º - 300º. Place the pre-colored shrink plastic design on a non-stick baking sheet and place in oven.
The edges of the design should begin to curl within 25 seconds. If the edges do not curl in 25 seconds, increase the temperature slightly. If the edges begin to curl as soon as the design is put in the oven, reduce the temperature.
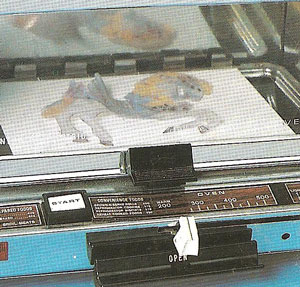
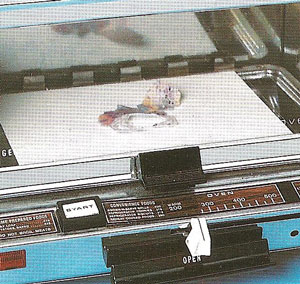
The plastic will curl.
… and sometimes roll. A large design may curl over on itself. If this happens, open the oven and unfold the design; then continue baking. (The plastic is hot so use cotton gloves to protect hands while handling the shrink plastic.) Sometimes it is helpful to also use wooden skewers to help maneuver the plastic while it is shrinking. This helps to protect you from burning your fingertips.
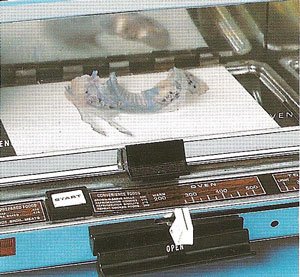
The plastic will continue to shrink to approximately 60% of its original size. (This varies from manufacturer to manufacturer.)
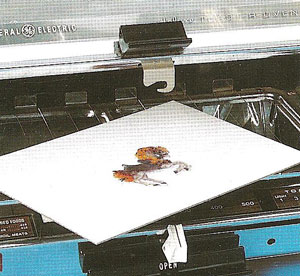
After about 1 – 2 minutes, the design will lie flat. If it is not flat, that usually indicates that it is not finished shrinking. Use a hot pad to remove from oven. To help keep design flat, place a book on top of the design until it cools completely.
Heidi’s Designer Tip: You can also place your plastic on a non-stick surface and use an embossing heat-gun to shrink your plastic. I like to first place a large piece of tile on my worksurface, then place the non-stick baking sheet and then lay the shrink plastic on top. I use a wooden skewer to hold the piece in place while I am shrinking it with the heat tool.
Your Recently Viewed Projects

Thanks for your comment. Don't forget to share!
another northern c rafter
Feb 05, 2010
This technique fascinates me and I'd like to try it. I have a question though--are there any fumes emitted during the shrinking process? Usually when any plastic gets hot there is a definite odour. This wasn't mentioned. Is that because it wasn't an issue?
Report Inappropriate Comment
Are you sure you would like to report this comment? It will be flagged for our moderators to take action.
Thank you for taking the time to improve the content on our site.