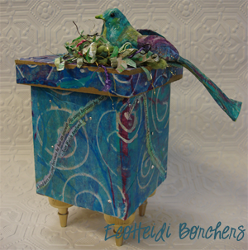
Tissue Art Box
Acrylic paint crafts are a great way to express your creativity. You don't have to be a crafting expert to create a Tissue Art Box from Heidi Borchers - just follow along with this tutorial and you'll have a fantastic keepsake box.

Painted Tissue
Materials:
- White tissue paper
- Waxed paper
- Tulip Slick White Dimensional Paint
- Acrylic paints – choice of three different colors
- Squeegee – cardboard or old credit card
Instructions:
- To prepare each piece of tissue paper, place piece of tissue onto a piece of waxed paper (cut the paper shorter than the waxed paper.)
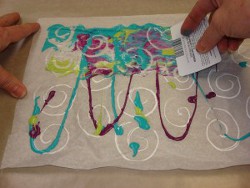
- Drizzle dimensional paint onto tissue background in desired pattern.

- Immediately drizzle first color of acrylic paint.
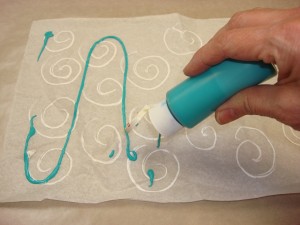
- Immediately drizzle second color of acrylic paint.
- Immediately drizzle third color of acrylic paint.
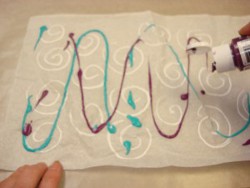
- While all paint is still wet, starting at top edge of tissue, place edge of squeegee at an angle on paper and pull across. Pull excess paint onto waxed paper.
- Place squeegee on paper just below first swipe and repeat squeegee technique.
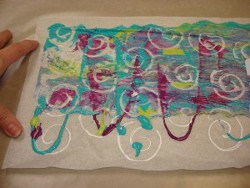
- Repeat until you have completed entire piece. NOTE: Do not run squeegee over the same area(s) twice or you will lose the resist pattern.
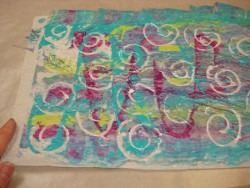
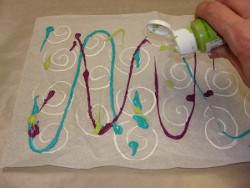
- Make up dozens of pieces in advance and let them dry completely.

Collage Box
Materials:
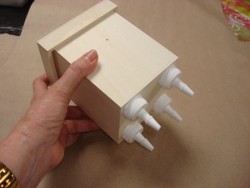
- Wood box
- Painted tissue (from above technique)
- Gold spray paint
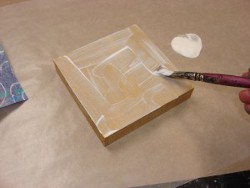
- Aleene’s Collage Pauge – Matte
- Brush – 1/2″ flat
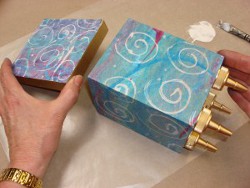
- Lids from empty glue bottles (4 for feet on box)
- Aleene’s Super Thick Tacky Glue
Instructions:
- Glue the plastic lids to the bottom of the box.
- Let glue dry completely.
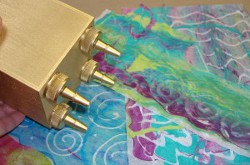
- Paint entire box inside and outside. Let dry.
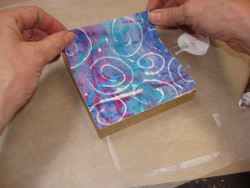
- Cut piece of the painted tissue to fit the top of the lid. Brush the Collage Pauge over the top of the lid.
- Brush the Collage Pauge onto the back of the pre-cut tissue.
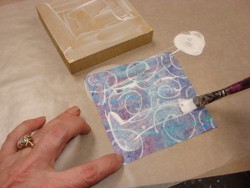
- Immediately place the glued piece to the top of the lid, glue side down into the wet glue on the lid. Using your finger, carefully press out any excess air bubbles.
- Brush a top coat of Collage Pauge over the top of the lid.
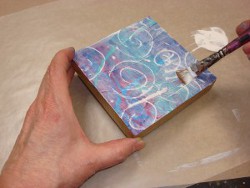
- Cover sides of box with same gluing technique.
- Decorate your box with fun embellishments!
For a comprehensive video tutorial, check out How to Make Custom Painted Tissue Paper.
Read NextDiy Decorative Waste Basket Tutorial