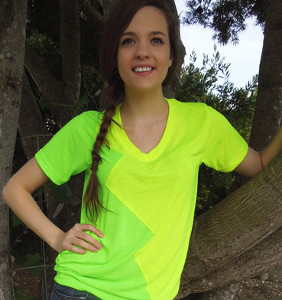
Two-In-One Refashioned T-Shirt
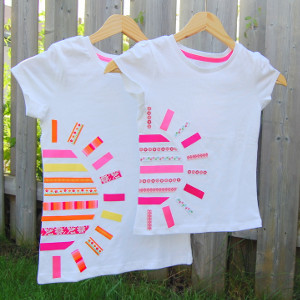
Get revved up for warm weather with this wearable spring craft. Learn the art of t-shirt refashioning by following this excellent tutorial. The Two-In-One Refashioned T-Shirt from Heidi Borchers combines two wild t-shirts into one wacky design. Note how unique this t-shirt design looks when it's all finished. You can make two t-shirts that mirror each other and give one to a friend. Vary your style by trying out new DIY shirt designs.

Materials:
- Aleene's Flexible Stretchable Fabric GlueT-shirts - you need two the same size and shape... but different colors
- Cutting mat and rotary cutter
- Straight pins
- Scissors
- Wax paper
- Cardboard or cereal box scrap (for spreading glue)
Instructions:
-
Lay cutting mat on smooth work surface.
-
Stack shirts on top of each other and pin together at shoulder seams. Keep shirts even along all edges.
-
For the zig zag pattern shown on finished example, place rotary cutter at the middle center of the left shoulder and begin cutting through all layers (two shirts.)
-
Zig zag your rotary cutter along the way down, working towards the bottom right. Be very careful where cutting lines meet as you don't want to overcut so use scissors to carefully cut those corners.
-
Remove pins from shoulder and re-stack each cut piece of shirt to create two shirts with mirror images.
-
Place wax paper inside shirt to keep the glue from soaking through. Arrange the cut edges of the two pieces so that they can be easily overlapped in gluing in the next step.
-
Working small sections at a time, first apply a thin line of glue along the cut edge. Use small scrap of cardboard to gently spread the glue along the cut edge. Do not press into the glue because you do not want the glue to seep through to the other side.
- Press top cut edge into glue. Continue to apply glue to cut edge and press to glue both pieces together until you reach the bottom edge. Let dry undisturbed overnight. Repeat to glue back pieces together.
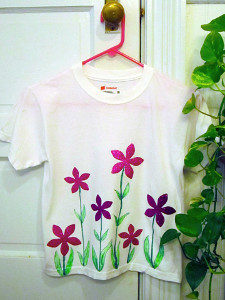
Read NextInspiring Spring T-Shirt
Your Recently Viewed Projects


Thanks for your comment. Don't forget to share!
colleengarner 9970 904
Oct 11, 2016
I would also like to know how well the glue holds up through washing and wearing, could this be done with sewing them together instead of using glue?
Editor Dana
Oct 11, 2016
Hi there! I might recommend posting this question to our Facebook page, or even looking into review of Aleene's Flexible Stretchable Fabric Glue on sites like Amazon for more information. I hope that helps! -Editors of FaveCrafts
Heidi Lorene
Mar 21, 2016
What a great idea. This would be a fum craft for my 11 year old daughter and her friend to make next time they get together. They both love bright fun colors and crazy patterns so this would be perfect for them. I have never heard of that kind of fabric glue before. Does it work well and have a strong hold to last through trips in the washing machine? Thanks.
Report Inappropriate Comment
Are you sure you would like to report this comment? It will be flagged for our moderators to take action.
Thank you for taking the time to improve the content on our site.