Removable Shrink Plastic Lettering
Personalize a plain shirt with removable lettering custom made from shrink plastic. Tiffany Windsor demonstrates how to create with die-cut letters.


Materials:
- Sizzix Big Shot
- Sizzix Alphabet Dies
- Aleene’s Tack-It Over and Over Glue
- Shrink plastic – clear
- Oven or heat gun
- Non-stick sheet
- Acrylic paint
- Foam brush
- Blue low-mask painters tape
Instructions:
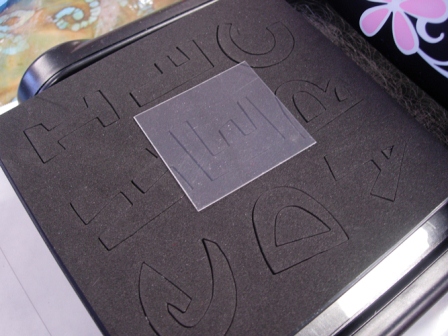
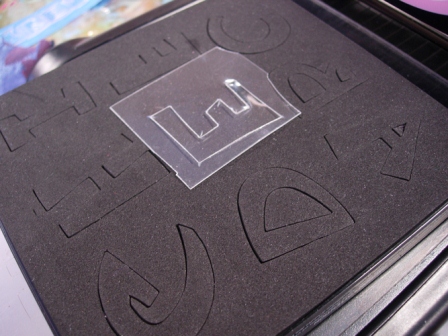
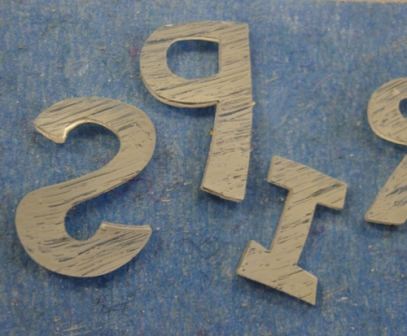
This is a quick and easy project. Just grab your Big Shot and alphabet dies! Cut your plastic about ½” larger than the letter. Lay onto die, layer with the cutter pads and run through your Big Shot. Don’t worry that the plastic may crinkle slightly as once you shrink it you will not see the imperfections. Remember that your plastic will shrink to about 40% of its original size.
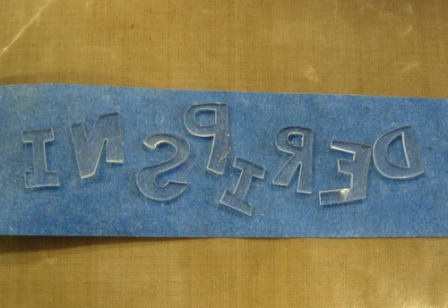
To shrink, place on non-stick sheet, place in oven and shrink according to package directions or use heat gun. If using the heat gun, I like to place my letters in a heat resistant tray so that they don’t blow away when using the heat gun! Sometimes I also use the end of a wooden skewer to hold them still while shrinking them with the heat gun.
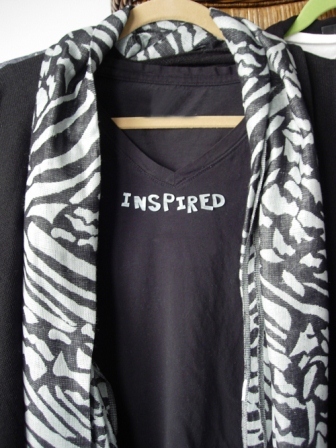
Place shrunk letters face down on sticky side of tape. I like to use blue low-mask painter’s tape. Brush on acrylic paint. Note on this example that I wanted to match the safari pattern so I gave a quick brush stroke on each piece rather than painting the entire surface. Let paint dry completely.

Apply a line of Tack-It directly from the bottle onto back of each letter. Let glue dry overnight or until completely clear. Remember it will still be tacky. Gently press glued letters onto wearable. When ready to launder, remove letters. Depending on how much lint fibers the glue has picked up, you may need to reapply glue in order to reapply letters on wearable.
Read NextVintage Button Up Shirt Pattern
Your Recently Viewed Projects
Thanks for your comment. Don't forget to share!
MissMaggie
Apr 25, 2011
Hi Dogwild, Try looking here: http://www.cutratecrafts.com/search.php?task=run_search&search_term=Aleene%27s+&page=0 You can have it delivered right to your door. Hope this helps! -Editors of FaveCrafts
dixie dweller
Apr 24, 2011
Love this idea! Unfortunately, Aleene's Tack It Over-and-Over Glue is nowhere to be found in my area! I've been looking for it for several years now; my "stash" is all used up. Would a spray adhesive work in a pinch?
Report Inappropriate Comment
Are you sure you would like to report this comment? It will be flagged for our moderators to take action.
Thank you for taking the time to improve the content on our site.