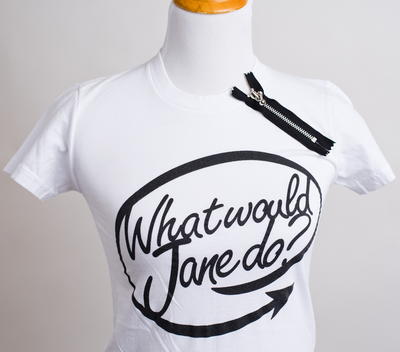
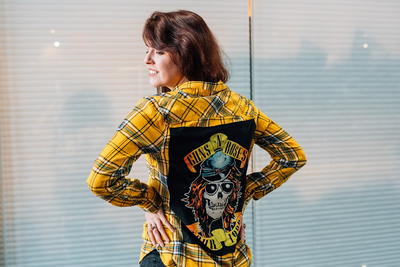
Nerdy Stenciled TShirts

When you learn how to make a stencil from freezer paper, you can create custom t-shirts and apparel for every occasion! These nerdy stenciled t-shirts would make great gifts for Star Wars or blogging enthusiasts, and they're practically free to make! However, you can create and make whatever designs you like with this super easy tutorial. Plus, these DIY shirts take practically no time to make!
Plus, check out the video below for a couple of great tips and tricks on how to get the perfect stenciled shirt!
Estimated CostUnder $10
Time to CompleteIn an evening
Primary TechniquePainting

Project TypeMake a Project
Materials List
- T-Shirt
- Martha Stewart paints or other fabric safe paint
- Paint applicator sponge
- Freezer paper
- Either an exacto knife or an electronic cutting machine
Nerdy Stenciled TShirts
How to Create Your Own Stencil Shirt
-
First decide on your design. I used a Silhouette Cameo to make my stencil, but you can make this project without a fancy cutting machine too. All you have to do is cut your design into a piece of freezer paper (shiny side down) and you'll have a stencil. If you're using the Silhouette, you can find any high-contrast jpeg image and turn it into a cut file using the trace tool. That's how I made the Chewbacca stencil. For the "I'm blogging this" stencil, I just cut using fonts I had downloaded onto my computer.
-
Once your stencil is made, iron it onto your T-shirt. The good thing about using freezer paper for stencils is that it will stay in place when you iron it (shiny side down!) but it's easy to peel off when you're done. Make sure you iron down all the corners and tiny strips that make up the details of the image.
-
After you iron the stencil, use your fabric paint to apply paint to the negative space in the stencil. Wait about an hour between coats of paint (or follow the directions on your paint bottle), and let dry over night.
-
When the paint is dry, peel back your freezer paper, and your shirt is done!
-
Grab your favorite nerd and make him model it for you.
Read NextZipper T-Shirt Refashion
Your Recently Viewed Projects
Thanks for your comment. Don't forget to share!
Mirjosmel 3721067
Apr 20, 2012
I love this! It is much simpler and neater than other ways I've come across. Love, love, love it! I cant wait to gather materials!!
Mirjosmel 3721067
Apr 20, 2012
I love this! It is much simpler and neater than other ways I've come across. Love, love, love it! I cant wait to gather materials!!
aje127
Apr 11, 2012
That just looks to easy to work. BRILLIANT!!!! I have had so many ideas to put on tshirts (Friday is smart ass t shirt day) and now I can make them all!!!! mmaaahhhhaaaaaaa. Thank you so much
Report Inappropriate Comment
Are you sure you would like to report this comment? It will be flagged for our moderators to take action.
Thank you for taking the time to improve the content on our site.