Angel in Disguise Wearable Project
Tulip Fashion Glitter adds glam to this angelic design. It’s easy to apply with Tulip Glitter Bond and then it’s machine washable!

Materials:
- Tulip Fashion Glitter™
- 23550 Silver Fine Jewel
- 23553 Orange Jewel
- 23555 Apple Red Jewel
- 23557 Royal Blue Jewel
- Tulip Mini Fashion Iron
- Tulip Sticky Fabric Stencils
- 23264 Edgy
- Tulip Soft Fabric Paint™
- BI15784 Glacier White
- BI15801 Ebony
- Tulip Fashion Glitter Bond
- Scissors
- Large sponge
- Foil
- Deep blue t-shirt
- Iron
- Freezer paper
- Small tip paintbrush
Pattern:
Instructions:
- Prewash shirt to remove sizing. Do not use fabric softener.
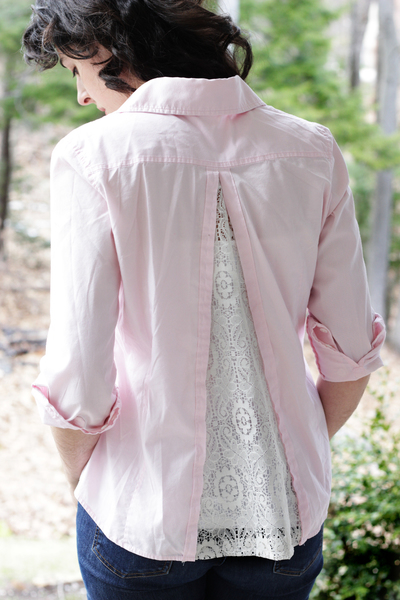
- Cut both arms and neckline off of shirt (see photo). On back of shirt, cut a line down the middle until 7” from bottom of shirt. Using extra material from sleeves, cut a strip 3” x 1-1/2” to use as tie for middle back of shirt. Using scissors, cut a slit 1’’ wide, ½” in from both sides of shirt at center back. Use strip of fabric to tie a knot holding the two sides of shirt together.
- Fold a 24” piece of freezer paper in half lengthwise. Draw a 20” long wing on one side of freezer paper. Keep folded and cut out wing, leaving border of freezer paper as your stencil.
- On ironing surface, place back of shirt together. Place wing stencil on back of shirt, shiny side of freezer paper face down. Iron to adhere.
- Place a small amount of White and Ebony paint on foil and mix together until light grey. Using sponge, apply mixture inside stencil until wing is solid. Let dry. Remove stencil.
- Place flame stencil, sticky side down, on wing. Using an applicator, lightly dab Glitter Bond in stencil openings. Lightly pour Glitter in desired order on glue. Using a piece of foil, gently press down on glitter design to make sure glitter contacts with glue. Proceed with this step until both wings are completely covered using photo as a guide. Let dry.
- Turn shirt over. Squeeze a small amount of Glitter Bond on foil. Dip paintbrush in Glitter Bond. On bottom left corner of shirt freehand the word Angel. Lightly pour Glitter on glue and let dry. When the shirt is completely dry, shake glitter off over a garbage can to get rid of excess glitter or tap over paper and save.
- Wait 72 hours to wash. Turn inside out. Machine wash warm on gentle cycle. Do not use harsh detergents or bleach.
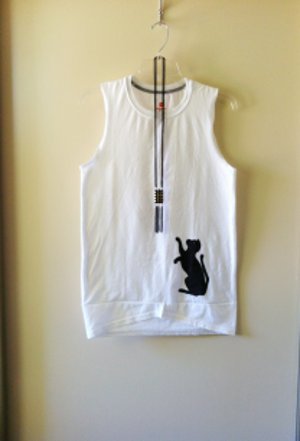
Read NextEasy DIY Tank Top
Your Recently Viewed Projects


Thanks for your comment. Don't forget to share!
650hpreventon 3426 888
Apr 07, 2011
Anyone didn't get the picture can go to this website, i hope this helps http://www.favecrafts.com/master_images/Wearable%20Crafts/angel-image.jpg
IheartVeg
Jun 02, 2010
Thank you for pointing out this issue, the Pattern has been fixed. Happy Crafting! - FaveCrafts Editorial Team
cwdncqueen1
Jun 01, 2010
I found it!! If you go to the site ilovetocreate.com and then go to projects. Next after that is shirt of the month...view all shirts. Towards the end of the projects is the shirt entitled "Angel in Disguise" and the pattern will load from there. Hope this helps all of you. I have my copy...now off to work on my shirt. Have a wonderful day!!
slwp
Jun 01, 2010
Clicking on Pattern 1 does not seem to be a working link. A green page with a small red x in a little box at the top of page is all that can be seen. I tried going to the web site of 'ilovetocreate' but was unable to locate the pattern. Where can I find this pattern?
Member 17896
Jun 01, 2010
Same here, Clicked on Pattern, and got a green page with a box marked with a red x. Don't think the link is working.
AnKsMemere
Jun 01, 2010
When I click on Pattern 1, I get a blank page. where can I get the design???
Report Inappropriate Comment
Are you sure you would like to report this comment? It will be flagged for our moderators to take action.
Thank you for taking the time to improve the content on our site.