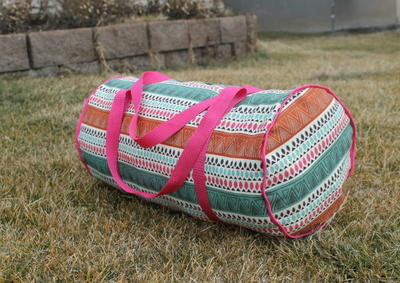
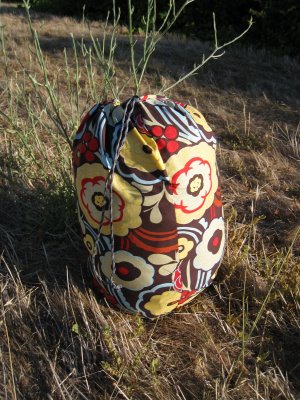
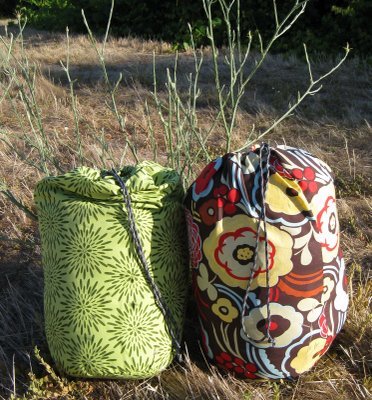
Camping or Sleep Over Bag
Ever struggle to get your sleeping bag back into that tiny sack you bought it in? Get a little creative and sew up a much more convenient bag in colorful fabric to transport your sleeping bag and other essentials. These are great for kids going to sleep-overs or anyone going on a camping trip. This great sewing project comes to us from Noelle Beegle of The Home Ec Teacher's Daughter.

Materials:
- Fabric (this will depend on the size of your sleeping bags ours were pretty small so half to three quarts of a yard were used.
- String/Ribbon and Clip (I reused the string and the clip from the bags we originally got)
- Thread
- Sewing Machine
- Scissors, Pinking Shears, and Rotary cutter if you have one
- Ruler
- Iron and Ironing Board (this is a MUST!!!)
- Safety pin (a small one)
- (You could also plan to add ribbon or ric-rac in the process as well. Another option would be to do some hand/Machine embroidery on the bag especially if you have kids)
Measuring:
First things first get out that Ruler and the sleeping bag you plan to make a new bag for. Roll up the sleeping bag as best as you can so you can get the measurements of the cylinder shape. Here are the measurements you will need
- Height + Radius of top of bag (Remember radius is ½ the diameter see geometry does come back to haunt you!)
- Diameter of the bottom
- Width of the Ribbon/String you will be using (if string just follow my directions)
My Measurements were as follows:
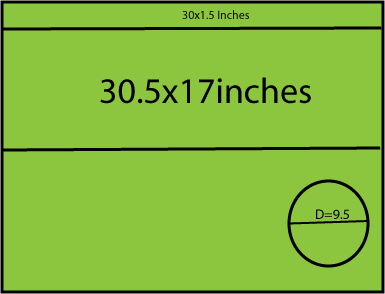
Height + Radius = 13+3 = 16inches Diameter of bottom = 6inches
From this we create the new measurements now this is where you have to get a little inventive on your own:
First increase the Diameter of the bottom by at least 1.5 inches (I increased by 3.5 and found a 9.5 round plate) . Use this to make the circular pattern piece for the bottom (I traced the plate on the fabric I had).
Second you have to calculate the Circumference of the circle which is Pi*Diameter or 3.14*Diameter = 3.14*9.5 = 30 inches (aprox) and then add a seam allowance of half an inch so 30.5inches
Third Add at least 4 inches to the height 13 + 4 = 17inches (you can add more to the height if you want the bag to be deeper to fit more items.

With the Second and Third measurements you will cut one large rectangle measuring 30.5x17 inches (or whatever the measurements you came up with)
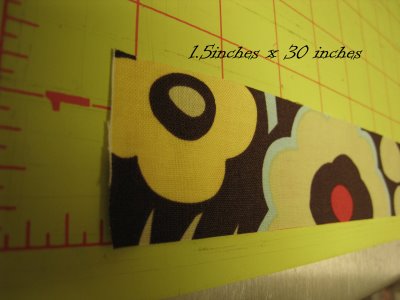
Fourth if you are using string or cording that is pretty thin you need to cut a strip of fabric that is 1.5inches x 30 inches. If you are using ribbon take the width and multiply by 2 and add 1 inch (if you have ribbon that is half an inch wide then your strip should be 2 inches wide)
Here is it mapped out on fabric:
Assembly:
First if you want to add embroidery or some ric-rac this is the time to do it! I would add it only to the large rectangle and the circle.
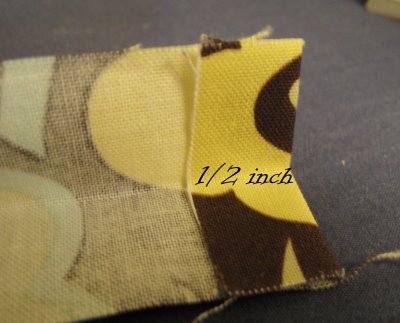
Take the small rectangle and fold the short edges over so they are ½ an inch, iron flat, and sew down.
Next fold the long edge over in ½ and iron flat.
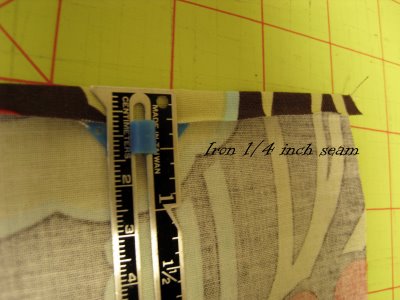
Take the large square and on the long edge fold over ¼ inch and iron.
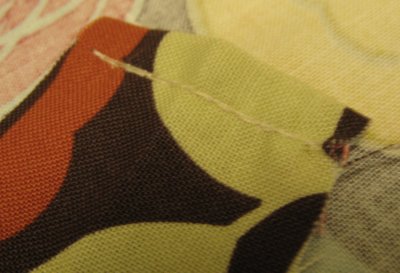
Pin the raw edge of the small rectangle under the flap on the large rectangle. Make sure you center it (there should be some of the large rectangle on either side).
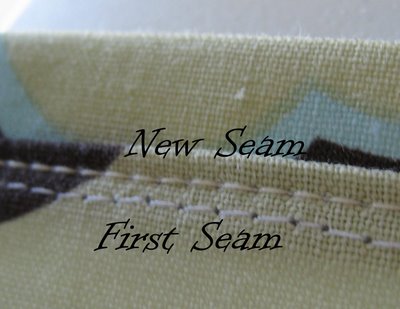
Sew the flap down. There really is no seam allowance here just try to make it in the middle of the flap. This makes a casing for the cord/ribbon.

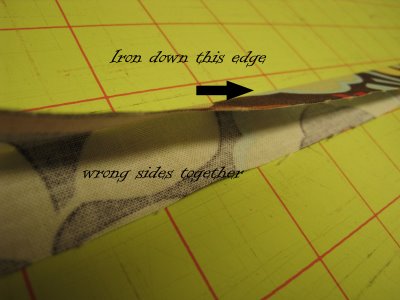
From here you are going to enclose the raw edge of the flap on the large rectangle. This is going to sound difficult but its really easy. Iron the casing so its going up.
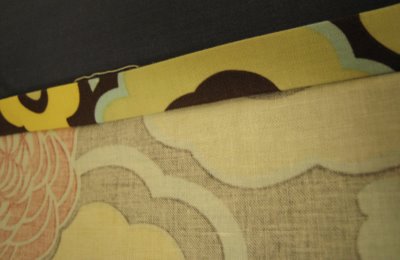
Next Flip over the fabric so you are looking at the right side of all the fabrics and iron the seam you just made up over the raw edge. This will enclose the raw edge of the flap.
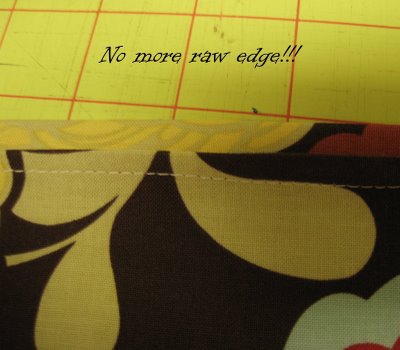
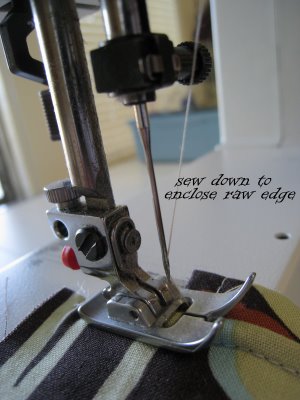
You can either pin this down or hold it down as you sew. When you sew it down you want to sew close to the first seam you made (you can do it on top of the first seam if you like. This will completely enclose all the raw edges on the top of the bag.
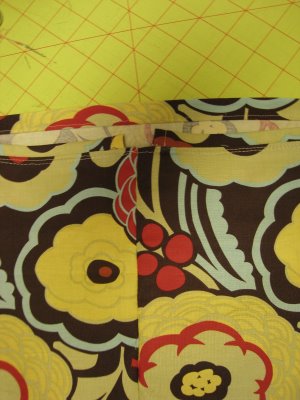
Now for the French Seams: Fold your bag in half so the short edges meet up with the wrong sides of the fabric together. Sew a quarter inch seam on the edge of the fabric (you will be sewing on the right side of the fabric). Next take pinking shears to the seam you just made cutting it down a bit. Turn fabric so the wrong side of the fabric is on the outside and the right sides of the fabric are together. Iron the seam and sew down with a quarter inch seam. Turn so the right side is out and notice the seam is enclosed. Easy Peasy right?
Now you’re ready to attach the circle to the bottom. Turn the tube you just made so the wrong side of the fabric is on the outside. Pin the circle to the edges of the bottom of the tube (where the raw edge is). Use lots and lots of pins!!! It should look like this
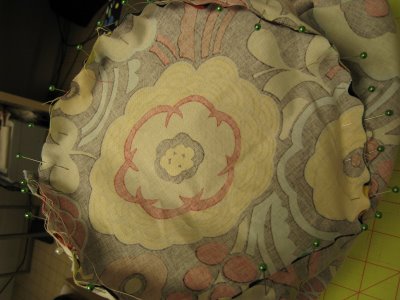
(You may need to make some adjustments to the tube if its too big. I just add a new seam that make the tube smaller at the bottom and then angle off to the old seam)
Next sew the circle to the tube using a 3/8 seam. Add a zig zag stitch to finish the edge and using pinking shears to finish edges as well.

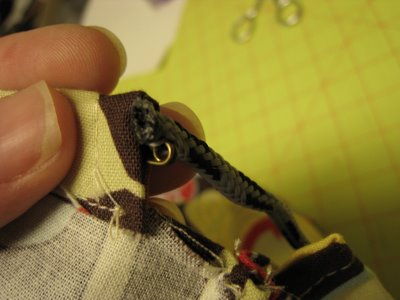
You’re almost there now take the safety pin and ribbon and thread through the casing you made add your clip or tie a bow and you’re done.
This project can be modified to make a dirty clothes bag, gift bags, makeup bags, ect the options are limitless!
Read NextFabric Scraps Tote Bag
Your Recently Viewed Projects

Thanks for your comment. Don't forget to share!
mmenns 5931489
Mar 29, 2011
This project is simple, minus the Math display find the diagram and size you wish and go for it.
MamaSmurf5000
Feb 27, 2010
When I was a Girl Scout leader, I taught my troop to pack their pillow in with the sleeping bag. That way I didn't have to deal with pillows being dropped along the path to the camp site. Sleeping bags should be aired out after a camping trip so that shouldn't have been a problem. With this pattern, one could make more room for the pillow. I never thought about making a separate casing for the tie. I just made a pocket by turning over the fabric. Gromments on the ends may take some of the stress off the seams.
Report Inappropriate Comment
Are you sure you would like to report this comment? It will be flagged for our moderators to take action.
Thank you for taking the time to improve the content on our site.