Bow Bag Sewing Tutorial
If you like this project, then you'll love the free sewing patterns featured in the eBook, 21 Easy Sewing Projects: DIY Designs and Sewing Craft Ideas. Download a copy today - it's free!
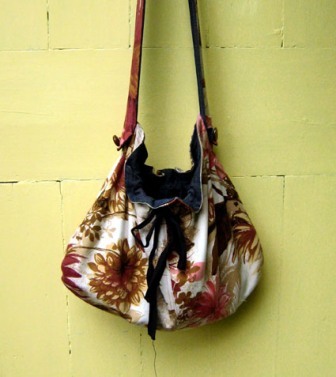
You can never have enough bags right? Especially with a free sewing pattern. Beccy from Wipster used scraps of upholstery fabric and an old pair of jeans to make this cute Bow Bag. The top has a drawstring so it can expand when you need it to, but draw it up for security (and cuteness).

Materials:
- 1 yard x 12” main fabric (I used large scraps of upholstery fabric)
- 1 yard x 12” lining fabric (I used an old pair of jeans)
- 1 yard of ribbon
- 5” elastic
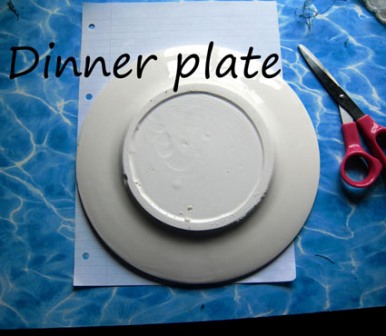
- A dinner plate
Instructions:
-
Because I wanted the bag to be able to hold files/paper etc. I used an A4 sheet of paper as a template.
-
Use a dinner plate to draw a curve around one corner (you can adjust the size of the curve by choosing smaller or bigger circular things).
-
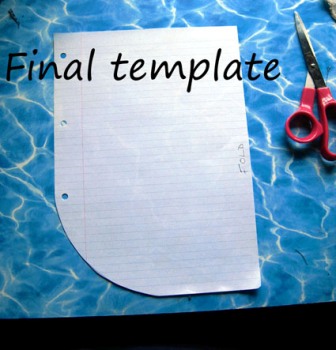
Cut the curve. This is the basic template; the straight edge on the right is the fold line.
-
Cut 1 (back) piece on the fold and two half (front) pieces. Add extra seam allowance to these two pieces. Cut two pieces on the fold for the lining (I recycled a pair of jeans).

-
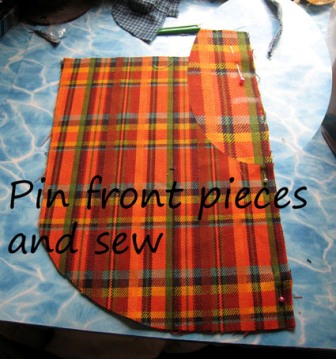
Pin the two half front pieces face together and place a mark 2 inches from the top, then another 1 inch below that. This will be the opening for the drawstring casing. Sew up front pieces, leaving the 1 inch marked area open.
-
Open out the front piece and press the seam. Topstitch the front seam open.
-
Cut a piece for the pocket approximately 6x6 inches.
-
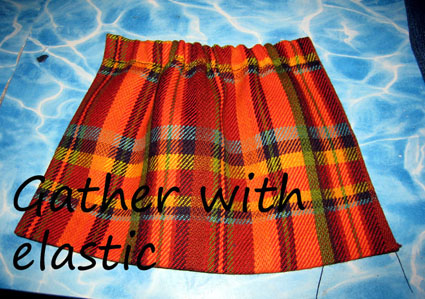
Fold and press the edges. Press the top edge deep enough to encase the elastic and sew this edge.
-
Thread elastic through casing using a safety pin, gather and secure at both ends.
-
Sew the pocket to one of the lining pieces, approx 3" from the top.

- Sew the two lining pieces together, leaving a 3" opening in the base.
-
Place the lining inside the outer, right sides together. Pin and sew.
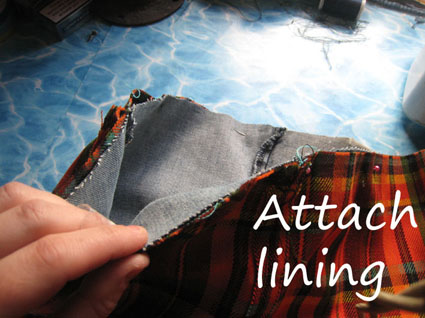
-
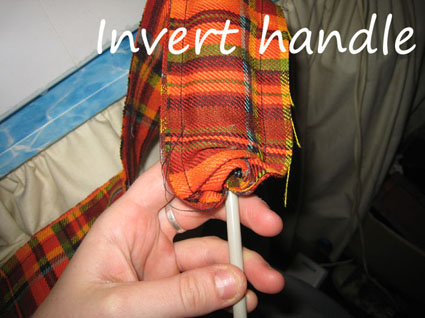
This bit's a bit tricky, but hold on in there :) Invert the bag by pulling all the fabric through the hole in the lining then sew up the hole. This always looks like it isn't going to work, and then it magically becomes a bag, you'll see ;)

-
Press the bag (again!) and topstitch around the top of the bag, as close to the edge as possible.
-
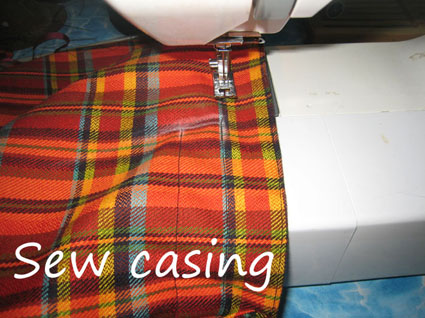
Measure from the top of the bag to the opening of the ribbon casing. Mark where the casing needs to be at each side of pocket and sew around the whole bag, like tram-lines (avoiding the pocket, don't want to sew that baby shut!)
-
Measure across your body to determine the length of the handle and cut two strips of fabric as long as you need (plus 1" seam allowance) by 2" wide.
-
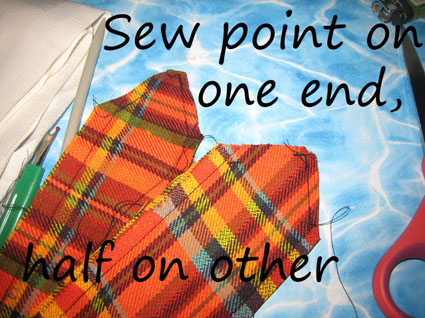
Sew a point on one end of the handle, and half the point on the other (this will make life easier later) and trim the seams.
-
Use a knitting needle to turn the handle the right side out (Keep going, nearly done...)
-
Press the handle flat.
-
This is where you'll be glad you half sewed the second point! Push the excess fabric inside to form the second point and press.
-
Topstitch the handle as close to the edge as possible.
-
Line up the handle with the outer side seam of the bag and stitch across, following the topstitching on the bag. The handle should overlap the edge of the bag an inch or so, for decorative effect.
-
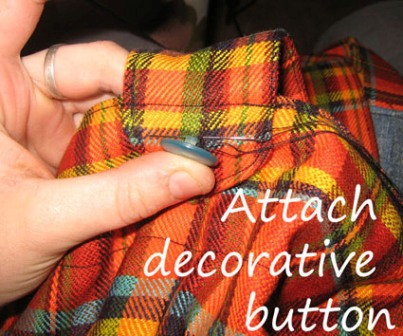
Sew a decorative vintage button to the pointed bit.
-
Tie your ribbon to a crochet hook and thread through casing.
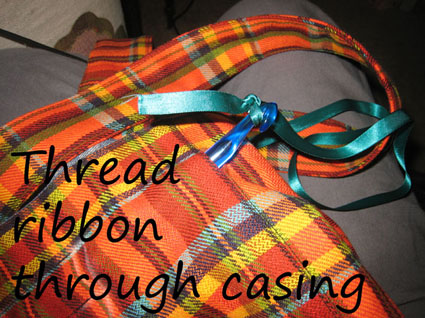
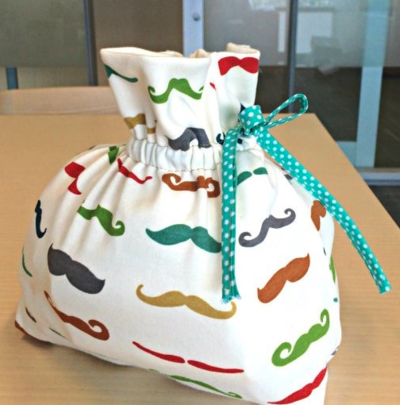
- Gather the top of the bag slightly and tie a bow and you’re done!
Read Next5 Minute DIY Toiletry Bag

Thanks for your comment. Don't forget to share!
flowergirl
May 02, 2018
Who doesn't love a good drawstring bag. You can never say no to a free pattern showing you how to make one either, especially if it comes with step by step picture aids. If you have some leftover fabric from your fabric stash then this is a great bag to make.
BettyVedder
May 02, 2017
Wow, this is great! I love the idea about using a dinner plate for a pattern piece. Thanks for the step by step, and the great photos.
mbtlcsfriends 3269 032
Jun 16, 2014
Neglected to mention when to sew outer front and back sections together. Should be after step 6 or before step 12.
Vina17
Mar 21, 2014
Great pattern, and very easy to understand, thanks! Can't wait to make it. I'm not so sure about leaving a gap in the middle seam of the two front pieces for the ribbon opening. Maybe I'm just paranoid, but I feel like it would eventually pull on the stitches and rip my seam. Maybe button holes instead? I think I'll try that.
mbtlcsfriends 3269 032
Jun 16, 2014
This is typical way of doing this. The two rows of stitching you do to make the casing secures the seam so it won't rip out. If you are really paranoid, just stitch across the seam again at top and bottom of casing in step 15.
annheineck
Aug 08, 2013
The tutorial was easy to follow and the photos really helped out a bunch!
gingerpup
Jul 17, 2013
the tutorial is very easy to follow. I will make several of these foe all seasons and for gifts..I willchange up the handles and material used fo drawstring but i am always altering patterns.
mgoggin
Jan 11, 2013
I made this bag tonight, the instructions were very easy to follow. I added a monogram to the front, an extra pocket inside and a fabric tie in place of the ribbon, getting lots of compliments. Thanks!
BJ FollmerWeirich
Aug 10, 2012
At step #4, is anyone lost besides me????
mbtlcsfriends 3269 032
Jun 16, 2014
Look at the pictures. The pattern is only half the pattern. Put the long straight edge of the pattern (marked "fold") on the fold of the outer fabric to cut the back piece. Cut the front on double fabric but not on fold so you have two separate pieces. The picture shows this. Cut front and back lining pieces on the fold.
KiiheleWest
Feb 28, 2011
This project turned out to be very cute. It's fun, the tutorial is easily followed. I have tons of scraps so I am going to make a few using a pieced together crazy quilt style.
tshhinman 5382322
Feb 09, 2011
I am just beginning to sew and love the opportunity to try to make things from free patterns. Thanks
Jessica Jean
Sep 28, 2010
Thanks for the step-by-step. It should help me get back to sewing - by hand or machine. However, despite how gorgeous the bright tartan colors are, using a less busy fabric for teaching might be better. Show off the bright material in a finished article, would be my suggestion. For the same reason, using a sewing thread that has high contrast with the material might make it easier for the inexperienced to see what is going on.
Member 8195154
Sep 25, 2010
The pictures don't seem to match the material cut out from the template. Where's the curved portion? I couldn't follow this with either directions or photos, to be honest. Could just be that I haven't done it in a long time, but I'm very confused on how to accomplish the bottom seam using both the lining and the outer cover simultaneously. It would be easier for me to sew their bottoms separately and then invert the lining into the purse. But, that's me.
gone2beach
Sep 16, 2010
I have tons of scraps, will be making a ton of these for gifts!! Easy and so cute...and can be adapted to age group so easily. I am going to add magnetic closures to mine...
Crafter 7858085
Jun 19, 2010
I'm a little confused with the directions, but the pictures are good to follow.
Love Crafts
Mar 14, 2010
I think this bag pattern is a great idea for my craft weekend coming up with my 5 granddaughters a few of their friends, (age range 6-9), they all want a bag to hold their craft projects in. Looks like it will be a easy pattern for them to follow, and I love the idea of recycling old jeans and matierals have lots and always try to find craft projects to use them for. Thanks for the pattern the girls will be happy I'm sure. Sherry
tullady
Jan 16, 2010
I have made two of these bags and the instructions are so easy to follow. My friend and daughter thought they were great.
Devonviolet
Jan 08, 2010
Super nice tutorial! I agree with Grandma Jean, though. Plain fabric might be easier to follow, and stitching above and then below the casing, on the handle, would free up the casing. I like the decorative button, keeping the handle securely attached to the bag. One thing I might change, is to put 14 inch elastic in the casing, to a size, that would allow for easily getting into the bag, but not keeping it so open, that things fall out. I would still thread a pretty ribbon in the casing, making it possible to tie the bag totally closed, for security, if desired. I also like Grandma Jean's idea, of making a fabric tie, to thread through the casing. This could be made from the contrasting lining fabric.
grandma jean
Jan 02, 2010
This looks like a great demo for kids and other new sewers. I liked the no pattern idea (except for the sheet of paper and a dinner plate) that helps keep the cost down. The only thing I'd change is the plaid fabric made it kind of hard to see the details. Awesome 70's retro though! I'd probably stitch the handle on different though, maybe make two stitching lines to avoid the casing and make it stronger. I know what all I stick in a bag. I wouldn't want the handle letting go in the middle of the street, etc. Is the thin rirbbon really strong enough to withstand repeated gathering of the bag? Would a decorative cording or strip sewn of denim be more appropriate?
Report Inappropriate Comment
Are you sure you would like to report this comment? It will be flagged for our moderators to take action.
Thank you for taking the time to improve the content on our site.