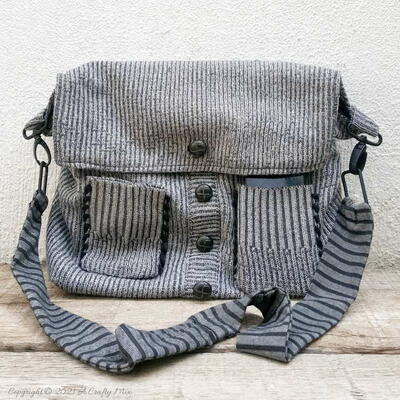
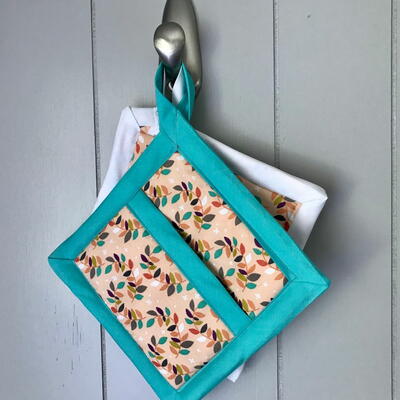
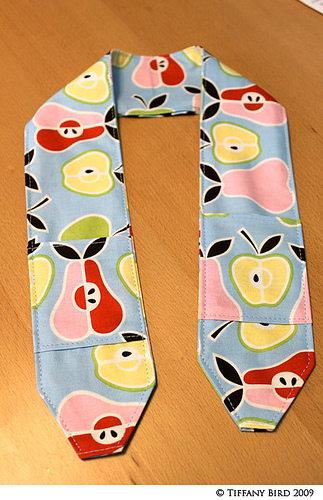
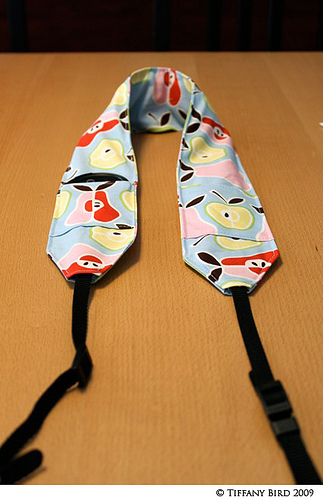
Pockets Camera Strap Cover
Sew up a cute cover for your camera strap in your favorite fabrics. Two pockets give you a place to stash your lens up and other small items. Use scrap fabrics for this sewing project designed by Tiffany Bird.

Materials:
- Scrap Fabric
- Sewing Machine
- Pencil
- Iron
Instructions:
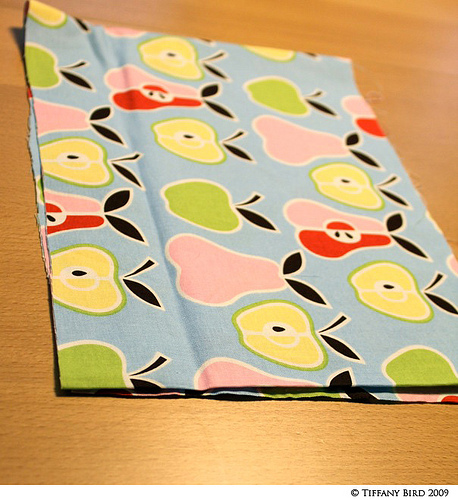
- Grab some scrap fabric. It’s fun to mix and match for the pockets or the inside of the strap.
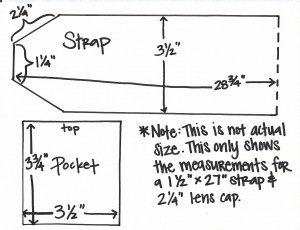
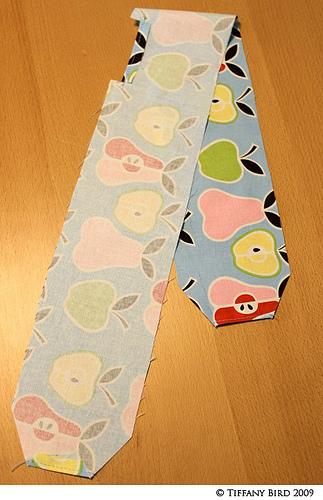
- Measure your camera strap. Different brands have different sizes. And I think the newer straps are longer. My strap was 1 1/2″ wide and 27″ long. If you have a different size strap, you’ll have to adjust the measurements below accordingly.
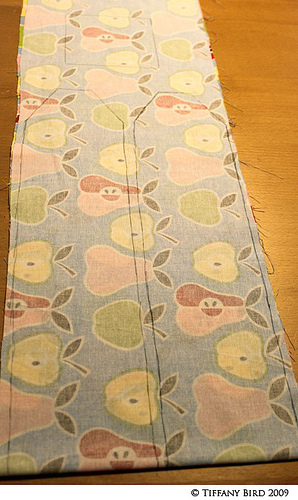
- Draw your pattern. The dotted line is the fold at the halfway point for the strap. Please note that the pattern below is not actual size. You will need to draw your own with those measurements if you have the same size strap (1 1/2″ x 27″) and same size lens cover (2 1/4″ diameter). Also, this strap cover is wider than the actual width of the strap to fit the pockets.
- Trace the pattern on to the back of your fabric and cut out. Make sure you have two strap pieces.
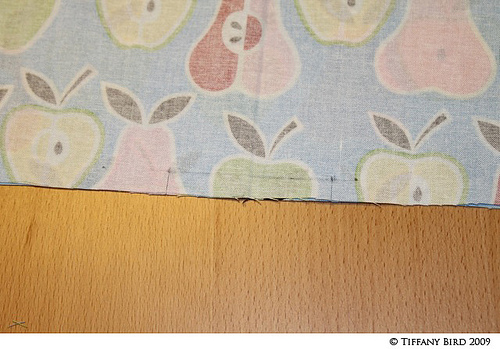
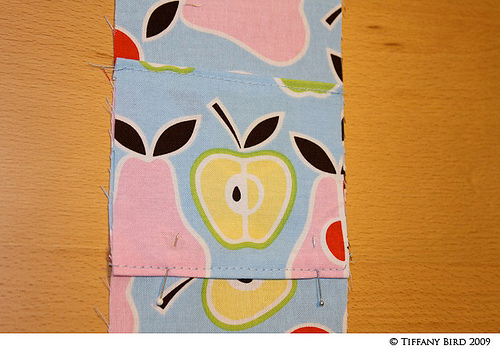
- Put the two strap pieces together with the right sides facing each other. At the middle crease of the pieces, draw a line 2 1/2″ long and 3/8″ in from the bottom edge. Make two 3/8″ cuts, one on each end of the 2 1/2″ line. That’s for the opening to put the strap through.
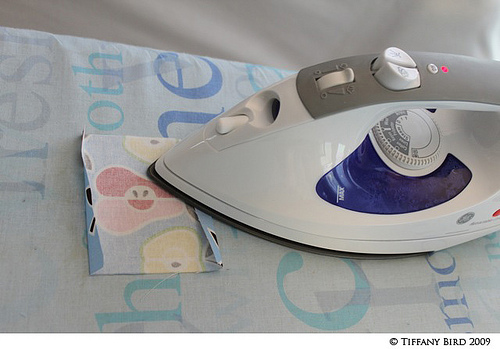
- Iron the small flap that you just cut, the tips on both strap pieces, and the top and bottom seams of the pocket, all 3/8″. I wanted two pockets for my strap to carry the lens cap and memory cards. Plus, I’m right handed and my husband is left handed. With a pocket on each side, it provides easy access for right handed and left handed persons.
- Sew the tips and the flaps down on both strap pieces. I sewed at about 1/4″ from the edge.
- Sew just the top seam of the pocket for now. Then place the pockets where you want them on the strap. I like it closer to the end of the strap. You may want to try the strap around your neck to get a feel for where would be a comfortable place for the pocket. Pin the bottom of the pocket to the strap. If you are only doing one pocket, decide whether you want it on the left or right end of the strap. Then sew the bottom of pocket to strap piece. Make sure it’s the piece you want as the outer side of the strap. And the pocket piece should flap open at the top because only the bottom is sewn down.
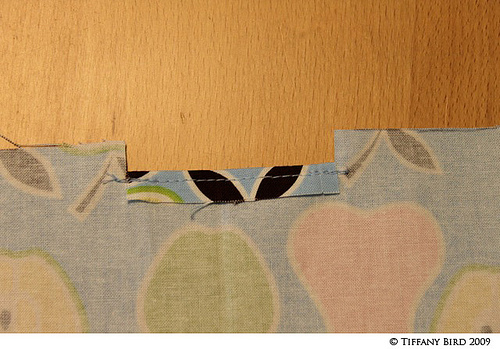
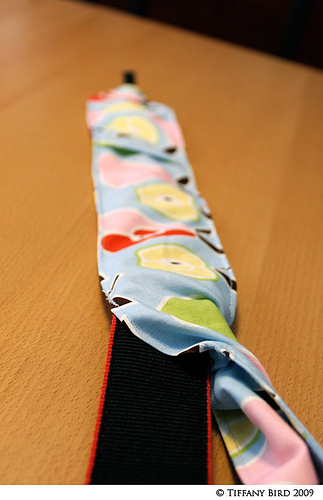
- Once the pocket is on, put the two strap pieces together again with the right sides facing each other. Make sure your openings at the bottom of the strap pieces match up and the pockets are flat. Sew a 3/8″ seam all the way around the strap, but not the end tips (where the camera strap comes out) and the opening (where you put the strap in).
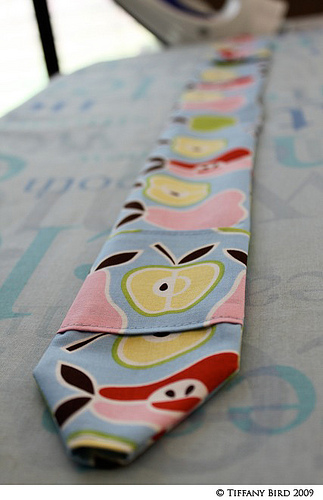
- Flip the strap right side out through the bottom opening. And iron flat. I ironed the seams open before flipping it right side out then iron again on the outside to make it a cleaner iron.
- Pin the beginning and end of the opening where you put the strap into the cover so you don’t sew it close by accident.
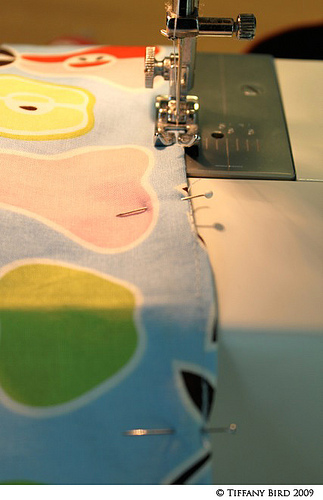
- Sew a straight line all the way around the strap except the tips and opening.
- Put your strap in the cover through the opening at the bottom. You can also hand stitch or sew the opening close if desired. Or leave it open to make it easy to change covers or take off to wash.
Read NextUpcycled Sweater Handbag
Your Recently Viewed Projects
Thanks for your comment. Don't forget to share!
Mistress of All Ev il
Dec 04, 2015
This looks like such a simple project. I might have to take this up over the weekend. My new camera would look great with a new strap. It's just the personal touch it's been missing.
mamabumx3
May 23, 2010
I have a question. Is the 28 & 3/4 just to the half way or is it the total length of the cover?
GAJ
May 17, 2010
This is a great project! Right now I'm going to my studio to select a fabric to make one for a birthday present to myself (tomorrow). I also looked for a pattern for an iPad envelope but, finding none, I'll just have to devise one for myself. If I do, I'll try to post it.
Report Inappropriate Comment
Are you sure you would like to report this comment? It will be flagged for our moderators to take action.
Thank you for taking the time to improve the content on our site.