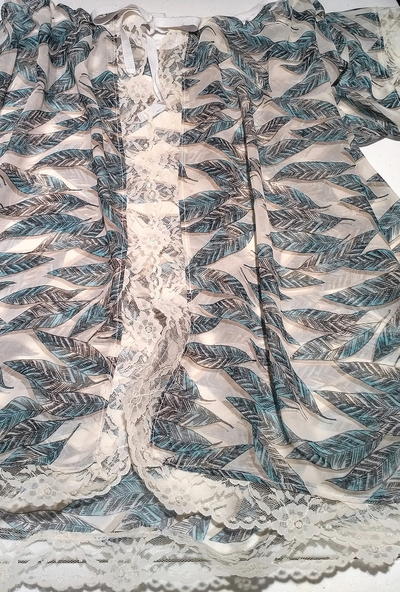
Classic Origami Skort

Many times, all it takes is a few easy sewing patterns for you to find love at first sight. This Classic Origami Skort is sure to turn heads. You will have so much fun making this skort and will especially love the results. Zara copying designs are so cool to bring to life and wear because they make your friends jealous in an instant. This Classic Origami Skort can become uniquely yours when you make it with your own personal touch. Create this skort and become a fashion icon amongst your friends.
Primary TechniqueSewing

Sewn byEither Hand or Machine
Materials:
- Brown paper
- Pencil
- Scissors
- Pins
- Fabric of your choice
- Invisible zipper
- Coordinating thread
- Hook and eye
Instructions:
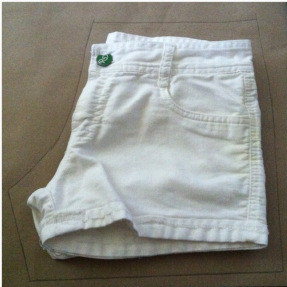
The Shorts Pattern
- Grab your favorite shorts and trace them on to your brown paper. You can also use an old calendar or newspaper, it is much more economical.
- It’s always better to make the shorts bigger because you can always alter them to fit later.
- Extend the inner sides of the pattern, this creates the back pattern for your shorts.
- Cut two pieces of this back pattern by folding your fabric either right or wrong sides together.
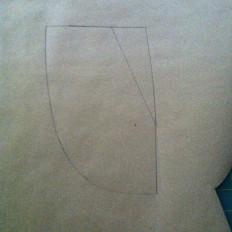
- Cut out those extensions. Once removed, it will serve as your front pattern piece.
- Starting from the top of the pattern piece, draw a vertical line to form an inverted isosceles triangle. You are creating a side pocket shape.
- Then cut it out.
- Now pin that down to your folded fabric to cut two front pieces of the shorts.
The Pocket Pattern
- You are going to create two patterns for the pocket. The pocket bag and the pocket lining.
- To create the pocket bag, simply trace the front pattern piece to your paper.
- Cut that pattern out then cut from your folded fabric. You will end up with the right and the left pocket bags.
- Next, cut out that vertical line or the isosceles triangle-shape like to create the pocket lining pattern.
- Then again, pin the pattern down to your folded fabric. Cut, creating two pocket linings. To hide it from showing, cut out a piece of the same fabric you’re using for your shorts then stitch it down to your pocket bags.
- Just a recap, you should now have two pocket pieces, two back pieces and two front pieces.
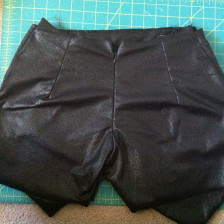
Sewing
- Take the pocket pieces and sew down the OUTER CURVE.
- Take the two front pieces of your shorts. Pin them right sides together then sew along the pin lines. DO NOT sew all the way down to the bottom!
- Take your pockets and pin them on to the wrong sides of your shorts. We are now ready to create the left flap.
- You are using your shorts to determine its size and to know how long and how wide the flap should be. The waist length should start from the left pocket ending on the right pocket. NOTE: There is no exact measurement for the flaps unfortunately, since it is based on the size of the shorts.
- Now cut the pattern out, pin them on to the folded fabric facing right sides together. We need two of them, one for the outer and one that will act as a lining. Once done cutting, pin the outer edges EXCEPT for the waist line edge. Then, sew along the pin lines.
- Then turn it inside out.
- Now take the front shorts, the flap and your left pocket. You are now sewing the three pieces together sandwiching the pocket.
- You are to pin the pocket lining, the left pocket edge of the shorts and the flap ALL WHERE THE POCKET SIDE EDGES ARE.
- Sew them together.
- DO NOT sew on top of the flap.
- Pin them together to keep it from moving. You are now ready to create the other flap. You just need to duplicate prior steps for the flap. But this time you are creating a bigger and longer version.
- Same process applies. Yet again, DO NOT sew the top waist line edge so you can turn it inside out.
- Same as the other flap sew it on sandwiching the pocket and, AVOID sewing on top of the flap.
- Sew along the top edge and the side edges with the largest stitch from your machine just to keep the flaps from moving. You do not want to stitch it too tight since you’re gonna need to rip it off for later adjustments. Stitching them down is much better rather than pinning them together unless you want to pin yourself come fitting time.
- Set that aside because it’s time to sew the back of the shorts.
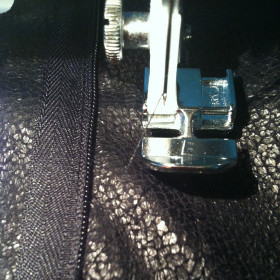
Sew an Invisible Zipper
- The first thing you want to do is press the teeth open. You have to make sure that the iron is set to the synthetic setting so you don’t melt it.
- Take the two back pieces of your shorts right side out. With the right side of the zipper facing you, unzip it and turn it over. Take the left side of the tape, place and pin it on the right side of the fabric. You’re gonna align the tape with your seam line making sure that the tape part of the zipper is facing the cut edge. Same concept applies to the other side of the fabric.
- Place one horizontal pin to where you want the zipper to end.
- You could buy an invisible zipper foot for this process. You have to sew close enough to the zipper teeth as much as possible. Take it slow, it’s not a race. Once you reach the horizontal pin, stop and do the back stitch.
- Switch the zipper foot to the other side and do the same way.
- Then zip up your zipper.
- Turn the back shorts with the wrong sides facing up then cut your zipper leaving about an inch extra.
- Now pinch the back side together and pin starting right at the point where you stop sewing the zipper. Next, you’re gonna sew along the pin lines.
- Cut the excess fabric off.
- Then hand sew a zipper stop.
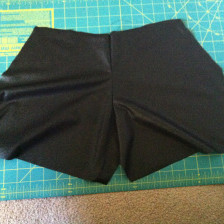
The Skort
- Take the front and the back pieces. Pin them right sides together.
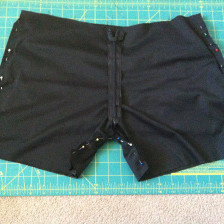
- Sew along the pin lines leaving a little opening at the bottom sides of the skorts
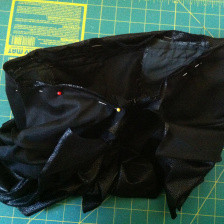
Fitting
- Now is the best time to make all of the adjustments you want. Turning the flaps on its wrong side, stitching and taking off the extra fabric.
The Waist Band
- Take your waist measurement and divide it into two.
- That’s for the front section. Now for the back piece.
- Cut that back piece into two parts.
- Grab some tape to connect the waist band pattern pieces. Take the front waist band pattern and overlap the two back waist band patterns with those side allowances taken in.
- Now you will end up with one waist band pattern piece. Pin it down to your folded fabric facing right sides together to cut 2 pieces.
- Then sew along the top portion of that waistband as shown in the picture. Then turn it inside out. Basically half of the waistband is not sewn.
- You need to sandwich the skorts’ waist line in that opening. Pin down the first waistband layer onto the skorts’ wrong side.
- Then run down some stitches.
- Next pin down the other side of the waistband on the inside skorts then stitch it down.
- Zip it up and fold the waist band down.
- Finally, take one hook and eye and hand sew it just above the zipper head.
Read Next10 Minutes Sew Cat Bed