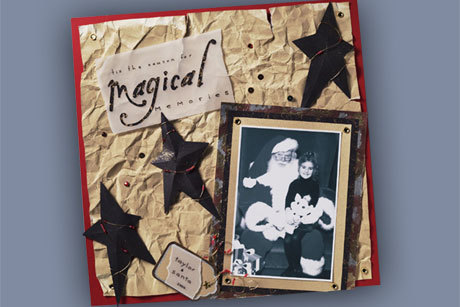
Tis The Season Scrapbook Layout
Glittering stars, wire, and beads bring the look of your Christmas tree to your scrapbook page in this layout from Krylon.

Materials:
- Krylon Glitter Spray - Glistening Gold (#401)
- Krylon Leafing Pens - Silver (#9902)
- Krylon Leafing Pens - 18 KT. Gold (#9901)
- Krylon Webbing Spray - Gold Chiffon (#603)
- Krylon Preserve It!® Digital Photo & Paper Protectant - Clear Matte (#7027)
- Krylon Leafing Pens - Copper (#9903)
- Krylon Easy-Tack™ Repositionable Adhesive - Easy-Tack™ Repositionable Adhesive (#7021)
- Gold Mirror Nail Heads
- Rhinestones
- Gold Star Eyelet
- Gold Sequins
- Red Beads
- 24 Gauge Gold Wire
- Vellum
- Solid cardstock
- Die Cut Stars
- Die cut letters “Magical”
- Stylis
Steps:
- To create background, crumble and slightly tear a sheet of 12" × 12" cream cardstock.
- Flatten cardstock.
- Secure to red cardstock using Gold Mirror Nail Heads in each corner.
- Add red rhinestones and gold sequins in various areas.
- To create title, print from computer onto cardstock.
- Trace “tis the season for and memories” onto vellum.
- Spray the word “Magical” with Webbing Spray. Let dry.
- Mount letters on vellum.
- String red beads onto 24 gauge gold wire and accent corner.
- Die cut star shapes.
- Using a stylus, draw a line from the center of each star to each point.
- Gently fold the points of the star on the scores.
- Spray lightly with Glitter Spray.
- String red beads onto 24 Gauge wire.
- Wrap stars with beaded wire and secure to page.
- To create black mat, trim black cardstock to desired mat size. Spray with Webbing Spray.
- To create metallic mat, trim light colored cardstock to desired size. Color edges using Leafing Pens.
- Mount photo to mats using Gold Mirror Nail Heads.
- To create tag, trim textured paper into tag shape.
- Color edge with Silver Leafing Pen.
- Mount on cardstock and trim edge.
- Color outside edge using Copper and Gold Leafing Pens.
- Set Star eyelet at top.
- Tear vellum and mount on tag.
- Journal on vellum.
For more project ideas, please visit www.krylon.com/projects.
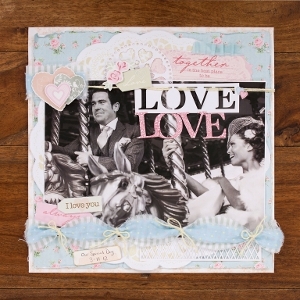
Read NextLove You Forever Layout