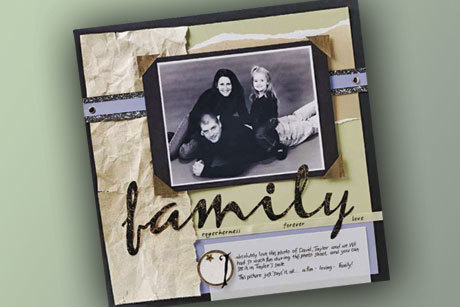
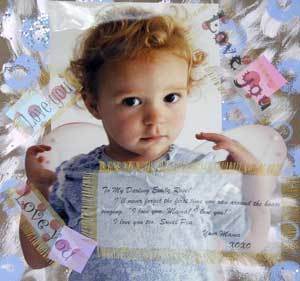
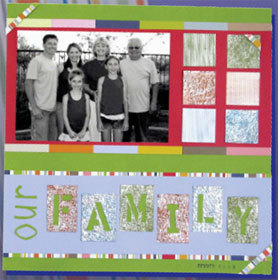
Family Scrapbook Layout
Neutral colors, textured paint, and simple journaling make family and your photo the true star of this page from Krylon.

Materials:
- Krylon Make It Stone!® Textured Paints - White Onyx (#18213)
- Krylon Preserve It!® Digital Photo & Paper Protectant - Clear (#7027)
- Krylon Spray Adhesive - Clear (#7011)
- Krylon Glitter Spray - Glistening Gold (#401)
- Krylon Webbing Spray - Gold Chiffon (#603)
- Krylon Leafing Pens - 18 KT. Gold (#9901)
- Cardstock: black, tan (2), periwinkle, celery
- Vellum
- Printed ribbon
- Round nailheads
- Star eyelet
- Metal rimmed tag
- Letter Sticker
- Craft knife
Steps:
- Trim celery cardstock and mount on black cardstock using Spray Adhesive. Trim a strip of periwinkle cardstock and mount over the bottom of the celery cardstock using Spray Adhesive.
- Tear one tan cardstock into a wide strip and adhere over celery cardstock using Spray Adhesive.
- Crumble and lightly tear edges of remaining tan cardstock. Flatten slightly and spay back with Spray Adhesive and mount layout.
- Spray a piece of black cardstock with White Onyx Make It Stone!®. Trim into a thin strip and place on periwinkle cardstock; trim and mount on layout using round nailheads.
- Print photo on photo paper and trim, leaving a thin white edge. Spray with Preserve It!® and let dry. Mount on black cardstock with Spray Adhesive; trim and mat on layout.
- Cut corners from cardstock and color with 18 KT Gold Leafing Pen. Mount on corners of photo.
- Spray printed ribbon with Glistening Gold Glitter Spray and place below photo.
- Spray black cardstock with Gold Chiffon Webbing Spray. Trim title, “family”, using a craft knife. Mount on layout using Spray Adhesive.
- Spray vellum with Preserve It!®, add journaling text, and spray again. Adhere to layout with Spray Adhesive.
- Add metal rimmed tag, secured by star eyelet. Color rim with 18 KT Gold Leafing Pen.
- Add “I” sticker to tag
For more project ideas, please visit www.krylon.com/projects.
Read NextLove You Forever Layout